

As I sifted through the fine, white mochiko flour, I couldn’t help but feel a sense of excitement wash over me—this was the start of something truly special. Enter the realm of the best mochi recipe! This delightful Japanese dessert is not only gluten-free and vegan but also a canvas for creativity, inviting you to craft your own unique flavor profiles. Making mochi at home is a breeze, with minimal ingredients and a simple technique that guarantees a chewy, satisfying treat. Whether you’re planning a cozy evening with friends or seeking a fun kitchen project to engage the kids, this recipe will become a cherished staple in your culinary repertoire. Ready to embark on this sweet adventure? Let’s dive into the world of homemade mochi together!
Why is Mochi a Must-Try Recipe?
Unique, Flavorful Base: This mochi recipe is made using Mochiko flour, which not only guarantees that delightful chewiness but also keeps it gluten-free and vegan.
Endless Customization: With the option to add flavors like matcha or ube, you can easily create a variety of mochi for different occasions—perfect for impressing your friends or simply indulging yourself!
Easy and Fun: The straightforward method means no advanced baking skills are required. You can even involve the kids in the fun of mixing and shaping!
Perfect for Sharing: These little squares of joy are not just delicious; they are great for gatherings. Pair them with fresh fruit or sweet tea for the ultimate treat!
Quick to Make: In just about an hour, you’ll have fresh mochi, making this an excellent last-minute dessert or fun after-dinner project that’s sure to delight everyone.
Give this recipe a chance, and you might find it rivals your favorites like Baked Buffalo Wings or cozy dishes like Smothered Chicken Rice!
The Best Mochi Recipe Ingredients
For the Mochi Base
• Mochiko Flour – Provides the chewy texture integral to mochi; this gluten-free flour is essential for a perfect bite.
• Granulated Sugar – Adds sweetness; consider using erythritol for a low-carb substitute if desired.
• Baking Powder – Helps create a lighter texture; don’t skip this for that ideal rise.
• Water – Acts as the liquid base for the batter, bringing everything together.
• Coconut Milk – Adds richness and a subtle coconut flavor; if you’re looking for a swap, regular milk may change the consistency.
• Vanilla Extract – Enhances flavor; feel free to experiment with other extracts like ube for delightful variations.
For Aesthetic Appeal
• Food Coloring – Optional for a pop of color; use sparingly to avoid overpowering the flavor.
• Potato Starch – Prevents sticking once cut into pieces; cornstarch can work, but it may slightly change the taste.
Dive into this easy, homemade mochi recipe, where you can unleash your creativity and discover the joys of crafting this traditional Japanese treat.
Step‑by‑Step Instructions for The Best Mochi Recipe
Step 1: Preheat the Oven
Begin your journey to making the best mochi recipe by preheating your oven to 350°F (175°C). This temperature ensures the perfect bake for your mochi. While the oven warms up, you can gather all your ingredients and equipment to set up a smooth cooking experience.
Step 2: Combine Dry Ingredients
In a medium mixing bowl, combine 1 cup of mochiko flour, ½ cup of granulated sugar, and 1 teaspoon of baking powder. Use a whisk to ensure there are no lumps and the ingredients are well mixed. The consistency should be smooth and uniform, preparing for a delightful mochi base to come.
Step 3: Mix Wet Ingredients
In a large bowl, mix together 1 cup of water, 1 cup of coconut milk, 1 teaspoon of vanilla extract, and optional food coloring if you desire. Stir this mixture gently until it’s well blended and smooth. This combination will add richness to your mochi while keeping it gluten-free and vegan.
Step 4: Combine Wet and Dry Ingredients
Carefully pour the dry ingredients into the wet mixture. Using a spatula or whisk, stir until the batter becomes smooth and cohesive, with no dry streaks visible. This should take about 1-2 minutes. The consistency should be thick but pourable, perfect for the next step.
Step 5: Prepare the Baking Pan
Take a 9×13 inch baking pan and grease it generously with non-stick spray to prevent the mochi from sticking. Once prepared, pour the smooth batter into the pan, spreading it evenly. Cover the pan tightly with aluminum foil to trap steam and ensure your mochi bakes uniformly.
Step 6: Bake the Mochi
Place your covered baking pan in the preheated oven and bake for 60 minutes. You’ll know it’s ready when the edges start to pull away slightly from the pan and a toothpick inserted in the center comes out clean. This tender, chewy texture is what makes the best mochi recipe so delightful.
Step 7: Cool and Slice
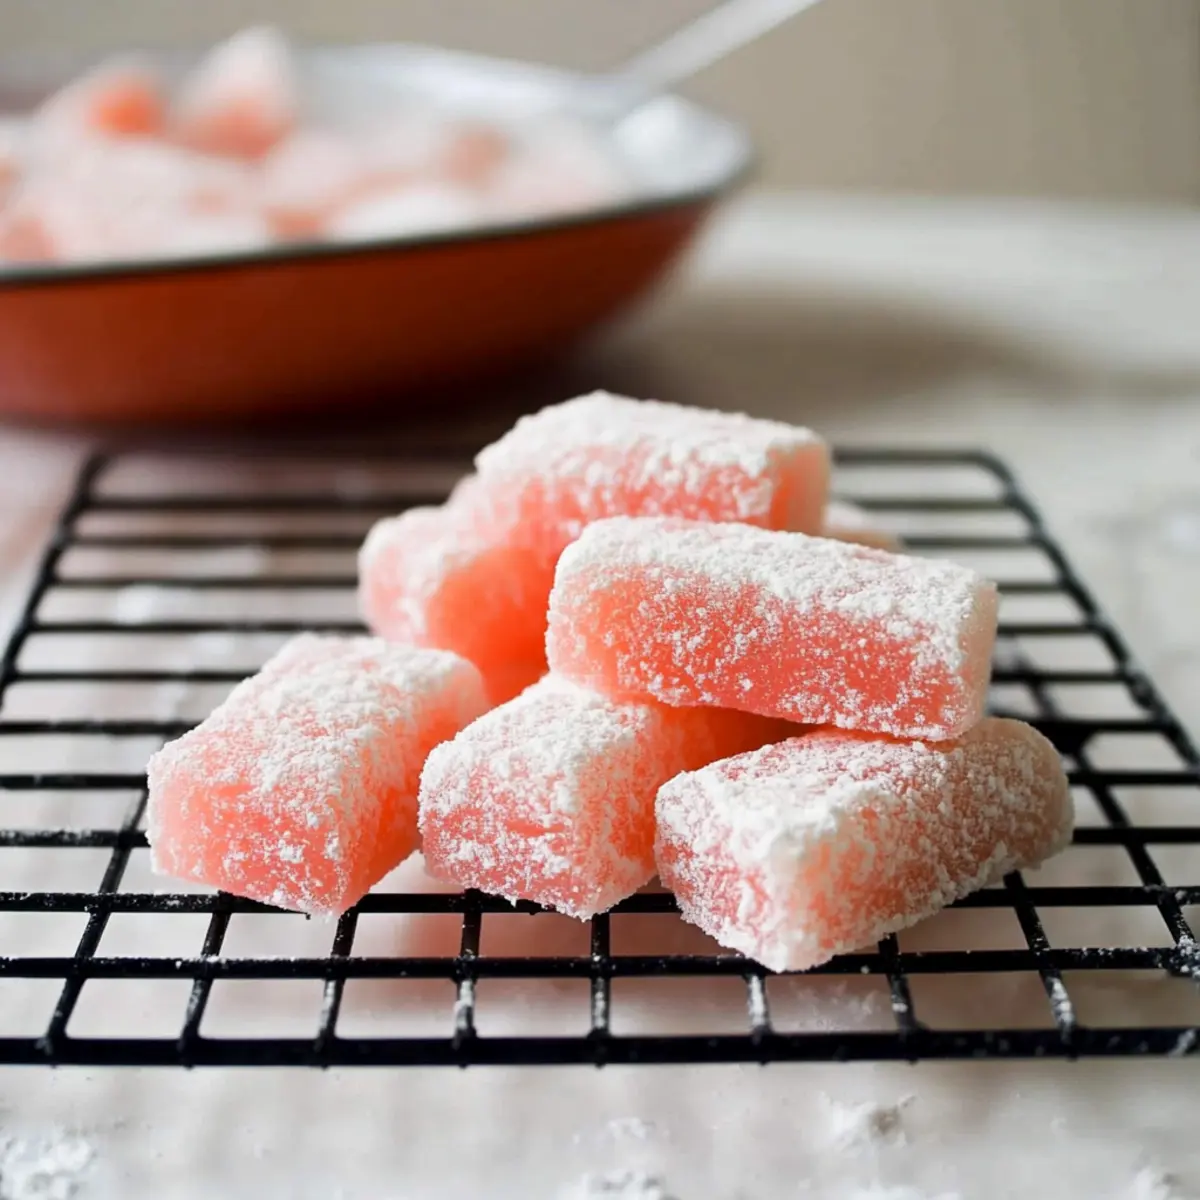
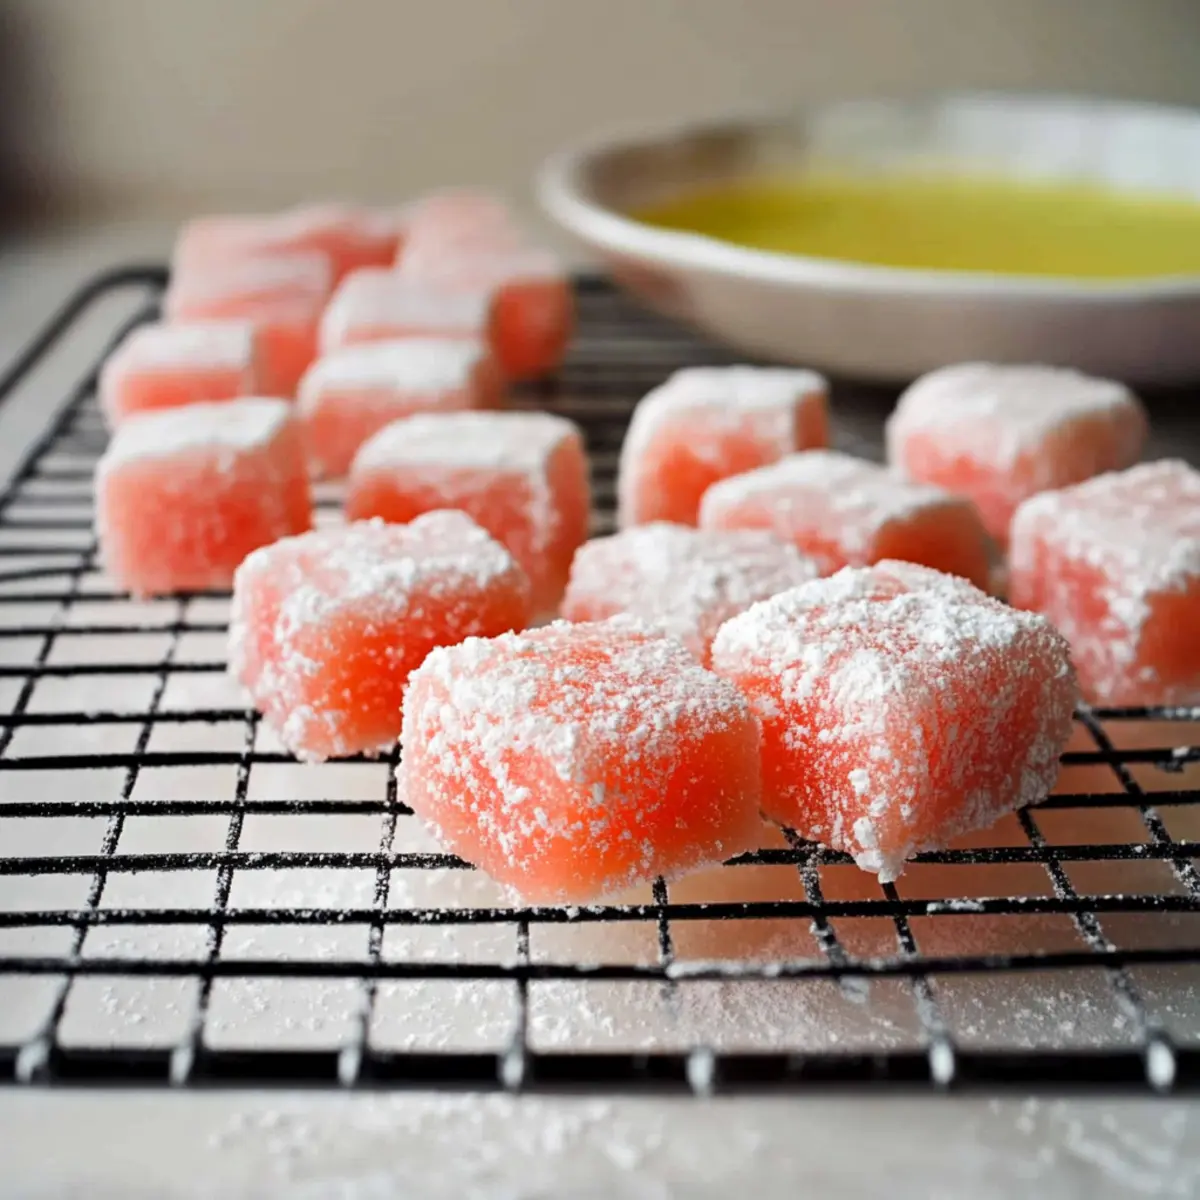
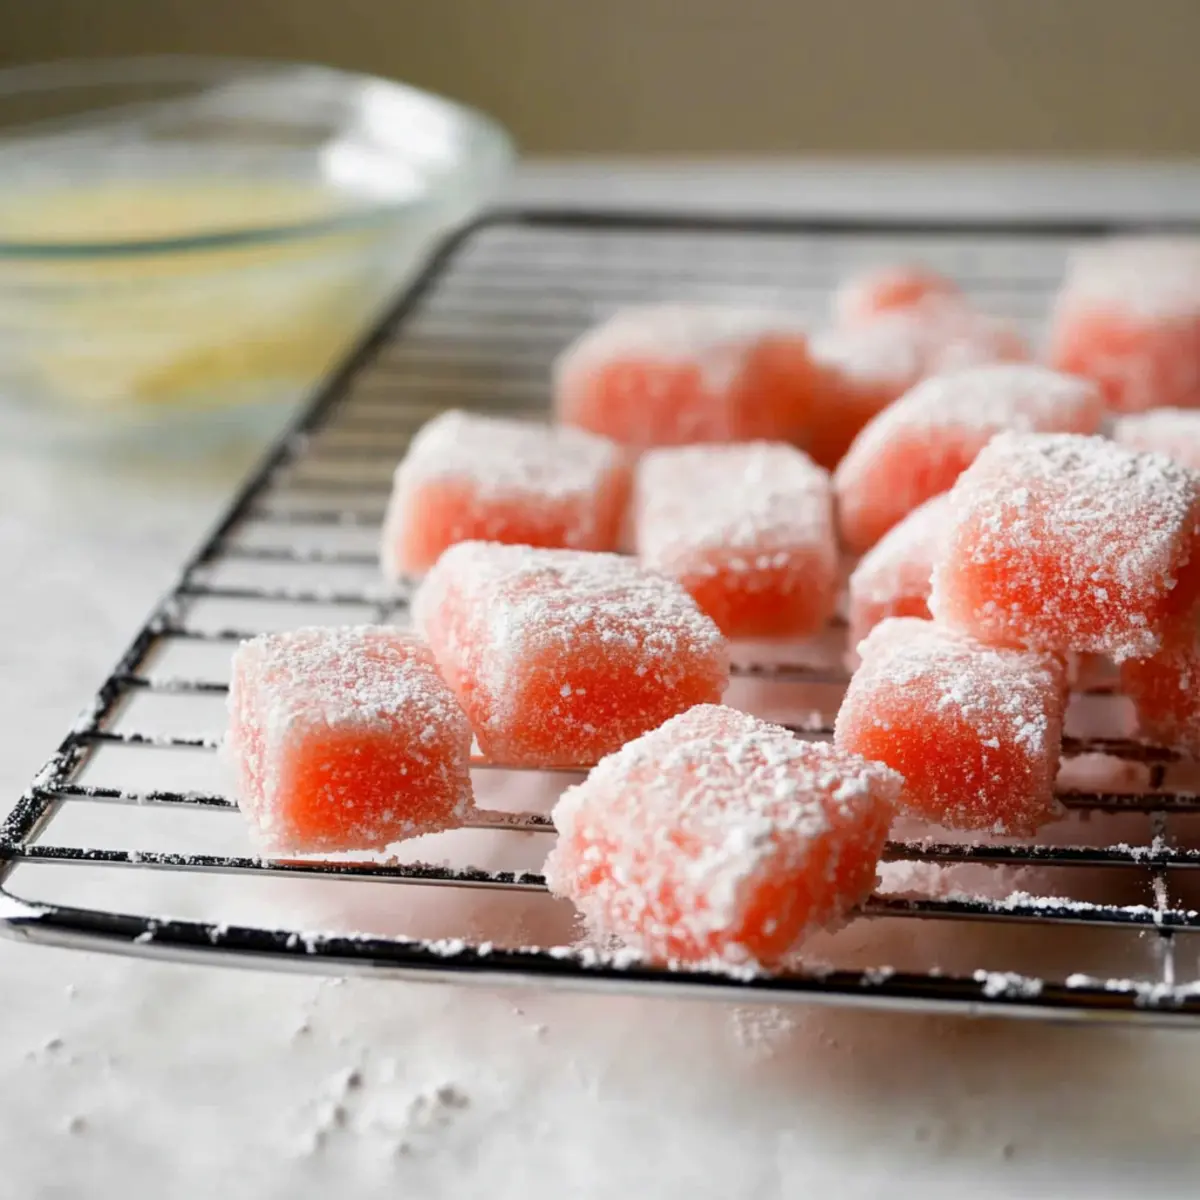
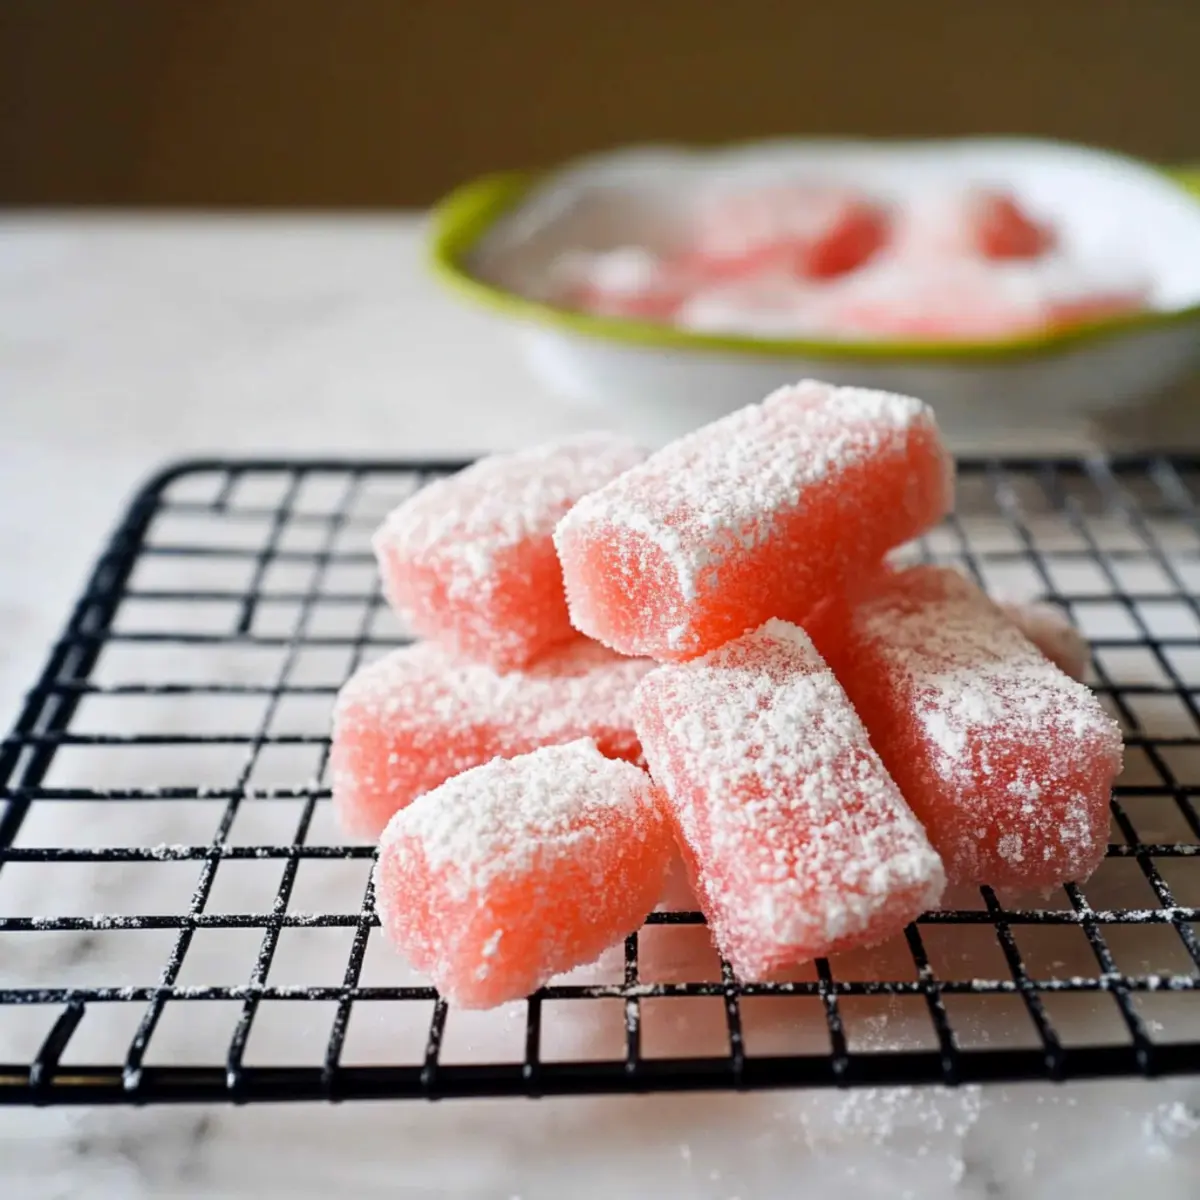
After baking, remove the pan from the oven and allow the mochi to cool completely in the pan. This will take approximately 30 minutes. Once cooled, invert the pan onto a surface dusted with potato starch. Gently tap to release the mochi, which should come out in one piece.
Step 8: Coat and Serve
To prevent the mochi from sticking together, dust the top and sides generously with potato starch. Cut into bite-sized squares using a knife that has been dusted with starch for easier slicing. Now your homemade mochi is ready to be enjoyed—perfect for sharing or savoring on your own!
Storage Tips for The Best Mochi Recipe
Room Temperature: Keep your mochi in an airtight container at room temperature for up to 2-3 days. This preserves its soft, chewy texture.
Avoid Refrigeration: Refrigerating mochi is not recommended, as it will harden and lose the delightful chewiness that makes this recipe so enjoyable.
Freezer: You can freeze mochi for up to one month if you need a longer storage option. Just ensure it’s wrapped well in plastic wrap and placed in a freezer-safe bag.
Reheating: If previously frozen, allow it to thaw at room temperature before enjoying. For a warm treat, you can briefly microwave the mochi for 10-15 seconds until soft.
The Best Mochi Recipe Variations
Feel free to unleash your creativity with these delightful mochi variations that will tantalize your taste buds and make each bite uniquely yours!
- Matcha Twist: Add 2 tablespoons of matcha powder to the dry ingredients for a vibrant green tea flavor.
- Ube Delight: Substitute vanilla extract with ube extract for a beautiful purple hue and sweet, nutty taste.
- Chocolate Infusion: Mix in 2 tablespoons of cocoa powder with the dry ingredients for a rich, chocolatey indulgence.
- Fruity Fusion: Blend in fruit puree such as strawberry or mango into the wet ingredients for a refreshing natural sweetness.
- Savory Mochi: Replace sugar with a pinch of salt and incorporate shredded cheese for cheesy, savory mochi bites that are fun appetizers.
- Filled Surprises: After baking, mold your mochi around fillings like chocolate ganache, sweet red bean paste, or ice cream for a delightful surprise.
- Heat Up: Incorporate a dash of chili powder or spicy extract into the batter for those who enjoy their mochi with a kick.
- Coconut Magic: Use coconut cream instead of coconut milk to amplify the rich coconut flavor and add a creamier texture.
These variations offer endless possibilities and invite you to tailor your mochi adventure. Once you’ve gotten the hang of this recipe, you might find yourself craving other delicious options like Southern Grits Cheddar or a comforting bowl of Noodle Soup Comfort. Happy experimenting!
What to Serve with The Best Chewy Mochi Recipe
Enhance your mochi experience by exploring delightful pairings that elevate every bite into a memorable moment.
-
Fresh Fruit Platter: Bright and juicy fruits like strawberries and mangoes provide a refreshing contrast to the sweet, chewy mochi, balancing flavors beautifully.
-
Green Tea: Sipping on warm matcha or traditional green tea offers an earthy, calming backdrop that perfectly complements the ricey sweetness of mochi.
-
Coconut Milk Ice Cream: For a creamy twist, serve with a scoop of dairy-free coconut ice cream; the flavors meld together for a blissful indulgence.
-
Sweetened Condensed Milk Drizzle: A drizzle of sweetened condensed milk adds richness and sweetness that pairs wonderfully with the chewy texture of mochi.
-
Chocolate Sauce: Decadent and delightful, a drizzle of warm chocolate sauce creates an irresistible contrast and satisfies any dessert lover’s cravings.
-
Sesame Seeds: Tossing mochi pieces in toasted sesame seeds adds a nutty depth while enhancing the visual appeal, making it an enticing option for gatherings.
-
Bubble Tea: Pair your mochi with a glass of bubble tea; the chewy tapioca pearls create a fun texture contrast with the mochi’s softness.
-
Mochi with Red Bean Paste: Enjoy the mochi filled with sweet red bean paste for a traditional twist that brings out cultural richness in every bite.
-
Citrus Sorbet: A refreshing citrus sorbet serves as a palate cleanser and bright complement to the sweet, chewy mochi.
Dive into these pairings to create a sumptuous dessert experience that celebrates your culinary achievements!
Expert Tips for the Best Mochi Recipe
• Grease Generously: Ensure your baking pan is well-greased to prevent sticking; a stuck mochi can be a sad surprise.
• Watch Your Bake Time: Use a light-colored baking pan for even cooking, as dark or glass pans can alter baking time. Check the edges for pulling away as a doneness indicator.
• No Refrigeration: For the best texture, avoid refrigerating or freezing the mochi; it will harden and lose that delightful chewiness.
• Slice with Ease: If cutting is tricky, dust your knife with potato starch to help glide through the mochi smoothly.
• Customize Flavors: Don’t hesitate to experiment with different extracts or powders; the best mochi recipe allows for playful customization to match your cravings!
Make Ahead Options
These delightful mochi treats are perfect for meal prep! You can prepare the batter up to 24 hours in advance. Simply mix the dry ingredients and store them in an airtight container. Combine the wet ingredients on the day you plan to bake. To maintain their quality, avoid refrigerating the uncooked batter, as it can affect the texture. When you’re ready to enjoy the Best Mochi Recipe, simply proceed to pour the batter into the greased pan, cover, and bake as instructed. This makes for a fantastic solution to impress your guests or treat your family with minimal effort!
The Best Mochi Recipe FAQs
What type of flour is used to make mochi?
Mochi is traditionally made with Mochiko flour, which comes from glutinous rice. This specific flour is gluten-free and lends the signature chewy texture that makes mochi a delight. Always look for Mochiko in the Asian aisle of your grocery store or at an Asian market to ensure you’re using the right ingredient, as it’s key to achieving that perfectly soft bite.
How should I store leftover mochi?
To keep your mochi fresh, store it in an airtight container at room temperature for 2-3 days. This method ensures it retains its delicious chewiness. Please avoid refrigeration; chilling mochi will cause it to harden and lose its delightful texture. If you find yourself with leftovers and want them to last longer, you can wrap them tightly in plastic wrap and freeze them for up to one month.
Can I freeze mochi, and if so, how?
Absolutely! To freeze mochi, start by cutting it into small, bite-sized pieces. Wrap each piece in plastic wrap individually to prevent them from sticking together. Place the wrapped pieces in a freezer-safe bag or container. This way, they can be preserved for up to one month. When you’re ready to indulge again, simply thaw them at room temperature, and if you prefer, warm them briefly in the microwave (10-15 seconds should do) to bring back their soft texture.
What should I do if my mochi is too sticky?
If you find that your mochi mixture is overly sticky, it may be due to an excess amount of moisture in the batter. A simple fix is to lightly dust your cutting board and knife with potato starch while slicing. The starch will help prevent the pieces from sticking together as you cut into them. Alternatively, if you’re mixing the batter and it feels too wet, you can add a little extra mochiko flour, about 1-2 tablespoons, until the desired consistency is achieved.
Is this mochi recipe suitable for those with dietary restrictions?
Yes, indeed! This mochi recipe is not only gluten-free due to the use of Mochiko flour but also vegan, making it a great option for a variety of dietary preferences. You can substitute granulated sugar with erythritol or another sugar alternative to cater to those seeking lower-carb options. Always check the labels of any substitutes to ensure they align with dietary needs, especially for allergens.
How can I infuse different flavors into my mochi?
To give your mochi a unique twist, experiment with flavorings! Start by adding 2 tablespoons of matcha powder for a green tea version, or consider using ube extract for a beautiful purple hue. You can also replace the vanilla extract with fruit flavor extracts or a touch of cocoa powder for a chocolatey treat. Get creative—mochi’s adaptability is one of its most fun features!
The Best Mochi Recipe: Soft, Chewy Delight at Home
Ingredients
Equipment
Method
- Preheat the oven to 350°F (175°C).
- Combine dry ingredients: 1 cup mochiko flour, ½ cup granulated sugar, 1 teaspoon baking powder in a bowl.
- Mix wet ingredients: Combine 1 cup water, 1 cup coconut milk, 1 teaspoon vanilla extract and optional food coloring in a large bowl.
- Combine wet and dry ingredients until smooth and cohesive.
- Prepare a 9x13 inch baking pan by greasing it and pouring in the batter.
- Cover the pan with aluminum foil and bake for 60 minutes.
- Allow the mochi to cool completely in the pan for about 30 minutes.
- Dust with potato starch, cut into squares, and serve.