

As I stood in the kitchen, the rich aroma of smooth peanut butter wafted through the air, merging beautifully with the tangy scent of Greek yogurt—an unexpected symphony I had to taste. This is where my adventure with Peanut Butter Yogurt Bowls & Pots began, and let me tell you, it was a game-changer for quick breakfasts, lunchbox snacks, or an easy, satisfying dessert. With just three simple ingredients, this versatile treat is not only health-conscious but also a delight for all ages. Plus, it packs a serious protein punch to keep you energized throughout the day. Curious about how to dress up these fluffy bowls? Let’s dive into some delicious topping ideas that will have everyone asking for seconds!
Why are Peanut Butter Yogurt Bowls a Must-Try?
Deliciously Easy: With only three ingredients, this recipe is a breeze to whip up, saving you precious time in the kitchen.
Versatile Options: Customize your bowl with toppings like fresh fruit or chocolate chips; the possibilities are endless!
Healthy Indulgence: Each serving is packed with protein, making it a nutritious start to your day or a guilt-free dessert.
Kid-Approved: Perfect for family-friendly snacking, these bowls cater to even the pickiest eaters. Try it alongside refreshing meals like Garlic Butter Salmon for a complete dining experience!
Meal Prep Friendly: Prepare jars in advance for quick grab-and-go breakfasts, ensuring you stay energized all week long.
Peanut Butter Yogurt Bowls Ingredients
• Unlock the secret to creamy, protein-packed bliss!
For the Yogurt Base
- Greek Yogurt – Provides creaminess and a rich source of protein; swap for non-dairy yogurt if desired.
- Smooth Peanut Butter – Offers flavor and healthy fats; try almond or sunflower seed butter for nut-free diets.
- Honey – Acts as a natural sweetener to balance flavors; substitute with maple syrup for a vegan-friendly alternative (not suitable for babies under 12 months).
For the Toppings
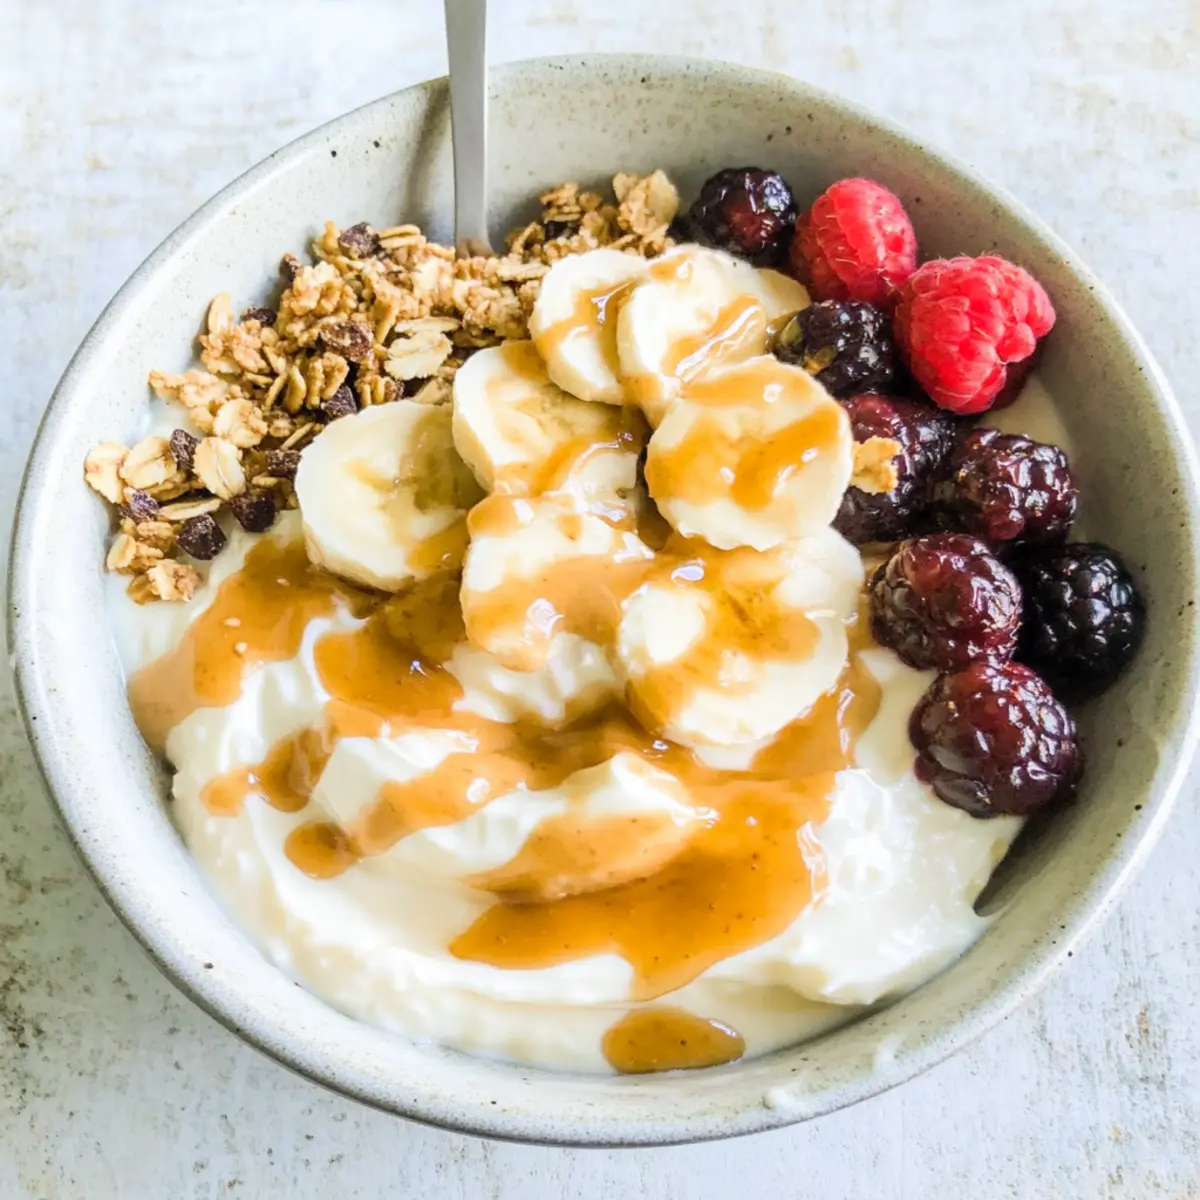
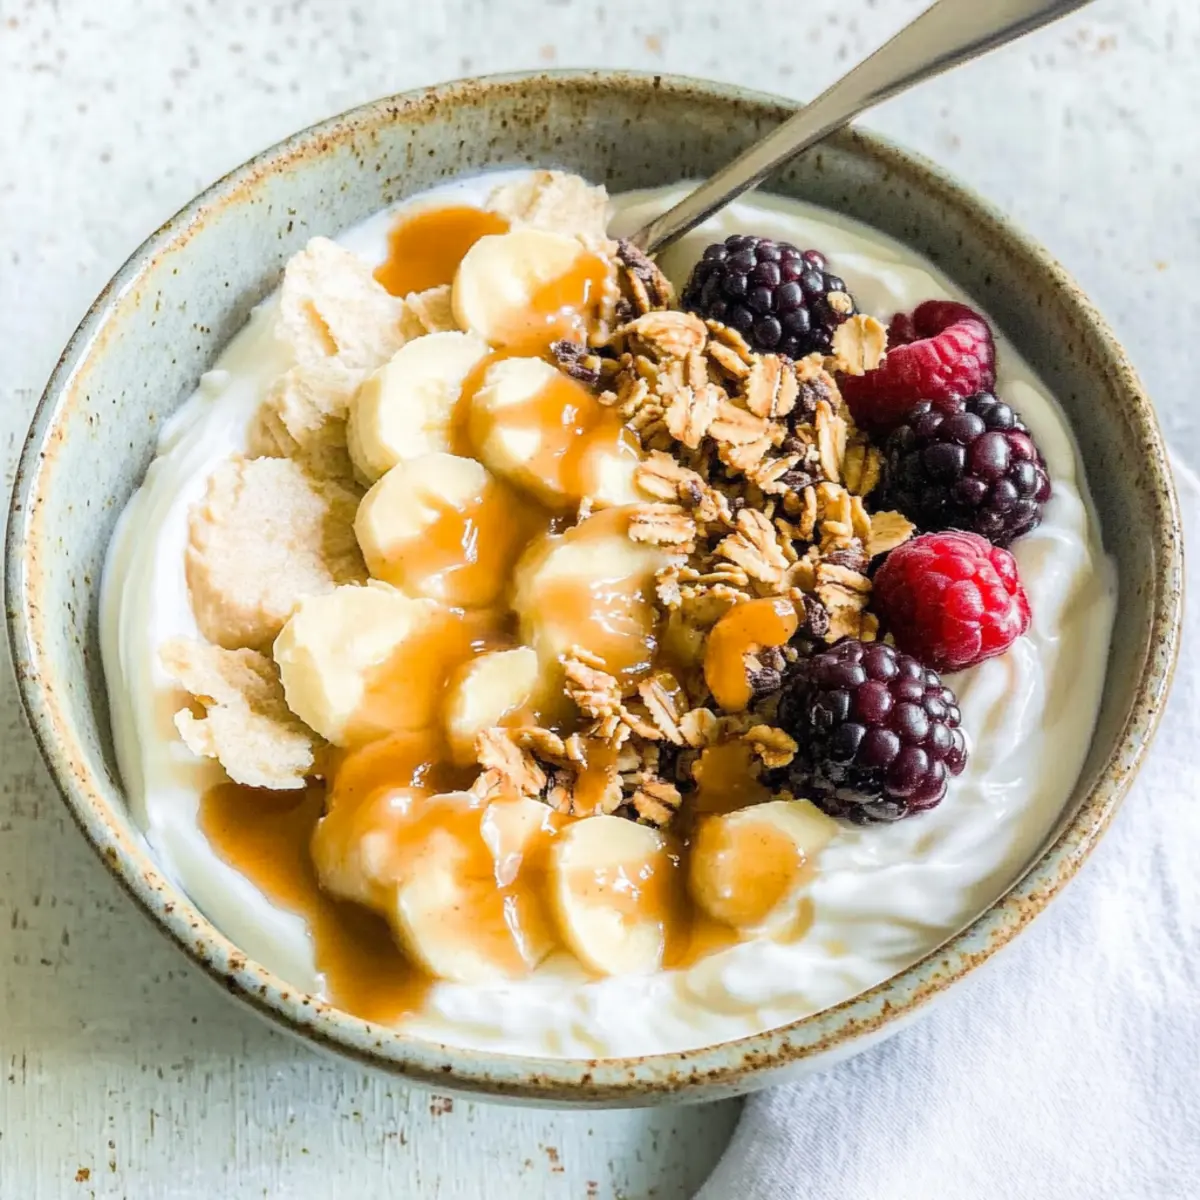
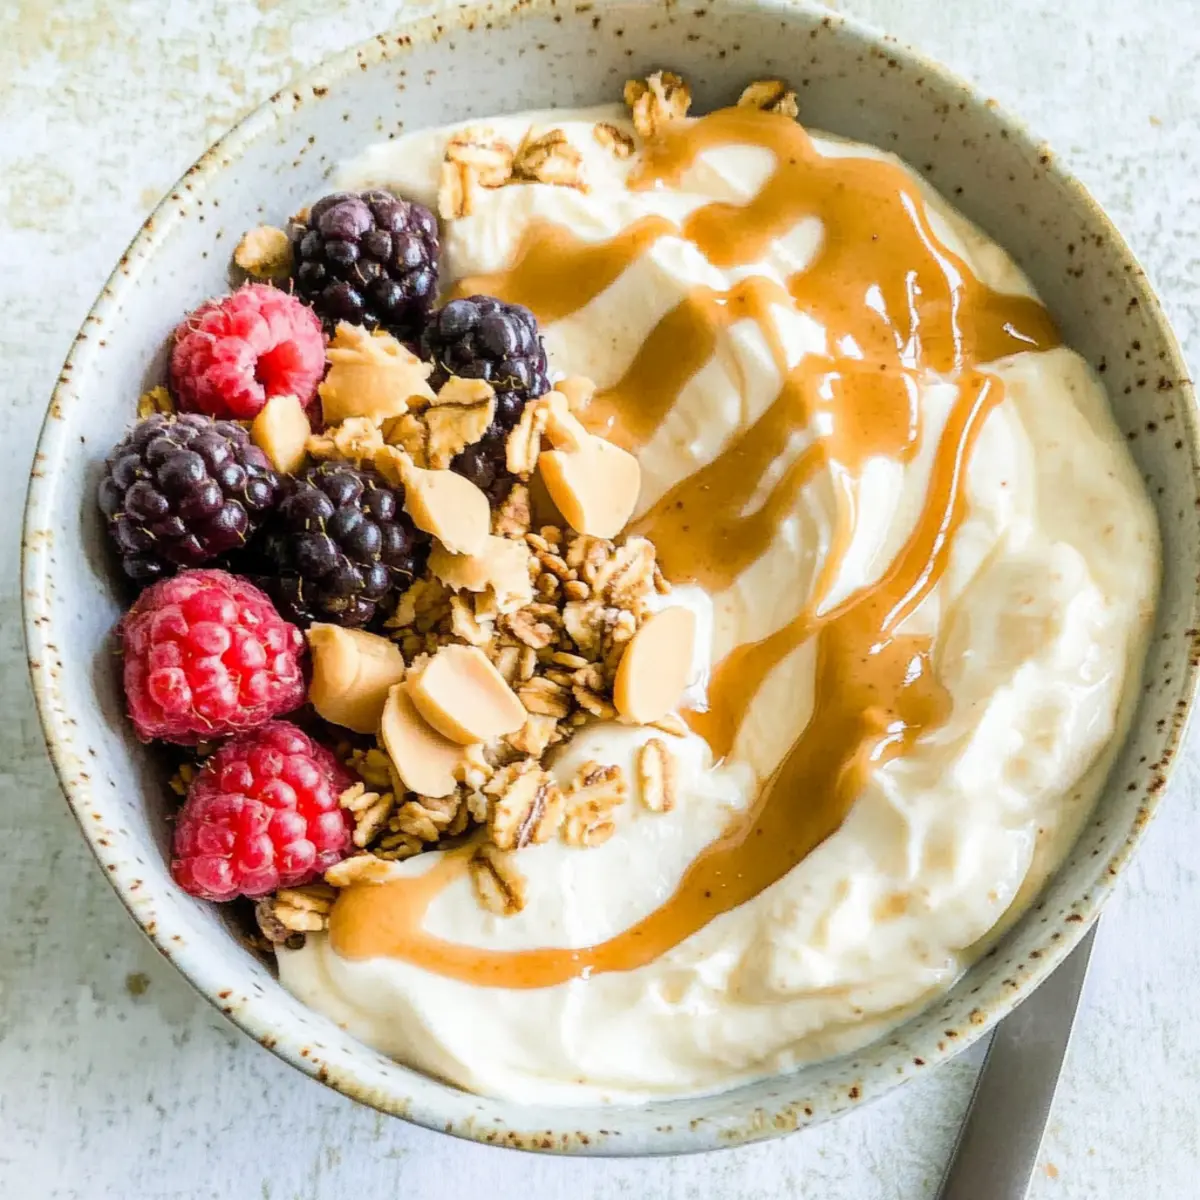
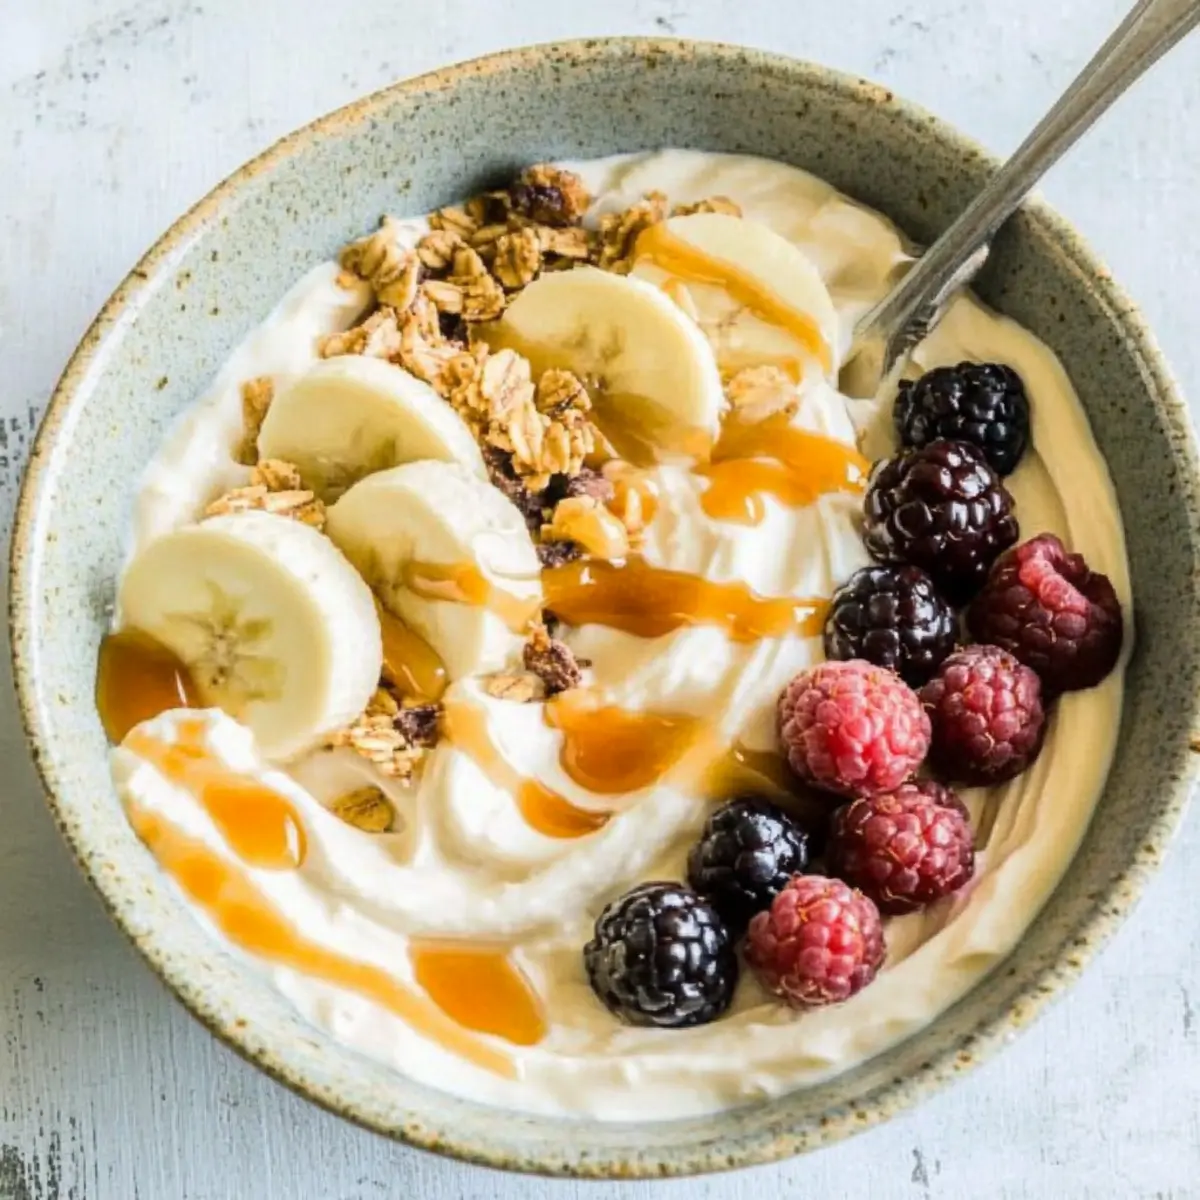
- Fresh Fruit – Adds a burst of freshness; consider bananas, strawberries, or blueberries.
- Chocolate Chips – A sweet treat that enhances flavors; look for dark or dairy-free options for a healthier choice.
- Granola – Provides crunch and texture; choose a low-sugar variety for a healthier topping.
- Nuts/Seeds – Boost the protein content and add a delightful crunch; try pecans, almonds, or chia seeds.
Step‑by‑Step Instructions for Peanut Butter Yogurt Bowls & Pots
Step 1: Combine the Base Ingredients
In a medium mixing bowl, add 1 cup of Greek yogurt, 2 tablespoons of smooth peanut butter, and 1 tablespoon of honey. Using a spatula or whisk, blend these ingredients together thoroughly until you achieve a creamy and smooth consistency. This should take about 1-2 minutes. If your Greek yogurt is particularly thick, a bit of elbow grease will help!
Step 2: Adjust the Sweetness
Once your yogurt base is silky and uniform, taste the mixture to see if it meets your sweetness preference. If you desire it sweeter, gradually stir in more honey, adjusting about a half teaspoon at a time. This step typically takes less than a minute, ensuring your Peanut Butter Yogurt Bowls & Pots have the perfect level of sweetness to balance the savory peanut butter.
Step 3: Assemble the Bowls
Spoon the creamy mixture directly into bowls or jars, filling them about three-quarters full. This presentation allows plenty of room for delicious toppings! Take about 30 seconds to ensure an even distribution, which will help when garnishing later. The thick, velvety texture makes it easy to layer beautifully with toppings for that ultimate snack experience.
Step 4: Add Toppings
Now comes the fun part—toppings! Sprinkle your choice of fruits, chocolate chips, granola, or nuts generously over the yogurt base. Aim for visual appeal with colors and textures; this should take about 2-3 minutes. Each addition enhances the flavor, making your Peanut Butter Yogurt Bowls & Pots not just a feast for the taste buds but also a delight for the eyes.
Step 5: Store for Later
If you’re preparing these bowls ahead of time, seal the jars with a lid and refrigerate them for up to 5 days. Before serving, simply give them a quick stir to reintroduce the ingredients if they separate. This storage step typically takes about 1 minute, providing you with delightful, healthy snacks ready to grab whenever hunger strikes!
Storage Tips for Peanut Butter Yogurt Bowls
Fridge: Store prepared Peanut Butter Yogurt Bowls in airtight jars for up to 5 days. This keeps them fresh and ready for snacking anytime you need a quick, nutritious pick-me-up.
Stirring Before Serving: If the yogurt mixture thickens or separates after refrigeration, give it a gentle stir before serving. This will bring back that creamy texture everyone loves!
Toppings Storage: If using toppings, consider storing them separately to maintain their freshness and crunch. Just sprinkle over the top just before enjoying to keep everything delightful.
Meal Prep Advantage: Preparing jars in advance can help streamline your mornings. Simply grab one from the fridge for a quick breakfast or snack on the go!
What to Serve with Easy 3-Ingredient Peanut Butter Yogurt Bowls
Indulging in a creamy yogurt bowl is a delightful experience, and pairing it with the right accompaniments elevates the moment even further.
-
Fresh Berries: Bright and juicy, they complement the creaminess beautifully while adding natural sweetness.
-
Granola Crunch: The crunch from granola enhances texture, making each bite more satisfying and providing an extra energy boost.
-
Apple Slices: Crisp and refreshing, apple slices can provide a fun, crunchy dip option that pairs perfectly with the peanut butter flavor.
-
Banana Slices: Soft bananas add a delicious creaminess that blends well with the peanut butter, creating a rich flavor combination.
-
Chia Seed Pudding: Bringing a nutty flavor and creamy texture, chia seed pudding makes for a unique and healthy side.
-
Chocolate Drizzle: A light drizzle of melted chocolate elevates the fun factor, transforming your bowl into a decadent dessert.
-
Herbal Tea: A hot cup of chamomile or mint tea offers a soothing drink that invigorates the palate after a sweet bite.
-
Coconut Flakes: Toasted coconut flakes bring a hint of tropical flavor and a delightful crunch that pairs well with the yogurt’s flavors.
-
Smoothie: A fruit smoothie can act as a refreshing drink alongside your yogurt bowl, providing more vitamins and excitement.
-
Dark Chocolate Chips: A sprinkle of dark chocolate delivers a rich, indulgent twist that makes your Peanut Butter Yogurt Bowls irresistible.
Make Ahead Options
These Peanut Butter Yogurt Bowls are a fantastic option for meal prep and can save you time during bustling mornings! You can prepare the yogurt base (Greek yogurt, peanut butter, and honey) up to 3 days in advance; simply make the mixture and store it in an airtight container in the fridge. For best results, add your toppings just before serving to maintain their freshness and crunch. If you’re planning to enjoy these bowls later in the week, divide the mixture into individual jars for grab-and-go convenience. This way, you can savor a deliciously creamy snack or breakfast without any hassle, just as tasty as if it was freshly made!
Expert Tips for Peanut Butter Yogurt Bowls & Pots
-
Choose the Right Yogurt: Use thick Greek yogurt for the best texture. If it’s too watery, your bowls may not have the right consistency.
-
Sweetness Adjustment: Taste before adding more honey. Start with small increments to avoid making it too sweet; the natural flavor should shine through.
-
Perfect Toppings: Always add an assortment of crunchy and soft toppings to enhance both texture and flavor. Get creative with fruits or nuts!
-
Make Ahead: Pre-prepare your bowls in jars for easy snacking. Refrigerate them for up to 5 days, ensuring you’ll always have a quick, healthy option.
-
Kid-Friendly Options: If making for children under 1 year, remember to use maple syrup instead of honey for safety.
Peanut Butter Yogurt Bowls Variations
Feel free to personalize your Peanut Butter Yogurt Bowls with these enticing twists and substitutions!
-
Dairy-Free: Substitute Greek yogurt with non-dairy yogurt made from almond or coconut for a creamy vegan treat. Enjoy the same luxurious texture while being kind to your tummy.
-
Nut-Free: Swap smooth peanut butter for sunflower seed butter to accommodate nut allergies, ensuring everyone can savor this delight without worry. It’s just as rich and flavorful!
-
Sweetener Swap: Replace honey with maple syrup for a vegan-friendly version. This offers a different flavor profile that pairs beautifully with peanut butter, letting you enjoy a touch of nature’s sweetness.
-
Flavor Boost: Add spices like cinnamon or a dash of vanilla extract for an exciting flavor dimension that uplifts the overall taste. These little additions create an aromatic experience that tantalizes your senses!
-
Overnight Oats: Transform your yogurt base into overnight oats by mixing it with rolled oats, leaving it to soak overnight. The next morning, you’ll have a creamy, hearty breakfast ready to go, full of fiber and flavor.
-
Chocolatey Twist: Stir in cocoa powder or top with chocolate chips for a decadent dessert version. There’s something magical about pairing chocolate with peanut butter that makes dessert dreams come true!
-
Crunchy Textures: Add a layer of granola or crushed nuts for an extra crunch that enhances your bowl’s texture, creating a delightful contrast to the creamy base. It just takes a simple sprinkle to transform it!
-
Fruit Medley: Top with a mix of your favorite fruits, like berries and banana slices, for added freshness, color, and nutritional benefits. Pair them with a comforting meal like Mediterranean Chicken Bowls or Honey Sriracha Salmon Bowls for a balanced plate that’s sure to satisfy!
Peanut Butter Yogurt Bowls Recipe FAQs
What type of Greek yogurt should I use for Peanut Butter Yogurt Bowls?
Absolutely! For the best texture, I recommend using thick Greek yogurt. It provides a creamy consistency that blends beautifully with the peanut butter. If you find it too watery, your bowls might not turn out as thick and delightful.
How long can I store Peanut Butter Yogurt Bowls in the fridge?
You can store prepared Peanut Butter Yogurt Bowls in airtight jars for up to 5 days. This makes it convenient for meal prep and ensures you always have a healthy snack ready. Just remember, give it a gentle stir before serving if it thickens while stored!
Can I freeze Peanut Butter Yogurt Bowls?
While it’s best to enjoy these bowls fresh, you can freeze the yogurt base for up to 3 months. To do this, ladle the mixture into freezer-safe jars or containers without toppings. When you’re ready to enjoy, thaw in the refrigerator overnight and reintroduce toppings just before serving for the best taste and texture!
What if my yogurt doesn’t blend well with the peanut butter?
No problem! If your yogurt is too thick to blend easily, I suggest letting it sit at room temperature for about 10-15 minutes before mixing. Alternatively, you can warm the peanut butter slightly in the microwave for about 15 seconds to help it incorporate smoothly into the yogurt.
Is there a vegan option for the Peanut Butter Yogurt Bowls?
Yes, indeed! You can easily make a vegan version by substituting Greek yogurt with a non-dairy yogurt, like almond or coconut yogurt, and using maple syrup instead of honey. This option is flavorful and perfect for anyone following a plant-based diet! Just be cautious with the sweetness adjustment.
Can I add toppings in advance?
While you can add toppings in advance, I recommend storing them separately to maintain their freshness and crunch. This keeps your Peanut Butter Yogurt Bowls vibrant and tasty when you’re ready to dig in. Just sprinkle them on just before enjoying for that perfect bite!
Creamy Peanut Butter Yogurt Bowls & Pots for Easy Snacking
Ingredients
Equipment
Method
- In a medium mixing bowl, add the Greek yogurt, smooth peanut butter, and honey. Blend the ingredients thoroughly until creamy.
- Taste the mixture and adjust the sweetness by gradually stirring in more honey if desired.
- Spoon the creamy mixture into jars or bowls, filling them about three-quarters full.
- Sprinkle your choice of fruits, chocolate chips, granola, or nuts over the yogurt base.
- Seal the jars with a lid and refrigerate for up to 5 days. Stir before serving if the mixture separates.