

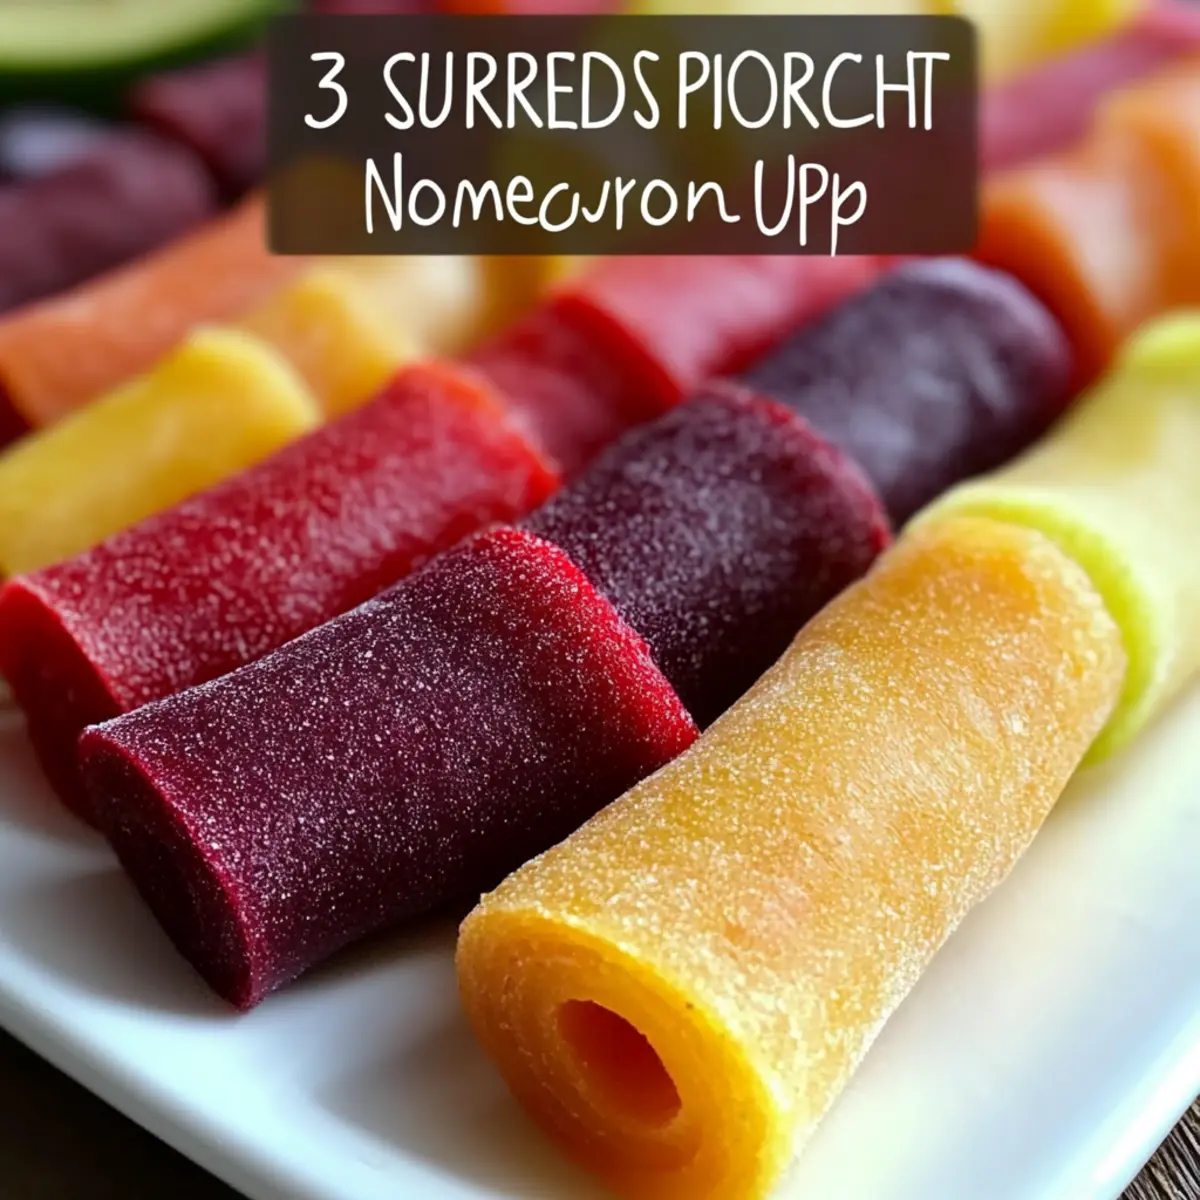
The sweet aroma of sun-ripened fruit fills the air, inviting you to take a delicious detour into the world of homemade snacks. You might not have considered making your own fruit roll-ups, but trust me—this simple recipe for Homemade Fruit Roll-Ups will change the way you think about snacking! With just three natural ingredients, these no-sugar treats are not only kid-friendly but also a healthier alternative to store-bought options. Imagine the delight of packing vibrant, chewy rolls for lunch or enjoying them during a sunny picnic—the perfect blend of fun and nutrition. Whether you choose fresh or frozen fruit, these roll-ups embody the taste of summer in every bite, all while being incredibly easy to prepare. Ready to transform your snacking routine? Let’s dive into the joy of making your very own fruit roll-ups!
Why Make Homemade Fruit Roll-Ups?
Nutrient-Rich Delight: These roll-ups are packed with vitamins and fiber, offering a healthy snacking solution your family will adore.
Simplicity at Its Best: With just three natural ingredients, this recipe is as easy as it gets—no culinary skills required!
Versatile Flavors: Mix and match your favorite fruits for endless combination possibilities; think peach-strawberry or blueberry-mango!
Perfect for Kids: A fun, chewy treat that kids love, making it an ideal addition to lunchboxes or after-school snacks.
Cost-Effective Treat: Ditch expensive store-bought versions and create delicious roll-ups at home, saving both money and packaging waste.
Great for Sharing: Perfect for parties or picnics, these fruit roll-ups are sure to impress both kids and adults alike!
Homemade Fruit Roll-Ups Ingredients
For the Fruit Base
• Fresh or Frozen Fruit – Choose ripe favorites like strawberries, mangoes, or peaches for vibrant flavor and color.
• Lemon Juice – This brightens the taste and helps preserve the fruit quality, enhancing your homemade fruit roll-ups’ overall flavor.
• Honey (optional) – While most fruits are sweet enough, add honey if you prefer an extra touch of sweetness.
Step‑by‑Step Instructions for Homemade Fruit Roll-Ups
Step 1: Prepare the Fruit
Start by washing, coring, and chopping your fresh fruit into smaller pieces for easier blending. If using frozen fruit, thaw it thoroughly before using. Aim for ripe fruits like strawberries, mangoes, or peaches, as they provide optimal sweetness and flavor for your homemade fruit roll-ups. This step ensures that the fruit is ready to be transformed into a delightful puree.
Step 2: Blend the Mixture
In a blender, combine the prepared fruit with a splash of lemon juice to enhance the flavor and preserve the fruit color. If you prefer a sweeter taste, add honey at this stage as well. Blend on high speed until the mixture is completely smooth and free of lumps, which should take about 1-2 minutes. This creates a luscious base for your fruit roll-ups.
Step 3: Spread the Mixture
Next, line a baking sheet with parchment paper to prevent sticking. Pour the smooth fruit mixture onto the lined baking sheet, using a spatula to spread it evenly to a thickness of about 1/8 inch. This uniform thickness ensures even drying, giving your homemade fruit roll-ups the perfect chewy texture. Make sure to spread it out to the corners for even drying.
Step 4: Dry the Fruit
Set your oven to its lowest setting, approximately 170°F. Place the baking sheet in the oven and let it dry for 4-6 hours, checking periodically. The fruit leather is ready when it’s no longer sticky to the touch and peels easily from the parchment paper. Keep an eye on it as it dries to avoid over-drying, ensuring the perfect consistency for your fruit roll-ups.
Step 5: Cut and Store
Once fully dried, remove the baking sheet from the oven and allow the fruit roll-ups to cool completely. Once cooled, use kitchen scissors or a sharp knife to cut the fruit leather into strips or squares. Store your homemade fruit roll-ups in an airtight container at room temperature for up to a week, or refrigerate for extended freshness, making them a delightful and healthy snack anytime!
Homemade Fruit Roll-Ups Variations
Let your creativity shine as you make these delightful homemade fruit roll-ups uniquely yours!
-
Berry Medley: Combine strawberries, blueberries, and raspberries for a sweet, tangy burst. A vibrant mix of colors makes this version irresistible.
-
Tropical Twist: Use a blend of mango, pineapple, and coconut for a tropical getaway in every bite. This sunny combination will transport you to the beach!
-
Citrus Zing: Add a splash of orange or grapefruit juice to the mix for a refreshing, zesty kick. This bright flavor reinvigorates the palate and adds a whole new layer of taste.
-
Herbal Infusion: Try blending in fresh mint or basil for an aromatic touch. This will elevate your fruit roll-ups to a gourmet treat, perfect for sharing at gatherings.
-
Nutty Crunch: Before spreading the fruit mixture, sprinkle chopped nuts on the baking sheet for added texture. Each chewy roll-up will surprise you with a delightful crunch!
-
Spicy Kick: Add a pinch of cayenne pepper or cinnamon for a warm edge. The subtle heat beautifully contrasts the sweetness of the fruit, creating an unforgettable flavor explosion!
-
Chocolate Drizzle: Once cooled, drizzle melted dark chocolate over the cut roll-ups for a decadent treat. This luscious touch will make every bite feel like a special occasion.
Don’t forget to explore exciting variations like those found in Bbq Chicken Homemade or Homemade Chicken Nuggets, which inspire creativity in the kitchen while keeping the family satisfied!
What to Serve with 3-Ingredient No-Sugar Homemade Fruit Roll-Ups
Elevate your homemade fruit roll-ups experience with a variety of delightful pairings that excite the palate!
- Creamy Yogurt: A dollop of yogurt adds a luscious creaminess and tang, making it the perfect dip for your chewy fruit snacks.
- Nut Butter: Pair with almond or peanut butter for a rich, nutty flavor contrast that makes for a satisfying and nutritious snack option.
- Fresh Fruit Salad: Brightly colored fruits refresh the palate, offering a vibrant contrast to the chewy texture of the roll-ups.
- Granola Bar Crumbles: Sprinkle over your roll-ups for a crunchy texture that adds delightful contrast, making each bite an adventure.
- Cheese Slices: Soft cheese, like goat or cream cheese, offers a rich, creamy element that balances the sweetness of the roll-ups beautifully.
- Herb-Infused Water: A refreshing drink like lemon-mint water brings a burst of flavor without added sugars, perfectly complementing the fruity rolls.
- Chocolate Dipping Sauce: Indulge your sweet tooth by dipping roll-ups in a light chocolate sauce, creating a fancy twist that kids and adults alike will love!
- Trail Mix: Create a custom trail mix to serve alongside your roll-ups for a nutty crunch and sweet chew, perfect for on-the-go energy.
- Fruit-Infused Sparkling Water: This refreshing drink elevates your snack time with bubbles and bursts of fruity flavor, fostering a festive atmosphere!
- Dark Chocolate Covered Almonds: Rich and delicious, these nuts add a decadent crunch that works wonders with the natural sweetness of your fruit roll-ups.
How to Store and Freeze Homemade Fruit Roll-Ups
Room Temperature: Store your fruit roll-ups in an airtight container at room temperature for up to 1 week. This keeps them fresh and chewy, perfect for on-the-go snacking.
Fridge: For extended freshness, refrigerate your homemade fruit roll-ups in a sealed container. They will stay delicious for up to 2 weeks, retaining their vibrant flavor.
Freezer: If you’d like to keep them longer, freeze your fruit roll-ups in a freezer-safe bag or container for up to 6 months. Thaw them in the fridge before enjoying.
Reheating: There’s no need to reheat these homemade fruit roll-ups; simply enjoy them as is from your container or after thawing them from the freezer!
Make Ahead Options
These Homemade Fruit Roll-Ups are a fantastic choice for busy home cooks looking to save time while providing healthy snacks! You can prepare the fruit mixture and spread it onto the baking sheet up to 24 hours in advance; simply cover it tightly with plastic wrap in the fridge. When you’re ready to bake, remove the fruit mixture from the refrigerator and proceed to dry it in the oven, which takes about 4-6 hours. To maintain the quality, ensure that the mixture is evenly spread, preventing uneven drying. Once cooled, cut the fruit roll-ups and store them in an airtight container, where they will stay fresh for a week. Enjoy the convenience of having delicious, healthy snacks ready to go!
Expert Tips for Homemade Fruit Roll-Ups
-
Fruit Selection: Choose ripe and sweet fruits for the best flavor. Overripe or under-ripe fruits can lead to an unbalanced taste in your homemade fruit roll-ups.
-
Blending Thoroughness: Blend until fully smooth to ensure a consistent texture. Any lumps can result in uneven drying, which may affect the final product.
-
Parchment Paper: Always use parchment paper on your baking sheet. This will prevent sticking and make it easy to remove your rolled-up treats.
-
Oven Monitoring: Check your oven periodically while drying to avoid over-drying. Each type of fruit has different moisture levels that influence drying time.
-
Storage Tips: Store in an airtight container to maintain freshness. For longer life, consider refrigerating or freezing your homemade fruit roll-ups.
-
Experiment with Flavors: Don’t hesitate to mix fruits or add herbs like mint for a unique twist. This opens up a world of delicious combinations in your homemade fruit roll-ups!

Homemade Fruit Roll-Ups Recipe FAQs
What kind of fruit is best for making homemade fruit roll-ups?
Absolutely! Ripe fruits like strawberries, mangoes, and peaches work best due to their natural sweetness and vibrant flavor. For frozen fruits, just ensure they’re thawed thoroughly. Overripe fruits can lead to an overly sweet product, while under-ripe fruits might make it too tangy.
How should I store my homemade fruit roll-ups?
You can keep your homemade fruit roll-ups in an airtight container at room temperature for up to one week. For extended freshness, place them in the refrigerator, where they’ll stay delicious for up to two weeks. If you want to store them longer, consider freezing them in a freezer-safe bag or container for up to six months.
Can I freeze homemade fruit roll-ups? If so, how?
Yes, you absolutely can freeze your homemade fruit roll-ups! To do this, first cut them into strips or squares as mentioned in the recipe. Then, place them in a single layer on a baking sheet lined with parchment paper and freeze until solid. Once they are firm, transfer them to a freezer-safe bag or container. Be sure to label the bag with the date, and they will stay tasty for up to six months. Thaw them overnight in the fridge before enjoying them.
What should I do if my fruit roll-ups are too sticky?
If your homemade fruit roll-ups are too sticky, this might be due to insufficient drying. Sometimes, different fruits have varying moisture levels. Make sure to check periodically as they dry and extend the baking time if necessary. If they are still sticky after drying, cut them into strips and dust lightly with cornstarch to absorb excess moisture.

Homemade Fruit Roll-Ups: Wholesome Treats Your Kids Will Love
Ingredients
Equipment
Method
- Prepare the Fruit: Wash, core, and chop fresh fruit into smaller pieces.
- Blend the Mixture: Combine fruit and lemon juice in a blender, adding honey if desired. Blend until smooth.
- Spread the Mixture: Line a baking sheet with parchment and spread the fruit mixture evenly to about 1/8 inch thickness.
- Dry the Fruit: Set oven to 170°F and dry for 4-6 hours, checking periodically.
- Cut and Store: Once dried and cooled, cut into strips and store in an airtight container.