

The moment I unwrapped the graham crackers and caught the scent of melted chocolate wafting through the air, I knew the magic of Halloween S’mores Pops was about to take shape! These delightful no-bake treats are the perfect blend of nostalgia and whimsy, making them an easy dessert choice for any spooky celebration. With just a bit of creativity, you can transform simple ingredients into charming pops that bring joy to both kids and adults. Plus, their quick prep time means you’ll spend less time in the kitchen and more time enjoying the festivities. Ready to impress your friends and family with a charming Halloween twist? Let’s dive into this irresistible treat that’s ideal for parties and school events alike!
Why Are Halloween S’mores Pops a Must-Try?
Easy and Fun: These Halloween S’mores Pops are no-bake treats, ensuring a stress-free time in the kitchen while effortlessly delighting your guests.
Customizable: Feel free to experiment with ingredients—try pumpkin spice marshmallows or colorful chocolate coatings for a unique twist that stands out at any Halloween party.
Kid-Friendly: Perfect for little hands, the pops are manageable for kids to help make and decorate, making them a great family activity during spooky season.
Instant Crowd-Pleaser: With their creative appearance and nostalgic flavors, these treats will evoke smiles and excitement at any gathering.
Quick Prep: A simple recipe means you can whip these up in under 30 minutes, leaving more time for enjoyment at your celebrations.
Get ready to dig into a delightful treat that brings everyone together!
Halloween S’mores Pops Ingredients
For the Pops
• Graham Crackers – The sturdy base that forms the backbone of your S’mores Pops; opt for honey or chocolate-flavored for a tasty twist.
• Square Marshmallows – These give a soft, gooey texture; use fresh marshmallows for the best results.
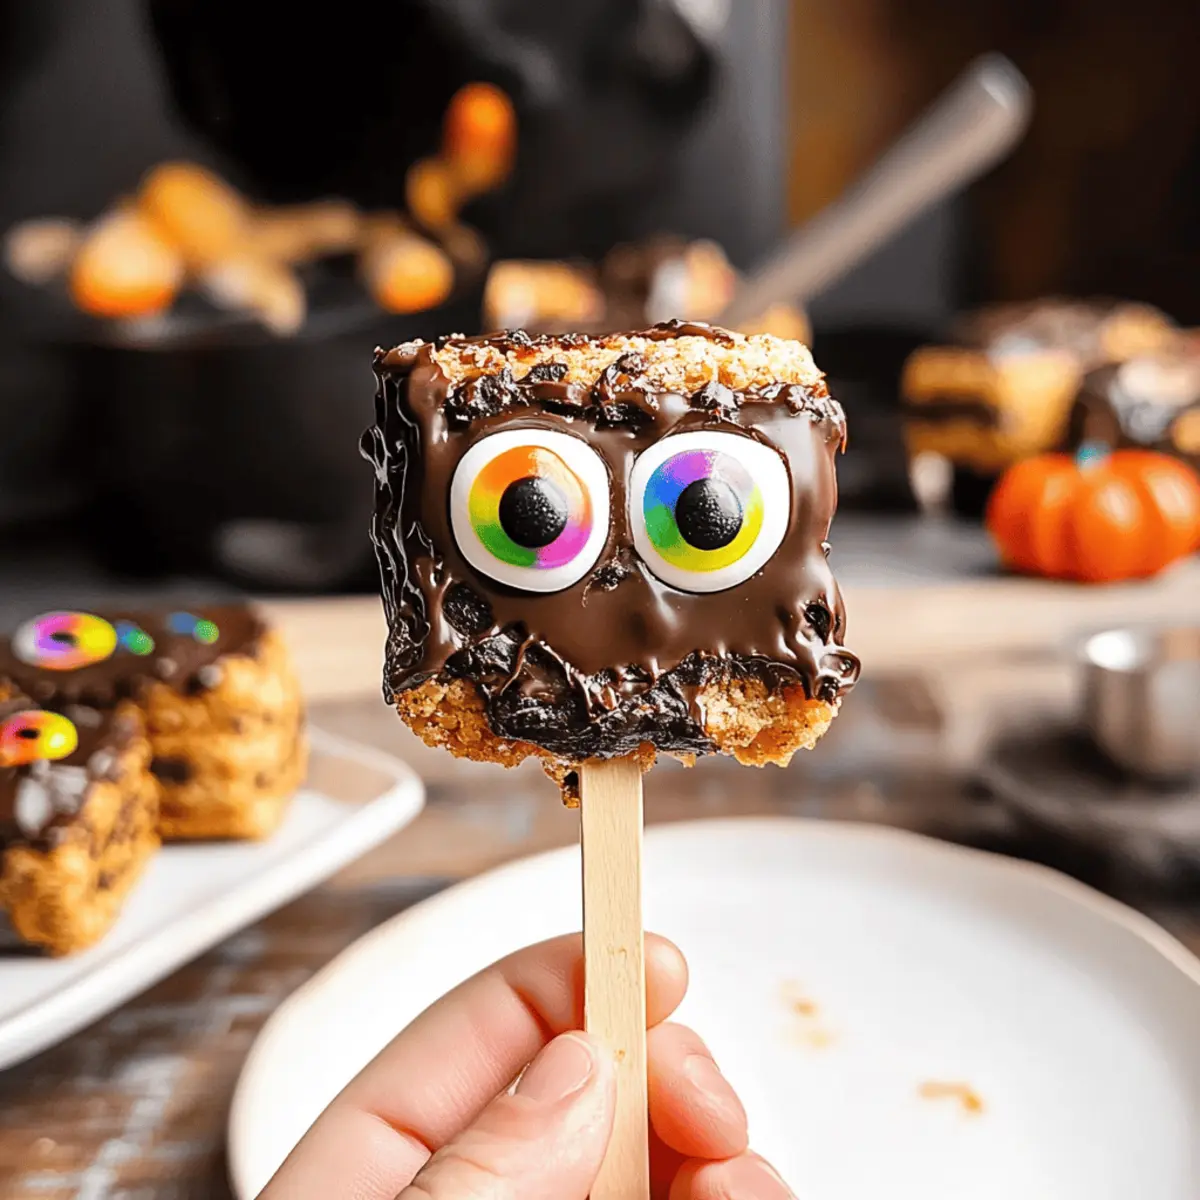
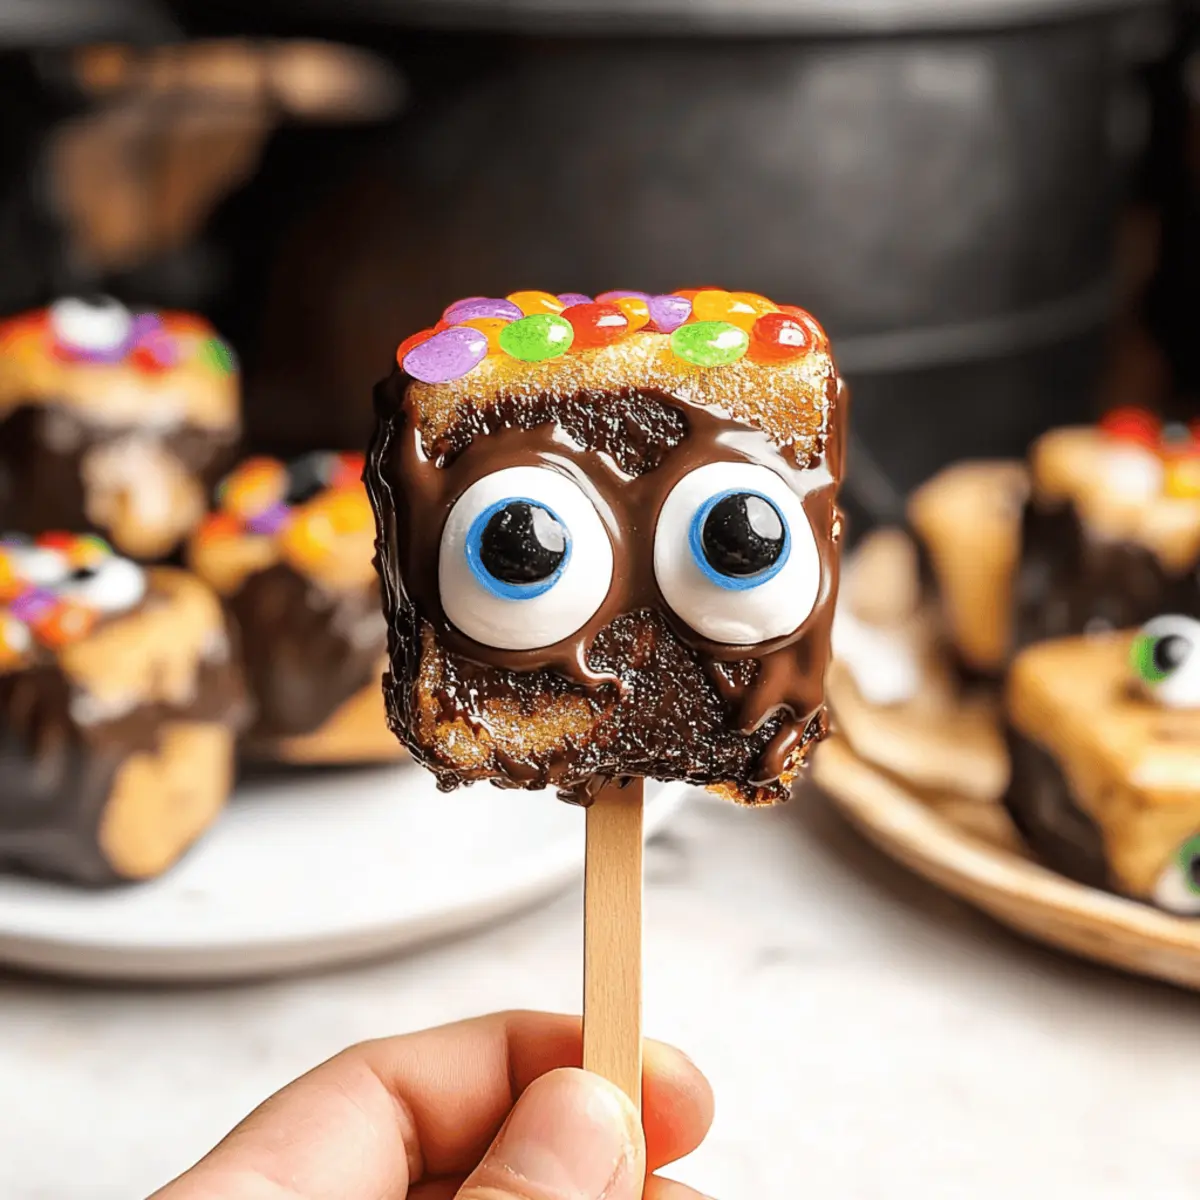
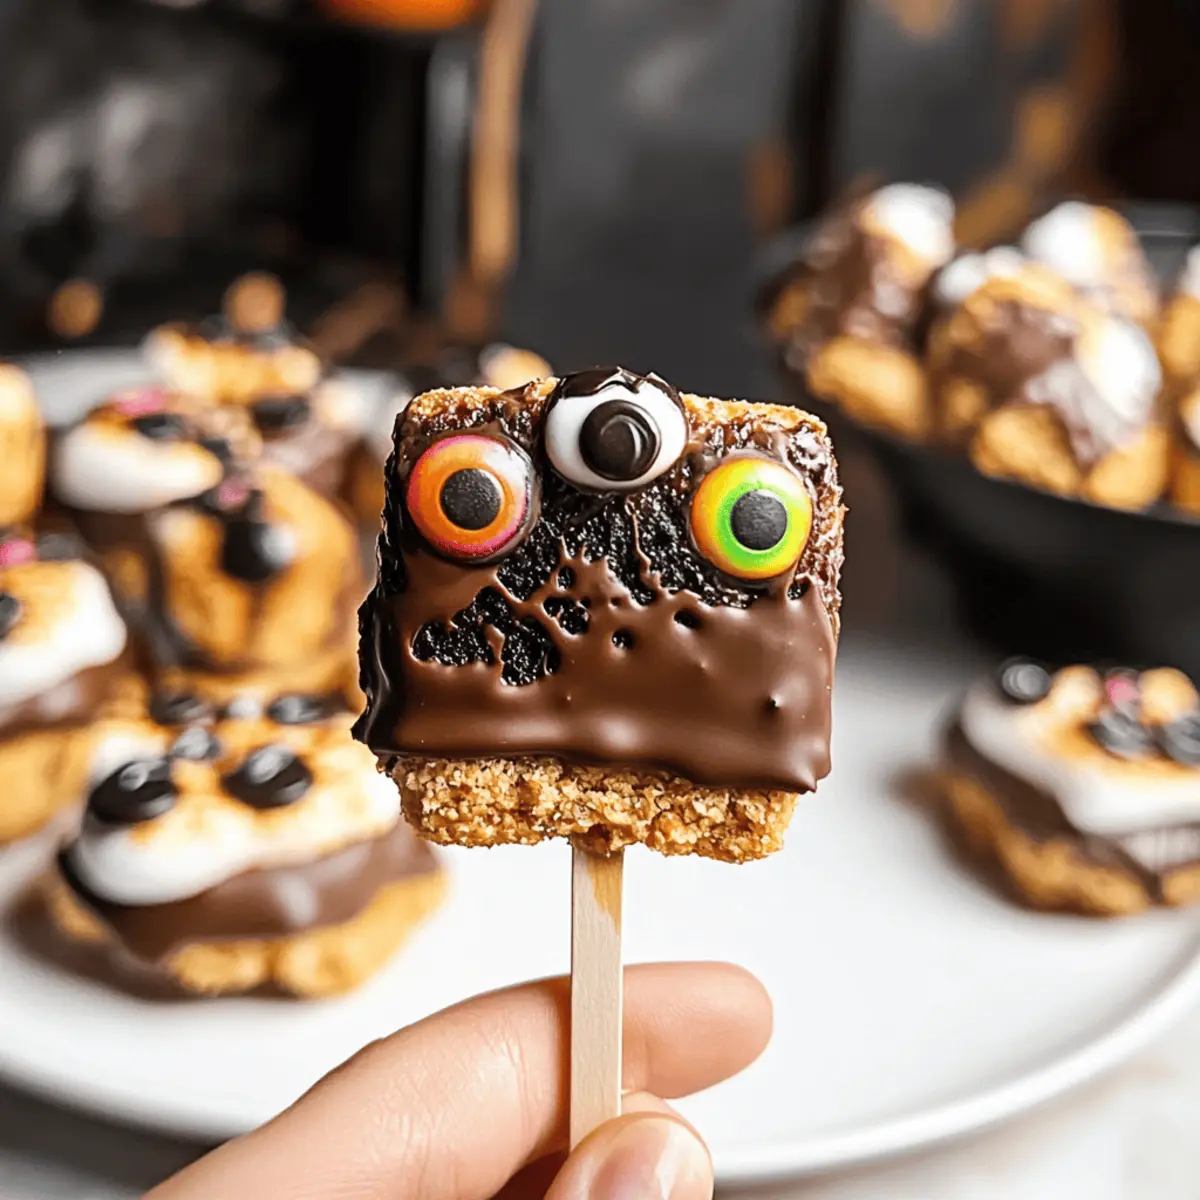
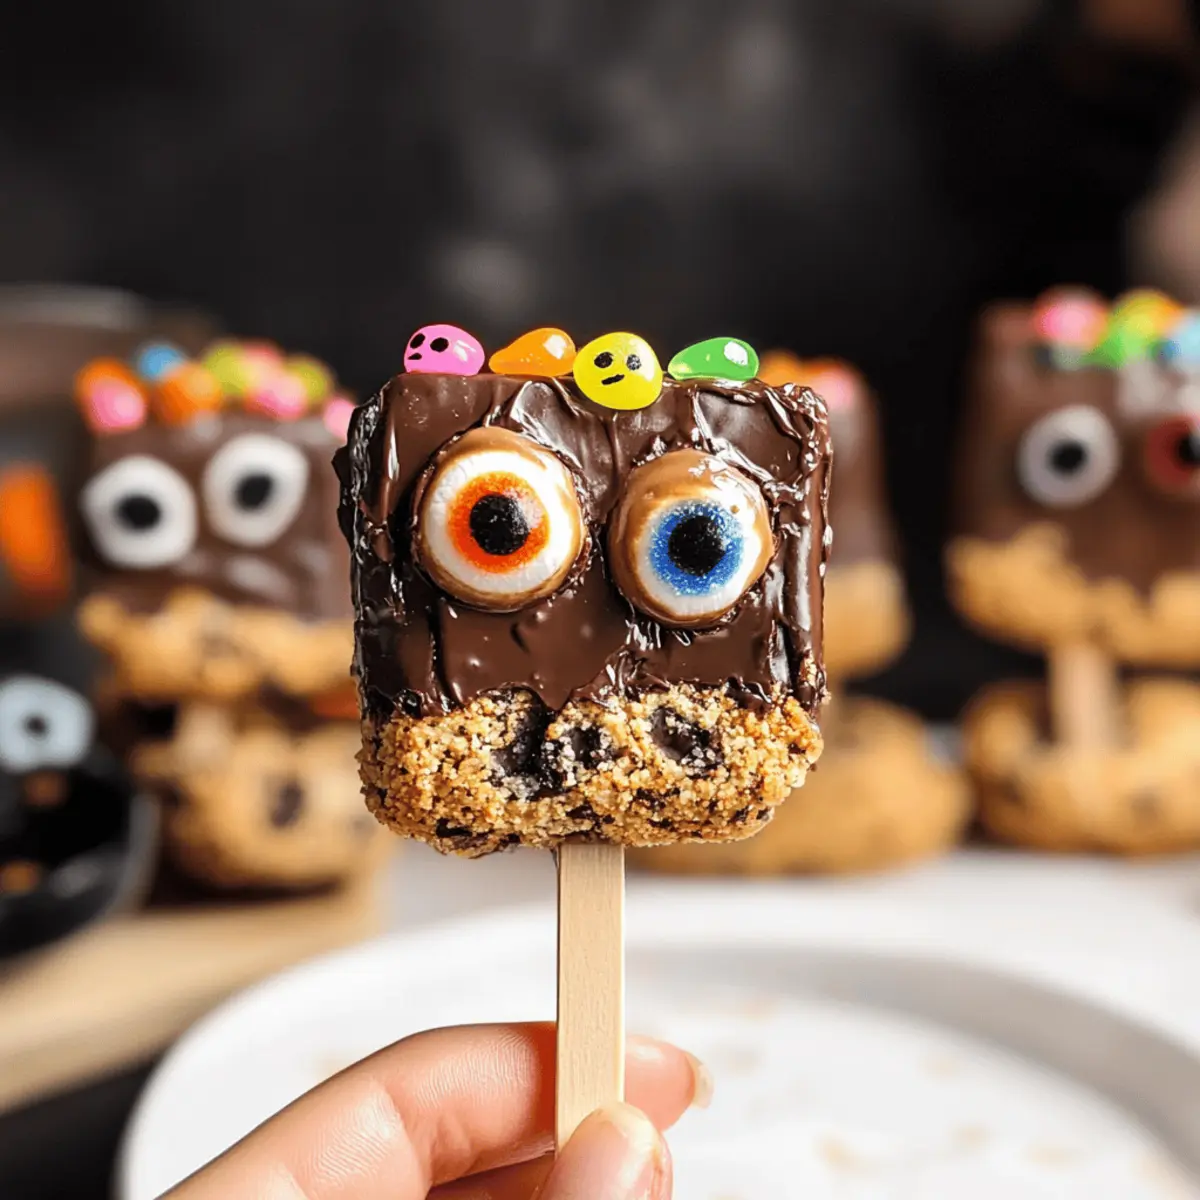
• Gummy Eyes – These spooky decorations make your pops come to life; for a different flair, consider using chocolate chips or candy melts instead.
• Chocolate (10-12 oz) – The rich coating for your pops; milk chocolate provides a classic flavor, whereas dark chocolate adds a deeper taste.
For the Coating
• Additional Chocolate (optional) – Melt a bit more chocolate for extra dipping or drizzling to enhance the visual appeal of your Halloween S’mores Pops.
For Garnish
• Edible Glitter or Sprinkles (optional) – Add a festive sparkle to your treats; it’s a fun way to elevate their spooky look while keeping it playful!
Step‑by‑Step Instructions for Halloween S’mores Pops
Step 1: Prepare the Marshmallows
Begin by carefully cutting a slit into each square marshmallow and inserting a gummy eye into the opening. Next, use a kitchen torch to toast the marshmallows over a low flame until they turn golden brown, about 10–15 seconds per side. Allow the toasted marshmallows to cool on a wire rack while you prepare the graham crackers.
Step 2: Set Up the Graham Crackers
On a piece of parchment paper, lay out your graham crackers in a single layer. Melt 10–12 ounces of chocolate in a microwave-safe bowl, heating in 30-second intervals until smooth and glossy, stirring between each interval. Once melted, spread a generous layer of chocolate on top of each graham cracker using a spatula.
Step 3: Insert the Popsicle Sticks
While the melted chocolate is still warm, insert a popsicle stick into the center of each chocolate-covered graham cracker, ensuring it’s positioned securely. This will serve as the handle for your Halloween S’mores Pops. Allow the chocolate to set slightly before proceeding to the next step for better adhesion.
Step 4: Attach the Toasted Marshmallows
Once the chocolate on the graham crackers has set but is still warm, carefully press the toasted marshmallows onto each cracker. Ensure the marshmallow sticks well to the chocolate layer, creating a delightful balance of textures. The gooey marshmallow combined with the warm chocolate will provide a perfect hold.
Step 5: Extra Chocolate Coating
For added indulgence, melt some additional chocolate in a bowl. Using a spoon, drizzle or dip the exposed side of the graham crackers into the melted chocolate for a beautiful finish. Allow any excess chocolate to drip off before placing them back on the parchment paper.
Step 6: Let the S’mores Pops Set
Transfer your Halloween S’mores Pops to a parchment-lined baking sheet. Place them in the refrigerator for about 15–20 minutes, or until the chocolate has completely hardened. This final chill ensures a satisfying crunch when enjoyed and helps keep everything together nicely.
Step 7: Decorate for Halloween
Once the chocolate has set, feel free to get creative! Add edible glitter or colorful sprinkles on top of the chocolate coating for a festive Halloween touch. You can also drizzle with an alternate chocolate color for a spooky effect, making your Halloween S’mores Pops even more eye-catching.
Step 8: Serve and Enjoy
After decorating, your Halloween S’mores Pops are ready to be served! Arrange them on a festive platter to showcase your spooky creations at parties or during family gatherings. These no-bake treats are sure to be a delightful treat for both kids and adults alike, bringing the spirit of Halloween to your table.
Make Ahead Options
These delightful Halloween S’mores Pops are perfect for meal prep enthusiasts! You can prepare the toasted marshmallows and graham crackers with chocolate coating up to 24 hours in advance, keeping them stored separately in an airtight container. This way, the marshmallows stay fresh and gooey while ensuring the crackers maintain their crunch. When you’re ready to impress your guests, simply assemble the pops by pressing the marshmallows onto the sticks and any additional chocolate coating, allowing them to set for about 15-20 minutes in the refrigerator. With these make-ahead tips, you’ll save precious time and still deliver a deliciously haunting treat that everyone will love!
What to Serve with Halloween S’mores Pops?
The perfect complement to your spooky treats can elevate any festive gathering, filling your table with delightful flavors and textures.
- Crispy Caramel Apples: These sweet, sticky bites provide a crunchy contrast to the gooey S’mores Pops, bringing a classic fall flavor to your festivities.
- Pumpkin Spice Hot Chocolate: Cozy and creamy, this drink captures the essence of autumn, making it the perfect warm counterpart to your chilly Halloween S’mores.
- Spooky Fruit Skewers: Fresh fruit adds a refreshing zest; mix in marshmallows for a playful twist that echoes the main treat’s theme.
- Chocolate-Dipped Pretzels: The salty crunch of these treats balances the sweetness of the S’mores Pops, providing a fun mix of flavors to enjoy.
- Mummy Mini Pizzas: Crafting mini pizzas with mozzarella and olives brings a savory touch to your dessert table, offering guests a fun, savory alternative.
- Witch’s Brew Punch: This fun, green beverage is eye-catching and bubbly, delighting guests while complementing the festive theme without overpowering the S’mores Pops.
- Ghostly Vanilla Cupcakes: Topped with whimsical ghost decorations, these light and fluffy treats add a charming element while staying within the sweet confines of your dessert table.
- Candy Corn Trail Mix: A mix of nuts, candy corn, and pretzels creates a sweet and salty snack that guests can nibble on between indulging in the S’mores Pops.
Storage Tips for Halloween S’mores Pops
Room Temperature: Keep your Halloween S’mores Pops in an airtight container at room temperature for up to a week, ensuring they remain fresh and delicious.
Fridge: For added longevity, store the pops in the refrigerator; they can last up to 10 days, although they may become a bit firmer.
Freezer: Store in a freezer-safe container to preserve them for a longer period, up to one month. Wrap each pop individually to prevent freezer burn.
Reheating: If you’d like to restore their gooey texture, allow them to sit at room temperature for about 10 minutes before serving, making them enjoyable once again!
Halloween S’mores Pops Variations
Feel free to let your creativity run wild as you customize these enchanting treats to suit your taste!
-
Flavored Marshmallows: Use pumpkin spice or caramel marshmallows for a seasonal twist that adds a festive flair to your pops. These flavors will evoke all the cozy feelings of fall!
-
Chocolate Coatings: Experiment with white chocolate or colored candy melts for a vibrant presentation. A splash of color can turn these treats into a delightful feast for the eyes!
-
Gummy Alternatives: Swap gummy eyes for mini chocolate chips or candy corn to add a new texture and taste. The colorful candy corn also enhances the Halloween spirit with its distinct colors!
-
Nutty Crunch: Incorporate crushed nuts or cookie crumbs into the melted chocolate coating for added texture and flavor. The crunch mingled with the gooeyness creates a delightful surprise!
-
Edible Glitter: Instead of gummy eyes, sprinkle edible glitter over the melted chocolate for a magical touch. The sparkles will catch the light and charm guests of all ages!
-
Spicy Kick: Add a dash of cayenne pepper or chili powder to the melted chocolate for a surprising heat that contrasts beautifully with the sweetness. It’s an unexpected thrill for adventurous palates!
-
Layered Pops: Create layers by drizzling each layer with different chocolates, such as dark, milk, and white chocolate. Each bite becomes an exciting experience bursting with varying flavors!
For more delightful variations, you might also enjoy making Gourmet Chocolate Dipped Fruits or exploring creative ideas for DIY Dessert Bar options to complement your spooky celebrations!
Expert Tips for Halloween S’mores Pops
-
Marshmallow Freshness: Use fresh square marshmallows for optimal gooeyness. Stale marshmallows can result in a less enjoyable texture.
-
Chocolate Consistency: If your chocolate is too thick, add a teaspoon of vegetable shortening to achieve a smoother consistency for coating your Halloween S’mores Pops.
-
Cooling Time: Allow toasted marshmallows to cool slightly before assembling to prevent melting the chocolate layer underneath during assembly.
-
Decoration Ideas: Get creative with your garnishes! Consider using colored sprinkles or edible glitter to elevate the spooky appearance of your treats.
-
Storage Solution: Store your Halloween S’mores Pops in an airtight container at room temperature for up to a week, ensuring they stay fresh and chewy.
Halloween S’mores Pops Recipe FAQs
How do I choose the right graham crackers?
Opt for honey or chocolate-flavored graham crackers for an extra taste boost. Look for ones that are whole and intact to provide a sturdy base; avoid any that are crushed or broken for the best pops.
How should I store my Halloween S’mores Pops?
Store your Halloween S’mores Pops in an airtight container at room temperature for up to a week. They’ll stay fresh and chewy during this time. For longer preservation, keeping them in the refrigerator can extend their life up to 10 days.
Can I freeze Halloween S’mores Pops?
Absolutely! To freeze your Halloween S’mores Pops, wrap each pop individually in plastic wrap, and then place them in a freezer-safe container. This method helps prevent freezer burn and allows you to enjoy them up to a month later. When ready to eat, simply let them sit at room temperature for about 10 minutes to regain their delightful gooeyness.
What should I do if my chocolate is too thick for coating?
If your chocolate feels thick and hard to work with, don’t fret! Just add a teaspoon of vegetable shortening to the melted chocolate and stir until smooth. This will help give your chocolate a more manageable consistency for perfect dipping and drizzling.
Are there any allergy considerations for this recipe?
Yes, definitely! This recipe contains chocolate and graham crackers, which may include common allergens like gluten and dairy. Always check ingredient labels to avoid cross-contamination. For a gluten-free version, you can seek out gluten-free graham crackers, and for dairy-free needs, opt for dairy-free chocolate.
Irresistible Halloween S’mores Pops: No-Bake Fun Awaits!
Ingredients
Equipment
Method
- Prepare the marshmallows by cutting a slit in each and inserting a gummy eye. Toast marshmallows over a low flame for 10-15 seconds. Let cool on a wire rack.
- Set up a single layer of graham crackers on parchment. Melt 10-12 ounces of chocolate in intervals until smooth. Spread chocolate on the crackers.
- While the chocolate is warm, insert popsicle sticks into each cracker.
- Press the toasted marshmallows onto the cracker while the chocolate is warm.
- Melt additional chocolate and drizzle over the pops for decoration.
- Transfer the pops to a baking sheet and chill for 15-20 minutes until set.
- Decorate with glitter or sprinkles once set. Serve and enjoy!