

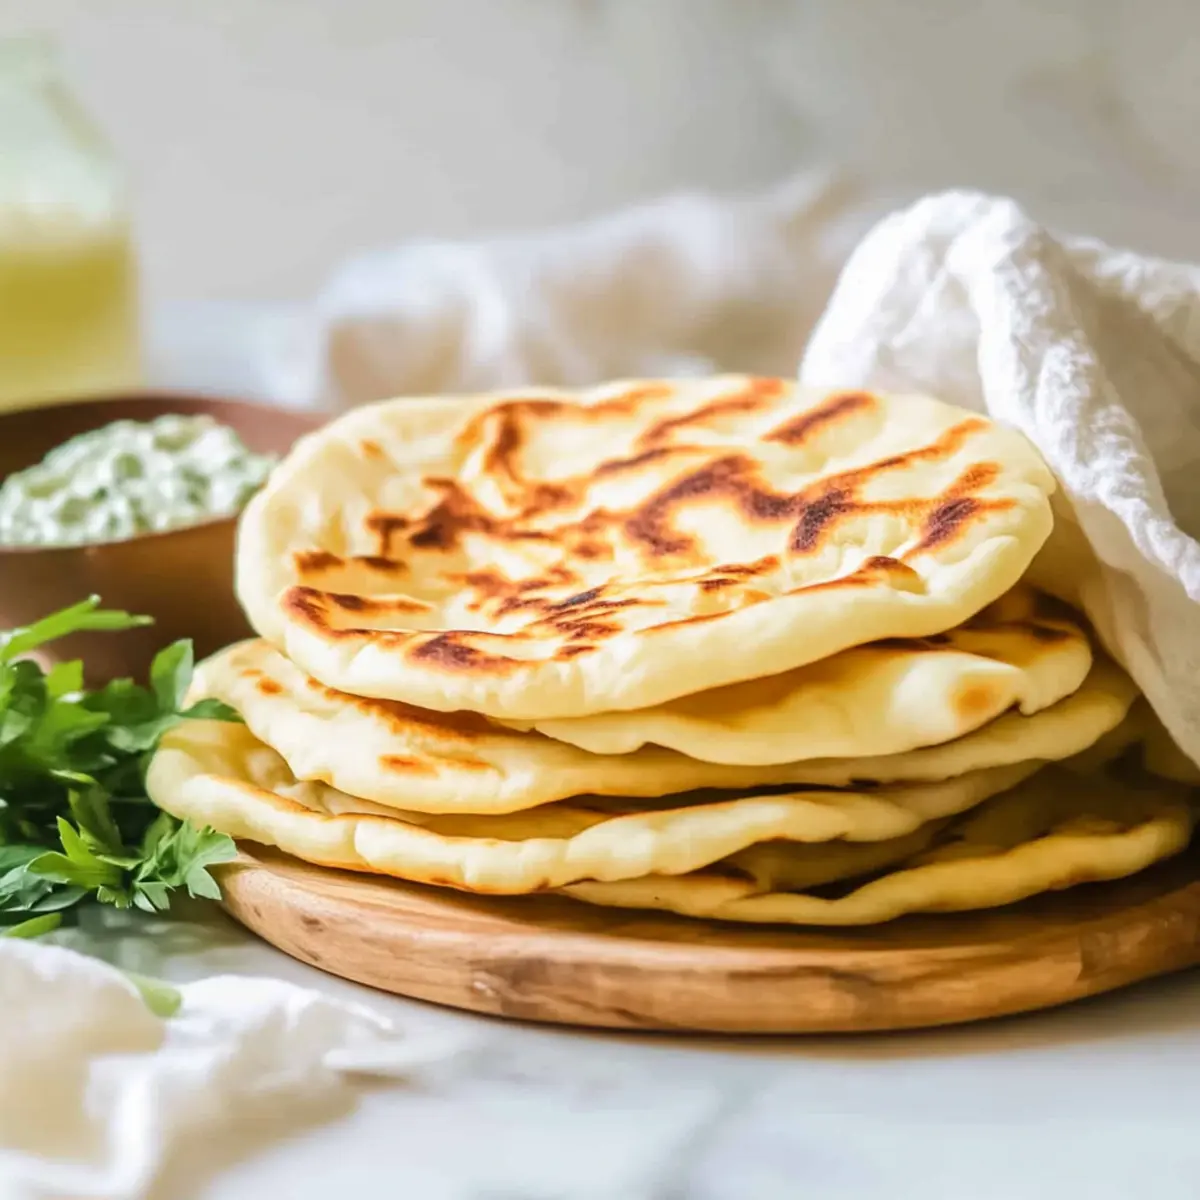
As I stood in my kitchen, the aroma of freshly baked bread transported me straight to the sun-kissed coasts of Greece. There’s something incredibly satisfying about making your own Greek pita bread at home. This easy pita recipe transforms simple ingredients into soft, pillowy pockets ready to cradle your favorite fillings. Perfect for wrapping up grilled veggies, succulent meats, or scooping up tasty dips, these little wonders are not only a delightful addition to any Mediterranean meal but also a fantastic crowd-pleaser at gatherings. Plus, they can easily be adapted for gluten-free diets! Curious how to achieve that fluffy texture and golden hue? Let’s get started on this journey to homemade perfection!
Why You’ll Love This Greek Pita?
Simplicity at Its Best: This easy pita recipe requires just a few staple ingredients, making it perfect for both novice and seasoned cooks alike.
Fluffy Texture: The result is a light and airy pita that’s soft enough for wrapping around your favorite fillings or scooping up dips like hummus or baba ganoush.
Versatile Delight: Whether you’re serving them warm straight from the pan or prepping for a meal prep, these pitas adapt beautifully to any dish, especially with a drizzle of olive oil and herbs for enhanced flavor.
Healthy Twist: You can easily swap out ingredients to cater to dietary needs, like using a 1:1 gluten-free flour blend or non-dairy milk, ensuring everyone at your table enjoys them.
Impressive Crowd-Pleaser: Evoke the flavors of the Mediterranean and impress your guests with homemade pita that beats any store-bought option, adding a touch of warmth and love to your meals.
For more delicious Mediterranean recipes, check out this Greek Eggplant Moussaka for a perfect pairing!
Greek Pita Bread Ingredients
For the Dough
- All-Purpose Flour – Provides structure and softness for the pita; can be substituted with a 1:1 gluten-free flour blend for a gluten-free option.
- Active Dry Yeast – Acts as a leavening agent, making the pita rise and puff during cooking; ensure it is fresh for best results.
- Kosher Salt – Enhances flavor and controls yeast activity; no direct substitutions recommended.
- Warm Milk – Adds richness and softness to the dough; substitute with non-dairy milk for a dairy-free option.
- Warm Water – Hydrates the dough, essential for activating yeast.
- Olive Oil – Adds flavor and moisture; extra oil is used for cooking and greasing the bowl.
Optional Finishing Touch
- Garlic and Herb Butter – Drizzled on top after cooking for added flavor; elevates your Greek pita to a new level.
Step‑by‑Step Instructions for Greek Pita
Step 1: Combine Ingredients
In a large mixing bowl, whisk together 2 cups of all-purpose flour, 2 teaspoons of active dry yeast, and 1 teaspoon of kosher salt. This dry mixture sets the foundation for your Greek pita bread. Make sure to mix thoroughly, ensuring even distribution of the yeast, which is essential for the dough to rise beautifully.
Step 2: Mix Liquid Ingredients
Warm up ¾ cup of milk and ½ cup of water until it’s just above body temperature, then gradually add this to your dry mixture. Stir until the liquids are fully incorporated, forming a shaggy dough. The warmth will activate the yeast, and you’ll start to see the mixture clump together as you continue to combine the ingredients.
Step 3: Incorporate Oil
Add 2 tablespoons of olive oil to the blended dough and begin to knead it on a floured surface. Knead for about 5–7 minutes until the dough is smooth and elastic. The dough should feel slightly tacky but not sticky. If it’s too sticky, sprinkle a bit more flour as needed. This step is crucial for that perfect fluffy texture in your Greek pita.
Step 4: Let Dough Rise
Grease a clean bowl with a little olive oil and place your kneaded dough inside, rolling it around to coat. Cover the bowl tightly with plastic wrap and let it rise in a warm place for 1 hour, or until it doubles in size. A good visual cue is when the dough has puffed up and filled the bowl, indicating that the yeast is working its magic.
Step 5: Shape Pita
Once risen, punch down the dough gently to release the air. Dust your work surface with flour and divide the dough into 8 equal pieces. Roll each piece into a ball, then flatten and shape into circles approximately 7-8 inches wide and ¼ inch thick. Ensure uniform thickness to help each Greek pita cook evenly.
Step 6: Cook
Preheat a cast iron pan or a non-stick skillet over high heat. Once hot, brush lightly with olive oil and place a pita in the pan. Cook for 1-2 minutes until you see bubbles forming and it begins to puff. Flip and cook for another 1-2 minutes, or until both sides are golden brown and fluffy. Repeat with the remaining dough, adding oil as needed for each pita.
Step 7: Optional Finish
For an extra touch of flavor, melt some butter mixed with minced garlic and fresh herbs, then drizzle it over your warm Greek pita right after cooking. This enhances the aroma and adds a delicious richness that pairs perfectly with the soft, pillowy texture of the pita.
How to Store and Freeze Greek Pita
-
Room Temperature: Store Greek pitas in an airtight container at room temperature for up to 2 days. This helps maintain their softness while keeping them fresh for your meals.
-
Fridge: If you need to extend their life, you can refrigerate them in a sealed bag for up to 5 days. However, be mindful that this may affect their texture.
-
Freezer: For longer storage, freeze pitas in a single layer, then transfer to a freezer-safe bag. Properly wrapped, they can last up to 3 months.
-
Reheating: To restore softness, warm frozen Greek pitas in a preheated oven at 350°F for about 5 minutes, or microwave them for 20-30 seconds.
Make Ahead Options
These Greek pita breads are perfect for meal prep enthusiasts! You can easily make the dough up to 24 hours in advance—simply follow the recipe up to the rising step, then cover and refrigerate the dough instead of letting it rise. When you’re ready to cook, allow the dough to come to room temperature for about 30 minutes before shaping it into pitas. Additionally, cooked pitas can be stored in an airtight container for up to 3 days at room temperature; just reheat them gently in a warm oven for a few minutes to restore their softness. This way, you’ll have restaurant-quality Greek pitas ready to elevate your meals with minimal effort!
Expert Tips for Greek Pita
-
Fresh Ingredients Matter: Ensure your active dry yeast is fresh; expired yeast won’t rise properly, leading to flat pita bread.
-
Perfect Heat: Preheat your pan fully for optimal puffing. A pan that’s too cool will prevent the Greek pita from rising beautifully.
-
Knead Just Right: Knead the dough until it’s smooth and elastic but not sticky. Adjust with flour as needed to achieve the perfect consistency.
-
Uniform Thickness: Roll out each pita to the same thickness; this ensures even cooking and that all your pitas puff just right.
-
Store Wisely: Keep leftover pitas in an airtight container at room temperature for a couple of days; warm them gently in the oven for best softness when ready to serve.
Greek Pita Variations and Substitutions
Feel free to get creative with your Greek pita bread; these delightful variations will tickle your taste buds and make mealtime even more enjoyable!
- Gluten-Free: Use a 1:1 gluten-free flour blend for a version that everyone can enjoy without compromising on taste.
- Dairy-Free: Swap warm milk with any plant-based milk like almond or soy for a deliciously dairy-free pita experience.
- Herbed Pita: Mix dried herbs like oregano or thyme into the flour for a fragrant twist that pairs beautifully with Mediterranean dishes.
- Spicy Kick: Add a teaspoon of cayenne pepper or crushed red pepper flakes to the dough for a mild heat that elevates your flavors.
- Stuffed Pita: Try filling your pitas with grilled veggies, marinated chickpeas, or your favorite protein for a hearty lunch or dinner.
- Mini Pitas: For cute appetizers, divide the dough into smaller pieces and roll into mini circles, perfect for dips like hummus or tzatziki.
- Sweet Pita: Drizzle with honey and a sprinkle of cinnamon after cooking for a sweet dessert option that will surprise your guests!
- Mediterranean Spread: Serve your pitas with a variety of spreads, like baba ganoush or tzatziki, for a delightful flavor explosion reminiscent of a classic Greek Eggplant Moussaka.
Experiment with these variations to discover your favorite twist on this versatile bread!
What to Serve with Greek Pita Bread
Create a delightful spread that will transport your taste buds to the Mediterranean.
-
Tzatziki Sauce: This creamy, cucumber-yogurt dip adds a refreshing coolness that beautifully complements warm, fluffy pitas. It’s a classic choice for a reason!
-
Grilled Chicken Skewers: Juicy and marinated to perfection, these skewers bring a savory depth to your meal, ideal for stuffing into your pita.
-
Mediterranean Quinoa Salad: Packed with fresh veggies and tangy feta, this hearty salad adds a burst of brightness and texture to your meal.
-
Stuffed Grape Leaves: The tender rice and herb filling in these delicate rolls pairs wonderfully with pitas, offering a taste of tradition and comfort.
-
Roasted Vegetables: Colorful and caramelized, a mix of seasonal veggies adds both flavor and nutrition, making your meal hearty yet healthy.
-
Hummus Trio: A selection of traditional, roasted red pepper, and garlic hummus provides creamy contrasts that pair exquisitely with warm pita for dipping.
-
Olives and Feta Plate: A platter of assorted olives and creamy feta cheese brings salty and savory notes, enhancing the Mediterranean flair of your meal.
-
Red Wine: A glass of full-bodied red wine like a Syrah or Cabernet Sauvignon elevates the entire dining experience, harmonizing with the flavors of your meal.
Greek Pita Bread Recipe FAQs
What type of flour is best for making Greek pita?
I recommend using all-purpose flour for a classic texture, but you can easily substitute it with a 1:1 gluten-free flour blend for gluten-free Greek pita! Just ensure it’s a quality blend to maintain that light, airy structure.
How should I store leftover Greek pitas?
Store your Greek pitas in an airtight container at room temperature for up to 2 days. This helps retain their fluffiness and prevents them from drying out. For longer preservation, consider refrigerating them in a sealed bag for up to 5 days, keeping in mind that the texture may change slightly.
Can I freeze Greek pitas?
Absolutely! To freeze, place cooked Greek pitas in a single layer on a baking sheet until they’re frozen solid. Then transfer them to a freezer-safe bag. When stored properly, they’ll remain fresh for up to 3 months.
How do I reheat frozen Greek pitas?
To restore softness, gently reheat your frozen Greek pitas in a preheated oven at 350°F for about 5 minutes. Alternatively, you can microwave them for 20-30 seconds, wrapped in a damp paper towel for moisture. This should rejuvenate their delightful texture!
What to do if my Greek pitas don’t puff up?
If your Greek pitas fail to puff, it could be due to several factors. Ensure your pan is adequately preheated; a temperature that’s too low won’t get the steam necessary for puffing. Also, check the freshness of your active dry yeast—expired yeast may not provide the rise you need. Knead the dough well to develop gluten structure, giving your pitas a better chance to puff beautifully.
Are Greek pitas safe for my gluten-sensitive friends?
Yes, you can accommodate gluten-sensitive diets by using a quality gluten-free flour blend in your Greek pita recipe. Just ensure no cross-contamination occurs during preparation, and check that your yeast and other ingredients are also gluten-free.
Fluffy Greek Pita: Elevate Your Homemade Meals Today
Ingredients
Equipment
Method
- In a large mixing bowl, whisk together 2 cups of all-purpose flour, 2 teaspoons of active dry yeast, and 1 teaspoon of kosher salt.
- Warm up ¾ cup of milk and ½ cup of water until it’s just above body temperature, then gradually add this to your dry mixture.
- Add 2 tablespoons of olive oil to the blended dough and begin to knead it on a floured surface for about 5–7 minutes.
- Grease a clean bowl with olive oil, place the dough inside, cover it tightly, and let it rise in a warm place for 1 hour.
- Once risen, punch down the dough gently, dust your work surface with flour, and divide the dough into 8 equal pieces.
- Preheat a cast iron pan or non-stick skillet over high heat, brush it with olive oil and place a pita in the pan.
- For an extra touch of flavor, melt some butter mixed with minced garlic and fresh herbs, then drizzle over the warm pita.