

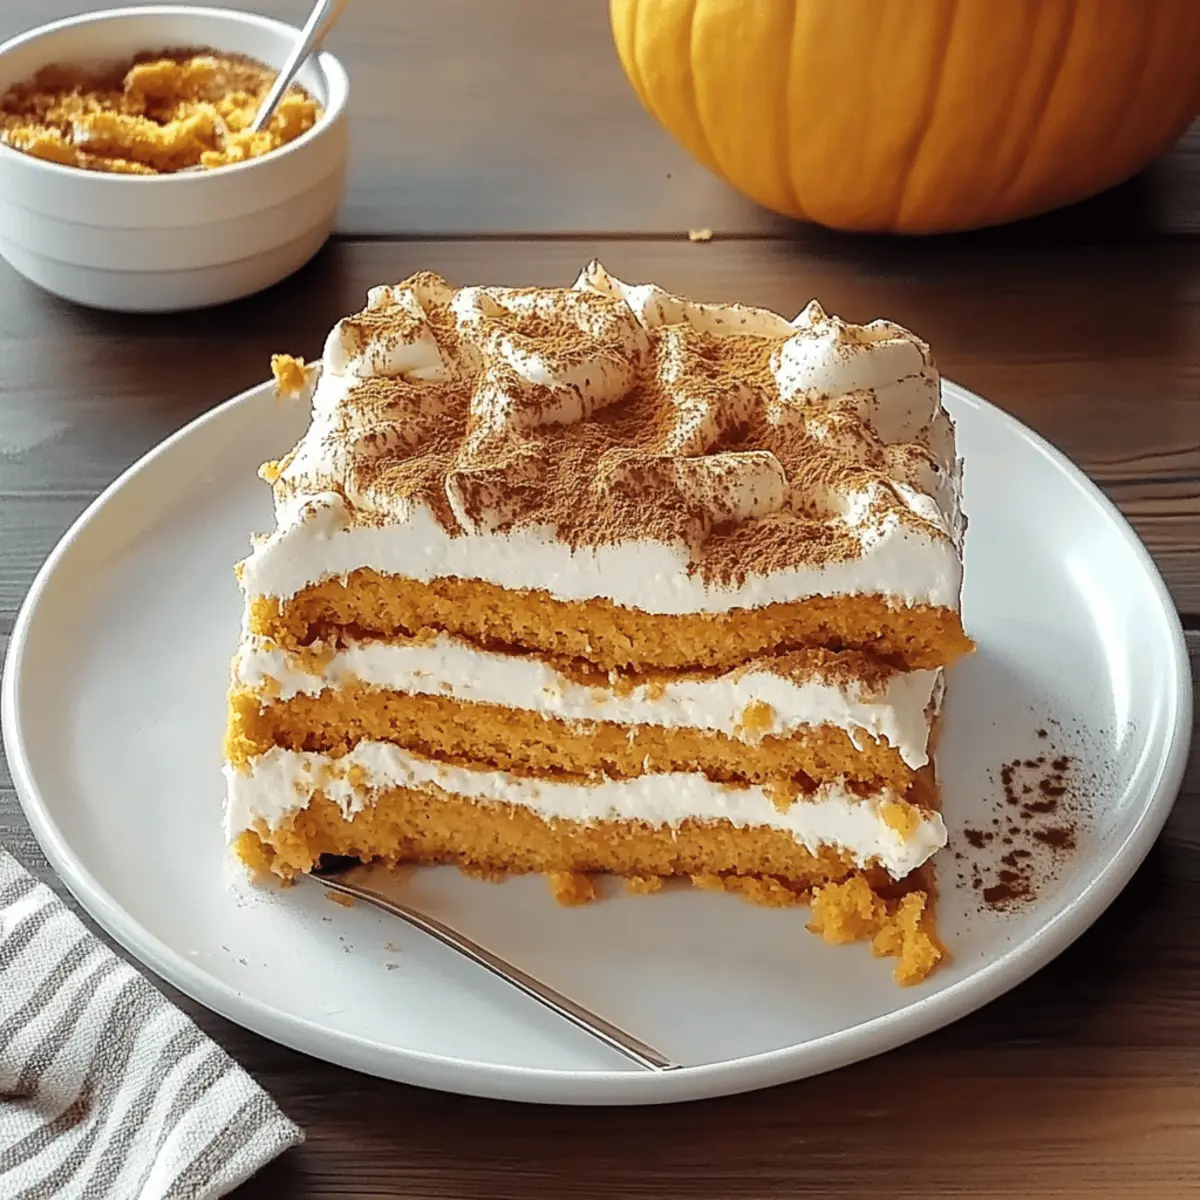
With the crisp autumn air swirling around me, I found myself craving a dessert that encapsulates the very essence of fall. Enter my Delicious Pumpkin Tiramisu, where the warmth of pumpkin and spices meets a luxurious creaminess that’ll make your taste buds dance. This delightful twist on a classic is not only a showstopper at any gathering but also incredibly easy to whip up, making it perfect for those cozy family dinners we all cherish. Imagine layers of homemade pumpkin ladyfingers mingling with a rich, spiced filling, creating a harmonious blend of flavors that feels like a big, comforting hug. And the best part? It’s gluten-free and offers dairy-free options, accommodating all your loved ones. Are you ready to indulge in this seasonal delight? Let’s dive into the recipe!
Why is Pumpkin Tiramisu a Must-Try?
Comforting, this Delicious Pumpkin Tiramisu is the ultimate fall dessert that your taste buds deserve. Unique spices like cinnamon and nutmeg elevate the flavor, giving you that warm, cozy feeling with each bite. Easily customizable, whether you’re gluten-free or seeking dairy-free options, everyone can join in on the enjoyment. Visually stunning, the layered presentation makes it a centerpiece at gatherings. Quick to prepare, it can be made ahead and served after a night in the fridge, freeing you to enjoy time with loved ones. Dive into this seasonal sensation!
Delicious Pumpkin Tiramisu Ingredients
For the Ladyfingers
- Butter – Adds richness and moisture. Substitution: For a lighter option, use coconut oil.
- Sugar – Provides sweetness; using brown sugar adds depth of flavor.
- Egg – Acts as a binder and helps aerate the mixture; ensure eggs are at room temperature for optimal blending.
- Honey – Adds sweetness and moisture; substitute with maple syrup for a different flavor.
- Pumpkin (solid-pack) – The main flavor base that offers moisture and nutritional benefits; for homemade, use a sugar pumpkin.
- Dark Rum – Enhances flavor with depth; omit for a non-alcoholic version.
- All-Purpose Flour – Provides structure to ladyfingers; use a gluten-free blend for a gluten-free option.
- Cinnamon, Ginger, Cloves – Spice mix for warmth and flavor; freshly ground spices yield better flavor.
- Baking Soda – Helps ladyfingers rise; ensure it’s fresh for effectiveness.
- Salt – Enhances overall flavor; fine sea salt is best for even distribution.
For the Filling
- Heavy Whipping Cream – Creates a creamy texture; substitute with coconut cream for a dairy-free version.
- Cream Cheese – Adds body and richness to the filling; full-fat is recommended for the best flavor.
This delectable and Delicious Pumpkin Tiramisu is waiting to be made! Whether you’re hosting friends or enjoying a quiet evening with family, these ingredients will help you craft a fall treat that will be remembered.
Step‑by‑Step Instructions for Delicious Pumpkin Tiramisu
Step 1: Preheat the Oven
Begin by preheating your oven to 350°F (175°C). This temperature ensures that your pumpkin ladyfingers will bake evenly and rise beautifully. While the oven heats, gather your ingredients and line two baking sheets with parchment paper, preparing for a seamless baking experience.
Step 2: Cream the Butter and Sugar
In a mixing bowl, cream together softened butter and sugar using an electric mixer on medium speed for about 5-7 minutes. Aim for a light and fluffy texture, which will add air to your batter. You’ll know it’s ready when the mixture becomes pale and creamy, a perfect foundation for your Delicious Pumpkin Tiramisu.
Step 3: Incorporate the Wet Ingredients
Next, beat in one room-temperature egg, honey, pumpkin puree, and dark rum to the creamed mixture until smooth. The combination should be well-blended and visually homogeneous, creating a rich base filled with fall flavors that will make your tiramisu irresistible.
Step 4: Prepare the Dry Ingredients
In a separate bowl, whisk together the all-purpose flour, baking soda, cinnamon, ginger, cloves, and salt. This dry mixture will add structure and spice to your batter. Once well combined, gently fold it into the pumpkin mixture to maintain the airiness of your blended ingredients, ensuring a light texture.
Step 5: Shape the Ladyfingers
Transfer the batter to a piping bag, fitted with a round tip, and pipe rows of 3-inch-long finger shapes onto the prepared baking sheets. Bake for 12-14 minutes, or until they turn golden brown and spring back when gently pressed. Let them cool completely on wire racks to avoid sogginess.
Step 6: Mix the Pumpkin Filling
While the ladyfingers cool, prepare the filling by mixing pumpkin puree with your chosen spices in a medium bowl. In a separate bowl, whip heavy cream until thick and fluffy peaks form. Gently fold the whipped cream into the pumpkin mixture, creating a light and airy filling that embodies the comforting flavors of fall.
Step 7: Beat the Cream Cheese
In a large bowl, beat the cream cheese on medium speed until smooth and free of lumps. Gradually incorporate the remaining whipped cream into the cream cheese until fully blended. This creamy mixture will add richness to your Delicious Pumpkin Tiramisu layers and balance the spiced pumpkin filling.
Step 8: Layer the Tiramisu
In a 13×9-inch pan, start layering by brushing the cooled ladyfingers with a bit of rum. Place a layer of ladyfingers at the bottom, followed by half of the pumpkin filling, followed by the creamy cheese layer. Repeat the layering process, finishing with the cream cheese mixture on top, creating a beautiful assembly that showcases the different layers.
Step 9: Chill the Tiramisu
Cover the assembled Pumpkin Tiramisu with plastic wrap and refrigerate for at least 8 hours, preferably overnight. This chilling time allows the flavors to meld beautifully, enhancing the overall tasting experience and providing a luxurious texture.
Step 10: Serve with a Touch of Spice
Before serving, dust the top of your Delicious Pumpkin Tiramisu with cinnamon using a sifter for an even coating. This final touch not only adds visual appeal but also highlights the warm spices within, inviting everyone to dive into this cozy fall dessert.
Make Ahead Options
These delicious Pumpkin Tiramisu are perfect for meal prep enthusiasts! You can make the pumpkin ladyfingers up to 24 hours in advance and store them in an airtight container to maintain their texture. Additionally, the pumpkin filling and cream cheese mixture can be prepared and refrigerated up to 3 days ahead, allowing the flavors to deepen beautifully. When you’re ready to assemble, simply layer the ladyfingers with the fillings, cover, and refrigerate for at least 8 hours (preferably overnight) to ensure everything melds together perfectly. This saves you time on busy days while ensuring your Pumpkin Tiramisu is just as delicious when served!
What to Serve with Delicious Pumpkin Tiramisu?
Imagine the perfect autumn gathering, where heavenly flavors blend to create an unforgettable dining experience.
-
Spiced Coffee: Infusing your brew with cinnamon and nutmeg echoes the flavors in the tiramisu, creating a warm harmony.
-
Candied Pecans: These crunchy, sweet treats not only add texture but also complement the earthiness of the pumpkin beautifully.
-
Whipped Cream: Light and airy, a dollop of freshly whipped cream enhances the creaminess of the tiramisu while providing a lovely contrast.
-
Vanilla Ice Cream: A scoop of creamy vanilla ice cream offers a cooling contrast, beautifully balancing the rich warmth of the pumpkin.
-
Gingerbread Cookies: The spiced notes of gingerbread tie in seamlessly with the flavors of the tiramisu, making for a festive pairing that delights.
-
Pumpkin Spice Latte: This seasonal favorite brings together the comforting flavors of fall, making it the perfect drink to sip alongside your dessert.
-
Chocolate Ganache Drizzle: Adding a drizzle of rich chocolate ganache gives an indulgent twist, enhancing the decadent nature of the pumpkin tiramisu.
-
Fall Fruit Salad: A blend of apples, pears, and pomegranate seeds adds a refreshing, tart contrast, bringing brightness to the table and balancing the rich flavors.
-
Caramel Sauce: Drizzling warm caramel over each slice adds a decadent touch, enhancing the flavor while inviting sweetness to the mix.
How to Store and Freeze Delicious Pumpkin Tiramisu
Fridge: Store in an airtight container for up to 3 days to maintain its creamy texture and rich flavors. Be sure to cover the dessert tightly to prevent any drying out or absorbing other odors.
Freezer: For longer storage, slice and wrap portions tightly in plastic wrap and then aluminum foil. These can be frozen for up to 3 months. Thaw in the fridge overnight before serving for the best texture.
Reheating: This dessert is best enjoyed chilled, so there’s no need for reheating. Just let it sit at room temperature for a few minutes before serving to enhance its creaminess.
Serving: Always dust with a little extra cinnamon just before serving for that warm, inviting aroma, elevating your Delicious Pumpkin Tiramisu experience!
Delicious Pumpkin Tiramisu Variations
Feel free to explore these delightful twists that elevate your Pumpkin Tiramisu experience to new heights!
-
Sweet Potato: Swap pumpkin for sweet potato for a sweeter, creamier twist that’s equally comforting.
-
Nutty Crunch: Add chopped pecans or walnuts between the layers for a delightful crunch and extra texture.
-
Flavored Extracts: Incorporate vanilla or almond extract into the pumpkin filling for an aromatic flavor boost that’ll excite your taste buds.
-
Coffee Infusion: Brush ladyfingers with cooled coffee instead of rum for an energizing coffee-flavored version, perfect for coffee lovers.
-
Caramel Drizzle: Drizzle homemade caramel sauce over the top before serving to introduce a rich sweetness that takes the dessert over the top.
-
Chocolate Layers: For a chocolate twist, add layers of chocolate ganache between the pumpkin and cream cheese layers, creating a decadent chocolate-pumpkin harmony.
-
Dairy-Free Delight: Use coconut cream and cashew cream cheese for a deliciously creamy, dairy-free version everyone will adore.
-
Spicy Surprise: Add a dash of cayenne pepper to the pumpkin filling for a subtle kick that contrasts beautifully with the sweet layers.
And if you’re looking for more pumpkin inspiration, you might also enjoy making Berry Tiramisu Refreshing for a fruity twist or serving these alongside delicious ground beef enchiladas from Ground Beef Enchiladas for a delightful meal!
Expert Tips for Delicious Pumpkin Tiramisu
-
Cooling Ladyfingers: Ensure the pumpkin ladyfingers cool completely before assembly to avoid sogginess in your tiramisu layers.
-
Brushing Technique: Brush, don’t soak, your ladyfingers in dark rum. This keeps the texture light and prevents them from becoming overly soggy.
-
Chill Time: Aim to refrigerate your Delicious Pumpkin Tiramisu overnight. This step melds the flavors beautifully, resulting in a rich and harmonious dessert.
-
Sifting Spices: Use a sifter for dusting cinnamon on top before serving. This prevents clumps and gives your presentation a refined touch.
-
Fresh Ingredients: Always use fresh spices and ingredients. They significantly enhance the flavor profile and overall delight of this seasonal dessert.
Delicious Pumpkin Tiramisu Recipe FAQs
How should I select my pumpkin for this recipe?
Absolutely! When choosing pumpkin, opt for solid-pack pumpkin puree for the best flavor and texture. If you’re using fresh pumpkin, select a sugar pumpkin, which is smaller and sweeter. Avoid using larger carving pumpkins, as they can be stringy and watery, making your tiramisu less enjoyable.
What’s the best way to store Pumpkin Tiramisu after making it?
After preparation, store your Delicious Pumpkin Tiramisu in an airtight container in the refrigerator for up to 3 days. This helps preserve its creamy texture and flavor. Cover it well to prevent it from absorbing any other odors in the fridge—nobody wants pumpkin-flavored garlic!
Can I freeze Pumpkin Tiramisu, and if so, how?
Certainly! To freeze your tiramisu, first slice it into portions. Wrap each piece tightly in plastic wrap, then in aluminum foil for added protection. This keeps your delectable dessert intact for up to 3 months. When you’re ready to serve, simply thaw the slices in the refrigerator overnight before enjoying. Remember, no need to reheat—enjoy it chilled!
What if my ladyfingers come out soggy? How can I fix them?
If you encounter soggy ladyfingers, don’t fret! The primary reason is likely that they weren’t completely cooled before assembly. To avoid this, always allow the ladyfingers to cool fully on a wire rack after baking. If they’re already soggy, re-bake them briefly at a low temperature to help dry them out again. For next time, ensure you brush—not soak—the ladyfingers in rum to maintain their perfect texture.
Is this recipe suitable for people with allergies or dietary restrictions?
Very! To accommodate different dietary needs, you can easily make gluten-free or dairy-free versions of this Delicious Pumpkin Tiramisu. Substitute all-purpose flour with a gluten-free blend, and for the filling, use coconut cream instead of heavy whipping cream. Always check your ingredients for potential allergens, especially if you’re serving guests with specific dietary restrictions.
How can I enhance the flavor of the pumpkin filling?
Certainly! You can boost the flavor of the filling by incorporating freshly ground spices or adding a splash of vanilla extract. For additional creaminess, consider mixing in a bit of cream cheese. These small tweaks can elevate the flavors and provide a delightful twist to your Delicious Pumpkin Tiramisu!

Delicious Pumpkin Tiramisu: A Cozy Fall Delight to Savor
Ingredients
Equipment
Method
- Preheat your oven to 350°F (175°C). Line two baking sheets with parchment paper.
- Cream together softened butter and sugar in a mixing bowl using an electric mixer on medium speed for about 5-7 minutes.
- Beat in one room-temperature egg, honey, pumpkin puree, and dark rum until smooth.
- Whisk together all-purpose flour, baking soda, cinnamon, ginger, cloves, and salt in a separate bowl.
- Gently fold the dry mixture into the pumpkin mixture.
- Transfer batter to a piping bag and pipe rows of 3-inch-long finger shapes onto prepared baking sheets. Bake for 12-14 minutes.
- Mix pumpkin puree with chosen spices. In a separate bowl, whip the heavy cream until thick and fluffy, and gently fold it into the pumpkin mixture.
- Beat the cream cheese until smooth and gradually incorporate the whipped cream until fully blended.
- Layer in a 13x9-inch pan by brushing ladyfingers with rum, followed by pumpkin filling and cream cheese layer; repeat.
- Cover with plastic wrap and refrigerate for at least 8 hours or overnight.
- Dust with cinnamon before serving.