

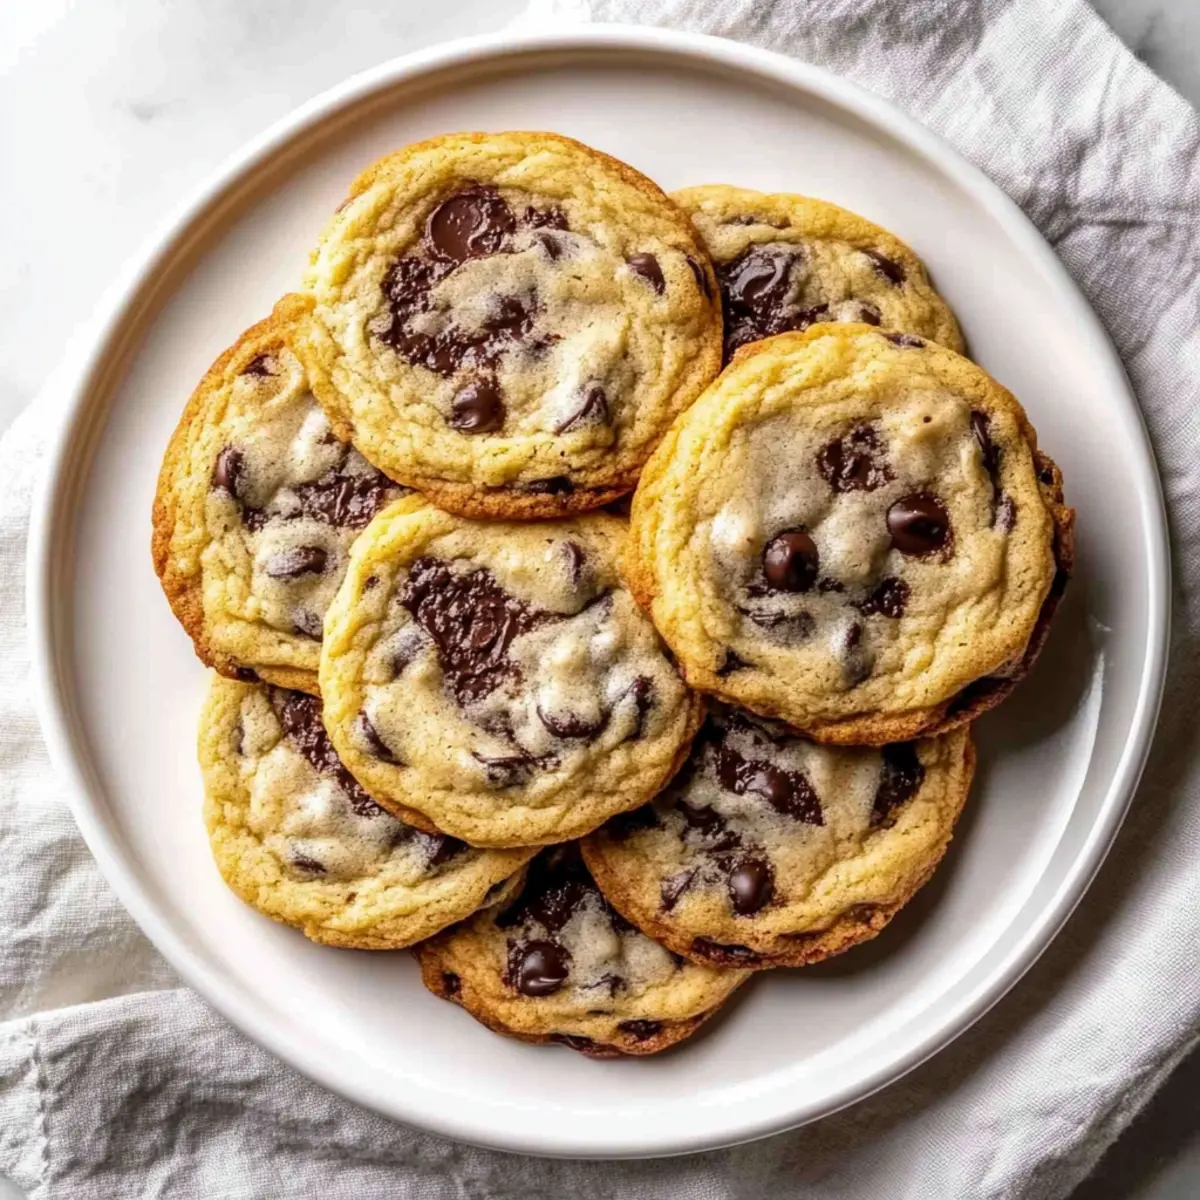
As I stood in my kitchen, the warm aroma of buttery dough and melting chocolate chips filled the air, instantly transporting me back to my childhood. There’s something undeniably magical about making Crispy Thin Chocolate Chip Cookies; they embody comfort and nostalgia in every bite. With a delightful crunch that gives way to a tender center, these cookies are not just a snack—they’re a moment to savor. The best part? They’re quick to whip up, making them perfect for impromptu gatherings or cozy evenings at home. Plus, their crispiness pairs wonderfully with a cold glass of milk or a scoop of ice cream. Who can resist a treat that satisfies both sweet cravings and the joy of baking? So, which variation will you explore first?
Why Choose Crispy Thin Cookies?
Crispiness at its finest: These cookies boast a light, crunchy texture that delights with every bite. Nostalgic flavor: Each cookie is infused with the classic taste of buttery dough and rich chocolate that brings back childhood memories. Quick and easy: Perfect for last-minute gatherings, these cookies come together in no time. Versatile pairing: Enjoy them as is, or serve warm with ice cream for a heavenly dessert experience. Perfect balance: Enjoy the fun contrast of crispy edges and a soft center, making these cookies an irresistible treat for any sweet tooth!
Crispy Thin Chocolate Chip Cookie Ingredients
-
For the Dough
• All-Purpose Flour – Essential for structure; you can swap for a gluten-free option if needed.
• Baking Soda – Provides lift and helps achieve that perfect crispy thin texture; keep it fresh for optimal results.
• Salt – Balances sweetness; consider using sea salt for an enhanced flavor experience.
• Unsalted Butter – Adds richness; let it soften at room temperature for easy mixing.
• Granulated Sugar – Lends sweetness and encourages spreading; ideal for crispy cookies.
• Brown Sugar – Introduces moisture and depth; using light or dark can adjust the flavor profile.
• Egg – Binds everything together while adding moisture; for a vegan option, try a flax egg.
• Vanilla Extract – Elevates the overall flavor; opt for pure vanilla for the best results.
• Chocolate Chips – The star ingredient; mix semi-sweet and dark for a rich and delightful experience. -
Optional Add-ins
• Chopped Nuts – For added crunch, fold in toasted walnuts or pecans.
• Flaky Sea Salt – Sprinkle on top before baking for an extra layer of flavor; it beautifully enhances the cookies’ sweetness.
The Crispy Thin Chocolate Chip Cookies you create will be a hit, perfect for any occasion!
Step‑by‑Step Instructions for Crispy Thin Chocolate Chip Cookies
Step 1: Prep the Oven & Pans
Begin by preheating your oven to 350°F (175°C). While it warms up, line your baking sheets with parchment paper to prevent sticking and ensure easy cleanup. This step is crucial for achieving the perfect crispy texture in your Crispy Thin Chocolate Chip Cookies, as the right temperature allows them to spread beautifully as they bake.
Step 2: Mix Dry Ingredients
In a medium bowl, whisk together 2 cups of all-purpose flour, 1 teaspoon of baking soda, and ½ teaspoon of salt. This blend of dry ingredients helps ensure that the baking soda is evenly distributed, which is key for a consistent rise. Set aside the mixture as you move on to the next step in creating your delightful cookies.
Step 3: Cream Butter and Sugars
In a large mixing bowl, beat together ¾ cup of softened unsalted butter, ½ cup of granulated sugar, and ¾ cup of brown sugar using an electric mixer on medium speed. Continue mixing until the mixture is light and fluffy, which should take about 2-3 minutes. This aeration is what contributes to the texture of your Crispy Thin Chocolate Chip Cookies, creating a delightful crunch.
Step 4: Incorporate Eggs & Vanilla
Next, add in 1 large egg and 1 teaspoon of pure vanilla extract to the butter-sugar mixture. Beat the batter well until the egg is fully incorporated, which will take about 1 minute. The egg adds moisture and binds the ingredients, while the vanilla enhances the overall flavor of your cookies, setting a warm and inviting aroma in your kitchen.
Step 5: Combine Mixtures
Gradually add the dry ingredient mixture to the creamed butter and sugars, mixing on low speed until just combined, which should only take about 15-20 seconds. Avoid overmixing, as this could lead to tougher cookies and detract from the crispy thin texture you desire in your Crispy Thin Chocolate Chip Cookies.
Step 6: Fold in Chocolate Chips
Using a spatula, gently fold in 1 cup of semi-sweet chocolate chips (or your choice of chocolate) until evenly distributed. This step is all about careful incorporation to maintain the dough’s lightness while ensuring each cookie has the delightful chocolatey goodness you want. If you’re adding any optional ingredients like nuts, fold them in at this time as well.
Step 7: Chill Dough (if needed)
If time allows, chill the dough in the refrigerator for 15-30 minutes to enhance the flavors and make it easier to handle, although this step is optional for thin cookies. Chilling can also slightly firm up the dough, which can help with spreading during baking, achieving that perfect crispy edge while keeping the center soft.
Step 8: Shape & Bake
Using a cookie scoop or a spoon, drop tablespoon-sized portions of the dough onto your prepared baking sheets, ensuring there’s enough space between each ball for spreading. Bake in your preheated oven for 10-12 minutes, or until the edges are golden brown and the centers appear slightly underbaked. This contrast is essential for that irresistible crispy thin texture.
Step 9: Cool
Once baked, remove the cookies from the oven and let them cool on the baking sheet for about 5 minutes. This resting time allows them to set before transferring them to a wire rack. Cooling on the sheets helps preserve the crispy exterior while allowing the centers to firm up, ensuring your Crispy Thin Chocolate Chip Cookies are just perfect!

Variations & Substitutions for Crispy Thin Chocolate Chip Cookies
Feel free to play around with these ideas to create your own spin on these delightful cookies that melt in your mouth!
-
Dairy-Free: Substitute butter with coconut oil and use dairy-free chocolate chips for a vegan-friendly option.
Dairy-free cookies offer a surprisingly rich flavor, keeping everything wonderfully moist and satisfying. -
Nutty Twist: Fold in chopped hazelnuts or almonds for an added crunch and depth of flavor.
Nuts not only enhance the texture but also infuse your cookies with a toasty aroma that’s simply irresistible. -
Brown Butter: Use browned butter instead of regular butter for a nutty, caramel-like flavor that elevates these cookies.
This slight change brings a lovely richness that might just become your new favorite! -
Spiced: Add a pinch of cinnamon or nutmeg to the dry ingredients for a warm, cozy flavor.
This twist is perfect for those chilly evenings where comfort food calls. -
Double Chocolate: Incorporate cocoa powder into the dry ingredients and use chocolate chunks for a chocolate lover’s dream.
These cookies are luscious and chocolatey, making them just as indulgent as they sound! -
Oatmeal Addition: Mix in 1 cup of rolled oats for a heartier texture and added nutrition.
Not only do oats add a nice chewiness, but they also make these cookies feel slightly wholesome. -
Salted Caramel: Drizzle with caramel sauce before baking and sprinkle with flaky sea salt for a sweet-salty experience.
The contrast of flavors ensures each bite is unique and unforgettable! -
Crispy with a Zing: Add grated lemon or orange zest to the dough for a bright, citrusy twist.
This fresh flavor can make your cookies feel vibrant and refreshing—perfect for special occasions!
Don’t forget to check out these delicious recipes while you’re at it: Chocolate Strawberry Shortcake or try these Decadent Dark Chocolate bars for a special treat! Enjoy spreading the joy of baking with these variations!
Expert Tips for Crispy Thin Cookies
- Right Butter Temperature: Use softened butter at room temperature. This ensures a smooth cream with sugars, contributing to the desired texture of your Crispy Thin Chocolate Chip Cookies.
- Don’t Overmix: Mix just until combined when adding dry ingredients. Overmixing can result in tough cookies instead of crispy and light ones.
- Chilling Optional: While optional, chilling the dough for 15-30 minutes can enhance flavor and make handling easier, helping your cookies spread beautifully in the oven.
- Watch Baking Time: Every oven is different! Keep an eye on your cookies when baking; look for golden edges and slightly underbaked centers for the best results.
- Flaky Salt Finish: Add a sprinkle of flaky sea salt on top before baking. It enhances the sweetness and gives that gourmet touch to your crispy thin cookies.
Make Ahead Options
These Crispy Thin Chocolate Chip Cookies are ideal for busy home cooks looking to save time without sacrificing flavor. You can prepare the cookie dough up to 24 hours in advance; simply refrigerate it in an airtight container to maintain its quality. If you prefer, you can also freeze the dough for up to 3 months. When ready to bake, just scoop the dough directly from the refrigerator or freezer, allowing an extra minute or two in the oven for baking the chilled or frozen dough. This simple prep method ensures you’ll always have freshly baked cookies ready to enjoy with minimal effort!
What to Serve with Crispy Thin Chocolate Chip Cookies?
Indulging in these delightful cookies opens up a world of flavors and textures to complement your sweet treat experience.
- Cold Glass of Milk: The classic pairing that brings out the cookie’s sweetness and enhances its creamy chocolate flavors.
- Vanilla Ice Cream: Serve warm cookies atop a scoop of rich vanilla ice cream for an irresistible contrast of temperatures and textures.
- Fresh Berries: A side of juicy raspberries or strawberries adds a lovely tartness that beautifully balances the sweetness of the cookies.
- Coffee or Espresso: The rich flavor of coffee enhances the chocolatey goodness, creating a delightful morning or afternoon snack moment.
- Caramel Sauce: Drizzle warm cookies with homemade or store-bought caramel for a decadent twist that adds a sweet-salty richness.
- Chocolate Milkshake: Blend up a thick and creamy milkshake to create an over-the-top dessert experience that’s sure to satisfy cravings.
- Nutty Granola: Sprinkle some crunchy granola on top of yogurt alongside your cookies, adding a wholesome touch to your dessert (or breakfast!).
- Fruity Smoothie: A refreshing smoothie can cleanse your palate while enjoying these cookies, making it a balanced and fun treat.
- Flavored Tea: Pair these cookies with a warm cup of chai or a refreshing mint tea for a comforting and aromatic experience.
How to Store and Freeze Crispy Thin Chocolate Chip Cookies
Airtight Container: Store your Crispy Thin Chocolate Chip Cookies in an airtight container at room temperature for up to 1 week to maintain their delightful crispiness.
Freezer: For longer storage, freeze cookies in a single layer, then transfer to a zip-top bag. They can last in the freezer for up to 3 months.
Reheating: To revive their crispiness, reheat frozen cookies at 350°F (175°C) for about 5-7 minutes directly from the freezer.
Cookie Dough: You can also freeze the unbaked dough. Portion it into balls, freeze individually, then store in a bag for up to 3 months. Bake from frozen, adding an extra minute or two to the baking time.

Crispy Thin Chocolate Chip Cookies Recipe FAQs
How do I choose the right chocolate chips?
It’s all about personal preference! I recommend using a blend of semi-sweet and dark chocolate chips for a perfect balance of sweetness and richness. If you’re feeling adventurous, try using milk chocolate for a sweeter cookie or even white chocolate for a different flavor experience.
How do I store my Crispy Thin Chocolate Chip Cookies?
To keep your cookies fresh and crispy, store them in an airtight container at room temperature for up to 1 week. This ensures they maintain that delightful crunch. If you find yourself with leftover cookies (which can be rare!), consider freezing them for longer storage.
Can I freeze the cookie dough?
Absolutely! Freezing the unbaked dough is a great way to have freshly baked cookies on demand. Simply portion the dough into balls, freeze them individually on a baking sheet, and once solid, transfer them to a zip-top bag. They can be kept in the freezer for up to 3 months. When you’re ready to bake, just add an extra minute or two to your baking time.
What if my cookies spread too much while baking?
If you find your cookies are spreading more than expected, a couple of adjustments can help! Ensure your butter is softened but not melted—overly soft butter can cause excess spreading. Additionally, check that you’re measuring your flour accurately; a little too much or too little can affect the dough’s consistency. If needed, you can also chill the dough for 30 minutes before baking to control the spread.
Can I customize the flavors of my Crispy Thin Chocolate Chip Cookies?
Very much so! Feel free to fold in some nuts for an added crunch or incorporate different types of chocolate chips. If you love a little saltiness, sprinkle flaky sea salt on top before baking for a gourmet touch. The beauty of cookie baking is that you can create a treat tailored to your taste!
Are these cookies suitable for any dietary considerations?
If you need to make adjustments for dietary restrictions, there are plenty of options! To make these cookies vegan, you can substitute the egg with a flax egg (1 tablespoon ground flaxseed mixed with 2.5 tablespoons of water) and opt for dairy-free chocolate chips. Always check ingredient labels to ensure they’re allergen-free as needed.
Crispy Thin Chocolate Chip Cookies for Your Sweet Cravings
Ingredients
Equipment
Method
- Preheat your oven to 350°F (175°C) and line your baking sheets with parchment paper.
- In a medium bowl, whisk together the flour, baking soda, and salt.
- In a large bowl, beat together softened butter, granulated sugar, and brown sugar until light and fluffy.
- Add egg and vanilla extract, and mix until well incorporated.
- Gradually add in the dry ingredients and mix on low speed until just combined.
- Gently fold in the chocolate chips and optional ingredients if desired.
- Chill the dough in the refrigerator for 15-30 minutes if time allows.
- Drop tablespoon-sized portions of dough onto prepared baking sheets and bake for 10-12 minutes.
- Let the cookies cool on the baking sheet for 5 minutes before transferring to a wire rack.