

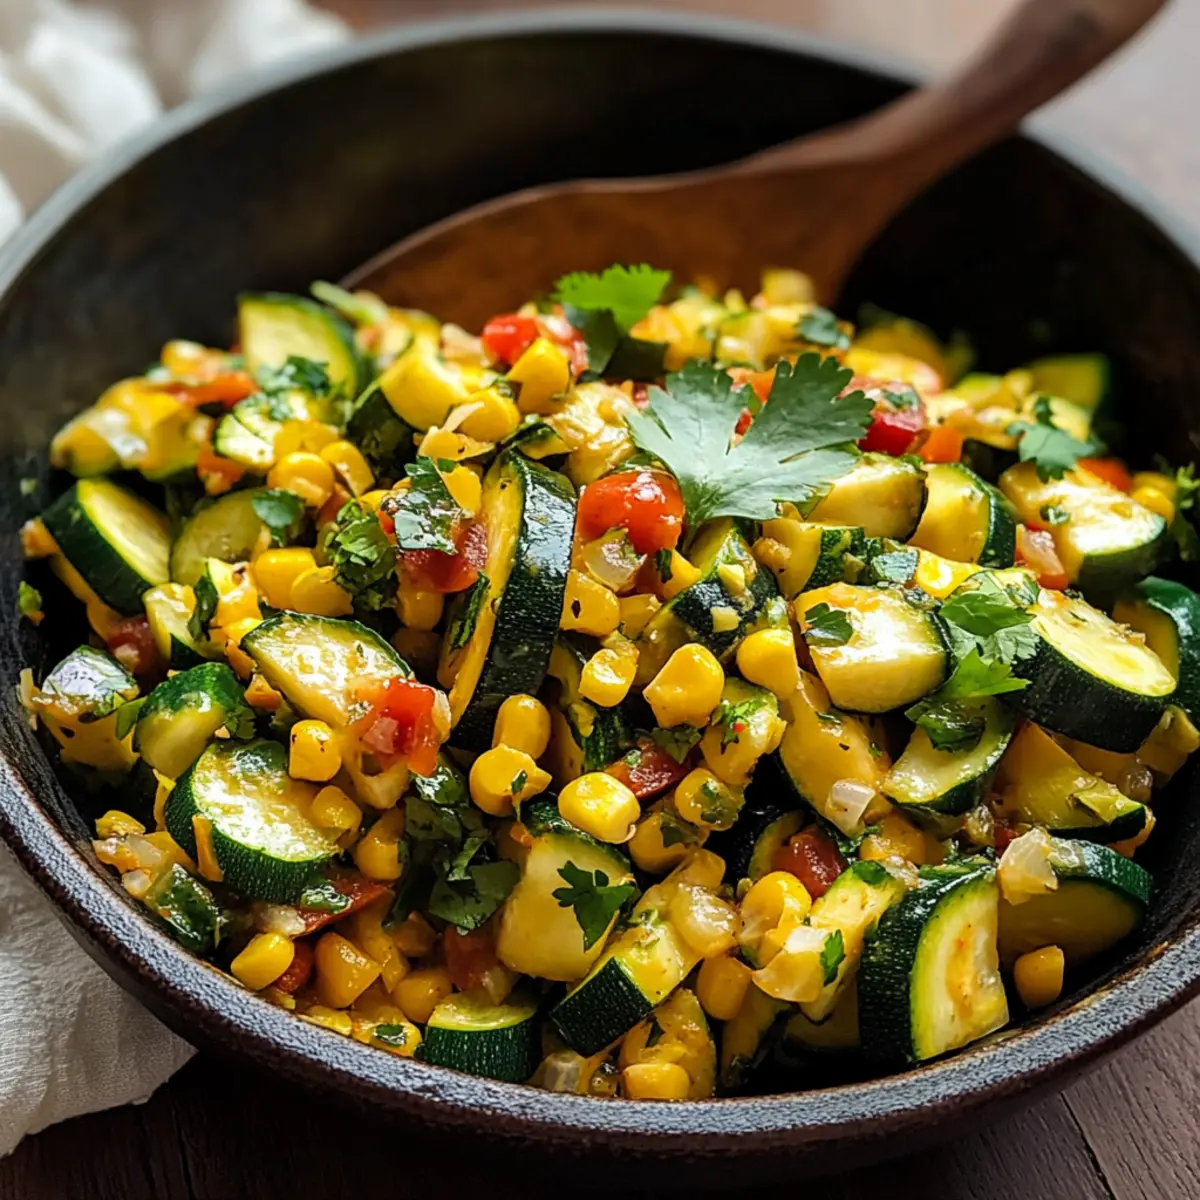
As soon as the sun graces the sky with its golden rays, summer produce fills local markets, revealing the season’s vibrant bounty. One of my favorites is Calabacitas: Mexican Zucchini and Corn—a dish that effortlessly celebrates the fresh flavors of zucchini and sweet corn, sautéed to perfection with a touch of tomatoes and onions. This delightful side is not only quick and easy to whip up but also a colorful addition to any meal, whether it’s a cozy weeknight dinner or a lively cookout with friends. Plus, it can easily be adapted to suit your taste or dietary needs! Have you ever thought about how something so simple can bring such joy to your table? Let’s dive into this delicious recipe together!
Why is Calabacitas a must-try?
Simplicity at its best: This dish requires minimal prep and cooking time, making it perfect for busy weeknights.
Bright, vibrant flavors: Combining fresh zucchini and sweet corn, each bite bursts with seasonal goodness, enhanced by sautéed onions and juicy tomatoes.
Versatile serving options: Enjoy it as a hearty side dish with grilled meats, or toss it into tacos for a zesty twist.
Healthy and nutritious: With around 150 calories per serving, these veggies bring a wealth of nutrients to your plate without any hassle.
Gather around: This colorful medley is sure to impress at gatherings and is a fantastic way to introduce more plant-based meals into your diet. Whether you’re pairing it with Balsamic Steak Corn or adding it to a Frito Corn Salad, Calabacitas will steal the show!
Calabacitas: Mexican Zucchini and Corn Ingredients
For the Main Dish
- Zucchini – Acts as the primary vegetable; provides a soft texture. Substitution: Can use yellow squash for variety.
- Corn – Adds sweetness and a pop of color; fresh or frozen works well. Note: Drain frozen corn well if not thawed.
- Onion – Provides sweetness and depth; use diced yellow or sweet onion.
- Tomato – Contributes moisture and acidity; can substitute with canned diced tomatoes if fresh isn’t available.
- Olive Oil – For sautéing; provides richness. Substitution: Avocado oil or butter.
- Garlic Powder – Enhances flavor; fresh minced garlic can be used instead.
- Cumin – Adds warm, earthy notes to the dish; can adjust according to taste.
- Salt/Pepper – For seasoning; adjust to personal preference.
For Garnishing
- Fresh Cilantro – Optional garnish; adds freshness. Substitution: Chopped green onions or parsley for a different flavor.
Step‑by‑Step Instructions for Calabacitas: Mexican Zucchini And Corn
Step 1: Prepare the Vegetables
Begin by washing the zucchini under cool running water, then slice it into thin half-moon rounds for uniform cooking. Dice the onion and if using fresh tomatoes, chop them as well. Gather all your ingredients so they are ready to go; this will streamline your process when making your Calabacitas.
Step 2: Heat the Oil
In a large skillet, heat 2 tablespoons of olive oil over medium heat until it shimmers, indicating it’s hot enough for sautéing. This is an important step to ensure your Calabacitas will have that lovely golden-brown color. Keep an eye on the oil to prevent it from smoking as you move to the next step.
Step 3: Sauté the Onion
Add the diced onion to the hot oil and sauté for about 3 minutes, stirring occasionally, until the onion becomes translucent and fragrant. This step builds a flavorful base for your dish. Once the onion is ready, it’s time to enhance the flavors with the poblano pepper.
Step 4: Add the Poblano Pepper
Incorporate the diced poblano pepper into the skillet with the onions and cook for an additional 5 minutes until the pepper softens. This adds a mild heat and depth to your Calabacitas. Stir frequently to prevent any sticking to the pan while you prepare for the next step.
Step 5: Stir in Tomato and Garlic
Now, quickly add the chopped tomatoes and garlic powder to the skillet. Stir for about 15 seconds, just enough time for the flavors to meld and the tomatoes to soften slightly. This step gives your dish a nice moisture component and elevates the savory profile of your Mexican zucchini and corn.
Step 6: Add Zucchini and Corn
Add the sliced zucchini and corn to the pan, mixing thoroughly to combine all the ingredients. Season with cumin, salt, and pepper to taste. Toss everything gently to ensure the zucchini and corn are coated in the delicious sauté mixture. Allow it to heat through before moving on.
Step 7: Simmer the Mixture
Let the mixture simmer uncovered for about 6-8 minutes, stirring occasionally. You want the zucchini to be tender yet firm, retaining some bite. Watch for the colors to brighten as the veggies cook, which indicates you’re well on your way to perfect Calabacitas.
Step 8: Prepare for Broiling
Transfer the zucchini and corn mixture to a rimmed baking sheet, making sure to spread it out into a single layer. This ensures even broiling and prevents overcrowding, which is key for that delightful char. Preheat your broiler while you prepare your dish for the final step.
Step 9: Broil for Char
Place the baking sheet under the broiler for about 2-3 minutes. Keep a close eye on it, as you want the edges to be slightly charred but not burnt. This step enhances the flavors and gives your Calabacitas a beautiful presentation. You’re almost ready to serve!
Step 10: Serve and Garnish
Remove the baking sheet from the oven and let it cool for about 30 seconds. Serve your Calabacitas warm, garnished with fresh cilantro or a sprinkle of cheese, if desired. Enjoy this vibrant dish that brings the essence of Mexican cuisine to your table!
What to Serve with Sautéed Calabacitas: Quick Mexican Zucchini and Corn
Savor the sun-kissed flavors of Calabacitas that can easily light up your meal alongside these delightful pairings.
- Grilled Chicken: Juicy grilled chicken adds a savory depth, perfectly balancing the bright flavors of the vegetable medley.
- Spanish Rice: Fluffy, seasoned rice complements the dish, soaking up the juices and enhancing the meal’s Mexican flair.
- Tacos: A zesty twist—spoon Calabacitas into warm corn tortillas for a fresh topping bursting with flavor.
- Cornbread: Soft and slightly sweet, cornbread provides a comforting side that contrasts beautifully with the sautéed veggies.
- Avocado Salad: A cool, creamy avocado salad introduces refreshing elements and healthy fats to the table, elevating your meal.
- Chips and Salsa: Crispy tortilla chips paired with fresh salsa make a fantastic appetizer that sets the tone for a fun gathering.
- Ranch-Style Beans: Hearty and flavorful, these beans add a protein punch and pair harmoniously with the lightness of the Calabacitas.
- Limeade: Sip on a refreshing limeade; its tartness harmonizes with the savory notes of the dish, creating a delightful experience.
- Chocolate Flan: For dessert, indulge in a creamy chocolate flan to wrap up your meal with a sweet note.
How to Store and Freeze Calabacitas
Fridge: Store leftover Calabacitas in an airtight container for up to 3 days. Keep the veggies fresh by ensuring they’re well-covered.
Freezer: Freeze Calabacitas in a freezer-safe container for up to 3 months. Allow it to cool completely before sealing to prevent freezer burn.
Reheating: When ready to enjoy, thaw overnight in the fridge and reheat in a skillet over medium heat until warmed through, adding a splash of olive oil if needed.
Tips for Texture: If your frozen Calabacitas has excess moisture after thawing, simply sauté it briefly in a hot skillet to restore its vibrant character.
Expert Tips for Calabacitas
Even Cooking: Ensure your zucchini slices are uniform in thickness, which helps them cook evenly and attain that perfect tender texture.
Mind the Broiler: Stay close while broiling—watch carefully to avoid burning. If your oven lacks a broiler, use a high heat setting instead.
Customize Heat Levels: For those who enjoy a bit of spice, incorporate jalapeño or red pepper flakes during cooking. This adds a delightful kick to your Calabacitas.
Boost Protein: Add black beans or serve leftovers in tacos for a satisfying protein-packed meal. This makes for a great next-day option!
Fresh Choices: Use fresh corn when possible for added sweetness. If you opt for frozen, ensure it’s drained well to avoid excess moisture in the dish.
Calabacitas: Mexican Zucchini and Corn Variations
Feel free to get creative and make Calabacitas your own with these fun twists and substitutions!
- Dairy-Free: Swap out any cheese for nutritional yeast. This adds a cheesy flavor without the dairy.
- Spicy Kick: Toss in diced jalapeños or a pinch of cayenne pepper for that extra heat; spice lovers will rejoice!
- Creamy Delight: Blend part of the dish with vegetable broth for a smooth texture while keeping some chunky. This creates a delightful contrast.
- Herb Boost: Fresh dill or basil can replace cilantro for a different herbaceous flavor; experiment to find your favorite!
- Grain Expansion: Serve Calabacitas over quinoa or farro. This not only adds nutritional benefits but also gives your dish more heartiness.
- Color Variation: Incorporate roasted red bell peppers or colorful cherry tomatoes to make it visually stunning. More colors, more flavors!
- Add Protein: Introduce black beans or chickpeas for a protein-rich meal; perfect for balancing your vegetarian options.
- Fresh Citrus: Drizzle with fresh lime or lemon juice right before serving to brighten the flavors. It’s a simple yet impactful touch!
These variations will surely enhance your Calabacitas experience! Combine them with ideas like serving it alongside Grilled Shrimp Salsa or adding it to a comforting dish like Chicken Rice Comfort for delightful meals that resonate with freshness and flavor. Enjoy the journey of flavor exploration!
Make Ahead Options
These Calabacitas: Mexican Zucchini and Corn are perfect for meal prep enthusiasts! You can chop the zucchini, onion, and tomatoes up to 24 hours in advance, storing them in an airtight container in the refrigerator to maintain their freshness. Additionally, the corn can be thawed overnight if using frozen, ensuring it’s ready to go. When it’s time to serve, simply sauté the prepped vegetables in olive oil, follow the usual cooking steps, and broil as directed. This way, you’ll enjoy the same delightful flavors with minimal effort, making your hectic weeknights a breeze!
Calabacitas: Mexican Zucchini And Corn Recipe FAQs
What type of zucchini should I use for Calabacitas?
Absolutely! Look for firm, shiny zucchini without dark spots or soft spots, indicating freshness. You can also use yellow squash as a tasty alternative!
How should I store leftover Calabacitas?
Store leftover Calabacitas in an airtight container in the fridge for up to 3 days. Make sure to let it cool completely before sealing to retain its fresh flavors.
Can I freeze Calabacitas?
Yes, you can freeze Calabacitas! Transfer the cooled dish to a freezer-safe container or resealable plastic bag, ensuring suitable sealing to prevent freezer burn. It will keep well for up to 3 months.
What should I do if my Calabacitas turns watery after being stored?
No worries! Simply reheat the leftovers in a skillet over medium heat, stirring occasionally. This helps evaporate the excess moisture and revives the delightful textures.
Are there any dietary considerations I should be aware of?
Certainly! For those with dietary restrictions, this dish is vegetarian and can be made vegan by using olive oil and omitting cheese. If you want to add protein, consider incorporating black beans or serving alongside grilled meats. Always check labels for potential allergens if using canned goods.
Savor Calabacitas: Mexican Zucchini and Corn Delight!
Ingredients
Equipment
Method
- Wash the zucchini and slice it into thin half-moon rounds. Dice the onion and chop the tomatoes if using fresh.
- Heat olive oil in a large skillet over medium heat until shimmering.
- Add diced onion and sauté for about 3 minutes until translucent.
- Incorporate diced poblano pepper and cook for an additional 5 minutes.
- Add chopped tomatoes and garlic powder to the skillet and stir for about 15 seconds.
- Mix in sliced zucchini and corn, seasoning with cumin, salt, and pepper. Toss gently.
- Let the mixture simmer uncovered for about 6-8 minutes, stirring occasionally.
- Transfer the mixture to a rimmed baking sheet and spread into a single layer.
- Broil for about 2-3 minutes until edges are slightly charred.
- Serve warm, garnished with fresh cilantro.