

Have you ever found yourself reaching for a snack that’s both savory and satisfying, yet guilt-free? Enter these Pepperoni Cheese Crisps: The Ultimate Guide to Making Them at Home. These crunchy delights are not only keto-friendly and gluten-free but also incredibly quick to whip up, making them the perfect solution for any cravings. Imagine serving these cheesy bites at your next gathering, or simply enjoying them as a flavorful solo snack—each crisp offers a delightful pop of pepperoni that keeps you coming back for more. With endless variations and easy ingredient swaps, you’ll have a fun and versatile snack at your fingertips. Curious to dive into the recipe and discover how to make your own? Let’s get started!
Why You’ll Love These Cheese Crisps
Easy to Make: The process is quick and requires minimal effort, making it perfect for busy days or spontaneous snack cravings.
Flavor Explosion: Each bite is bursting with a rich mixture of cheesy goodness and zesty pepperoni, hitting all the right savory notes.
Keto-Friendly: Low in carbs but high in flavor, these crisps support your healthy lifestyle while satisfying those snacky tendencies.
Versatile Options: Feel free to experiment with different cheeses and seasonings, like swapping mozzarella for gouda or adding a sprinkle of smoked paprika for a twist.
Great for Sharing: Whether for game day or casual gatherings, these cheese crisps are sure to impress your guests or make for a fun family snack!
Pair them with a side of marinara sauce for dipping, similar to what you’d find in my Crockpot Cheeseburgers for the ultimate munching experience!
Pepperoni Cheese Crisps Ingredients
For the Cheese Mixture
• Shredded Mozzarella Cheese – This core ingredient provides a gooey and melty texture; consider swapping it with provolone for extra stretch!
• Shredded Cheddar Cheese – Adds a sharp and rich flavor; Monterey Jack or pepper jack can create a milder, creamy profile.
• Grated Parmesan Cheese – Delivers a nutty and salty punch; if you’re looking for a twist, try Pecorino Romano as an alternative.
For the Protein
• Pepperoni – The star of the show, bringing delightful flavor and texture; turkey pepperoni serves as a lighter option without sacrificing taste.
For the Seasoning
• Italian Seasoning – Elevates the flavor complexity; herbes de Provence makes for a wonderful herbal variant.
• Garlic Powder – Infuses depth into each crisp; fresh minced garlic is a flavorful upgrade if you prefer that homemade touch.
• Optional Red Pepper Flakes – For those who enjoy a spicy kick; omit if you’re aiming for a milder bite.
For the Garnish
• Optional Fresh Parsley – Adds a burst of freshness; chives can also work well here or feel free to leave it off entirely.
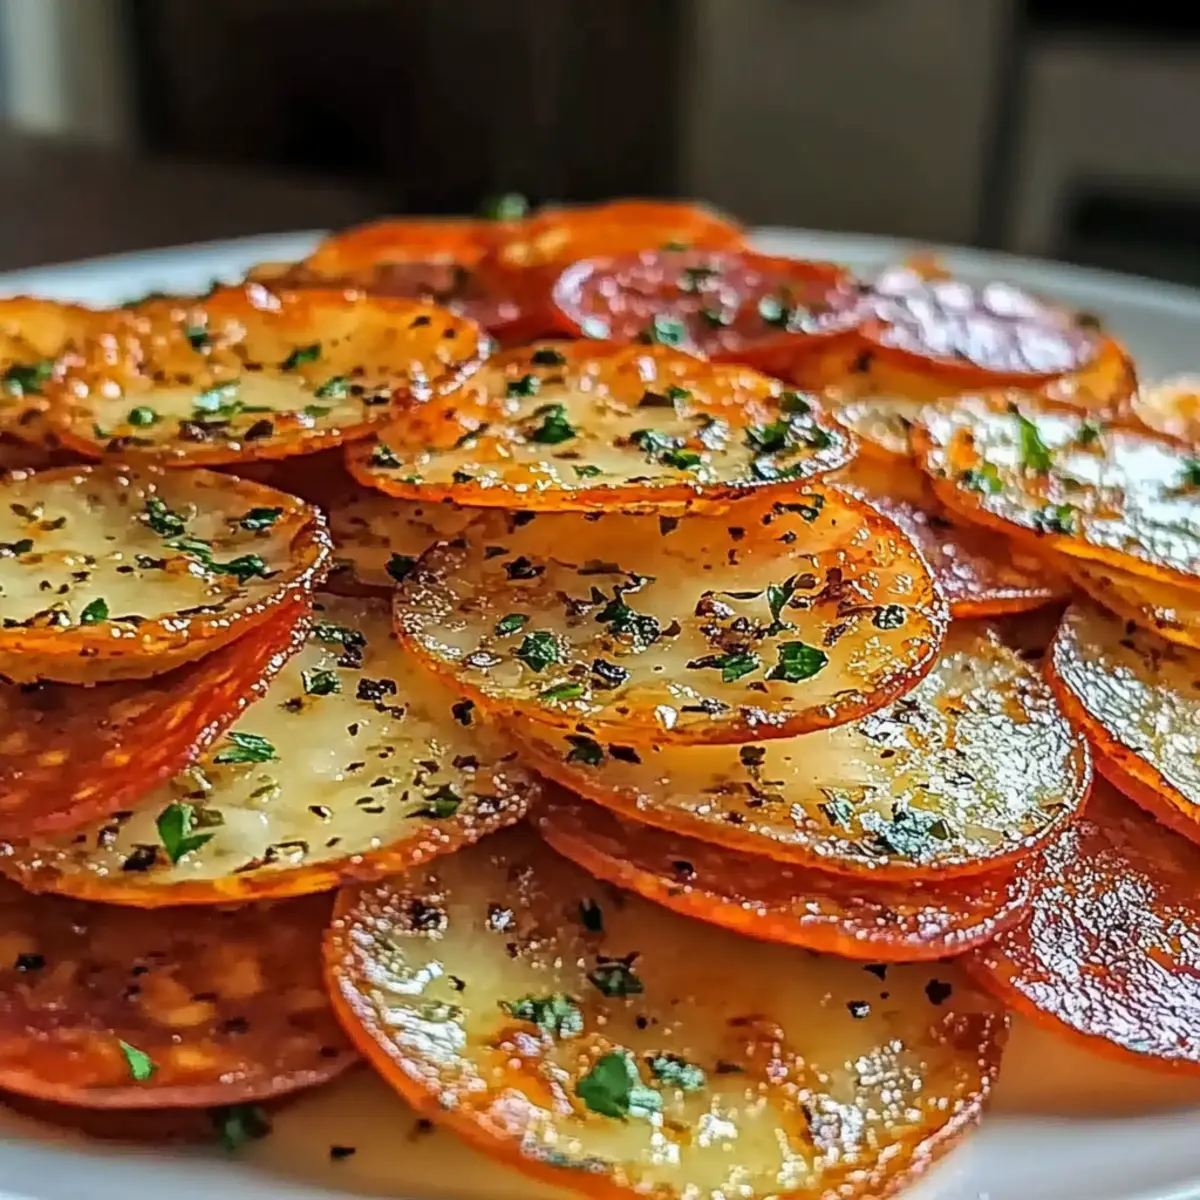
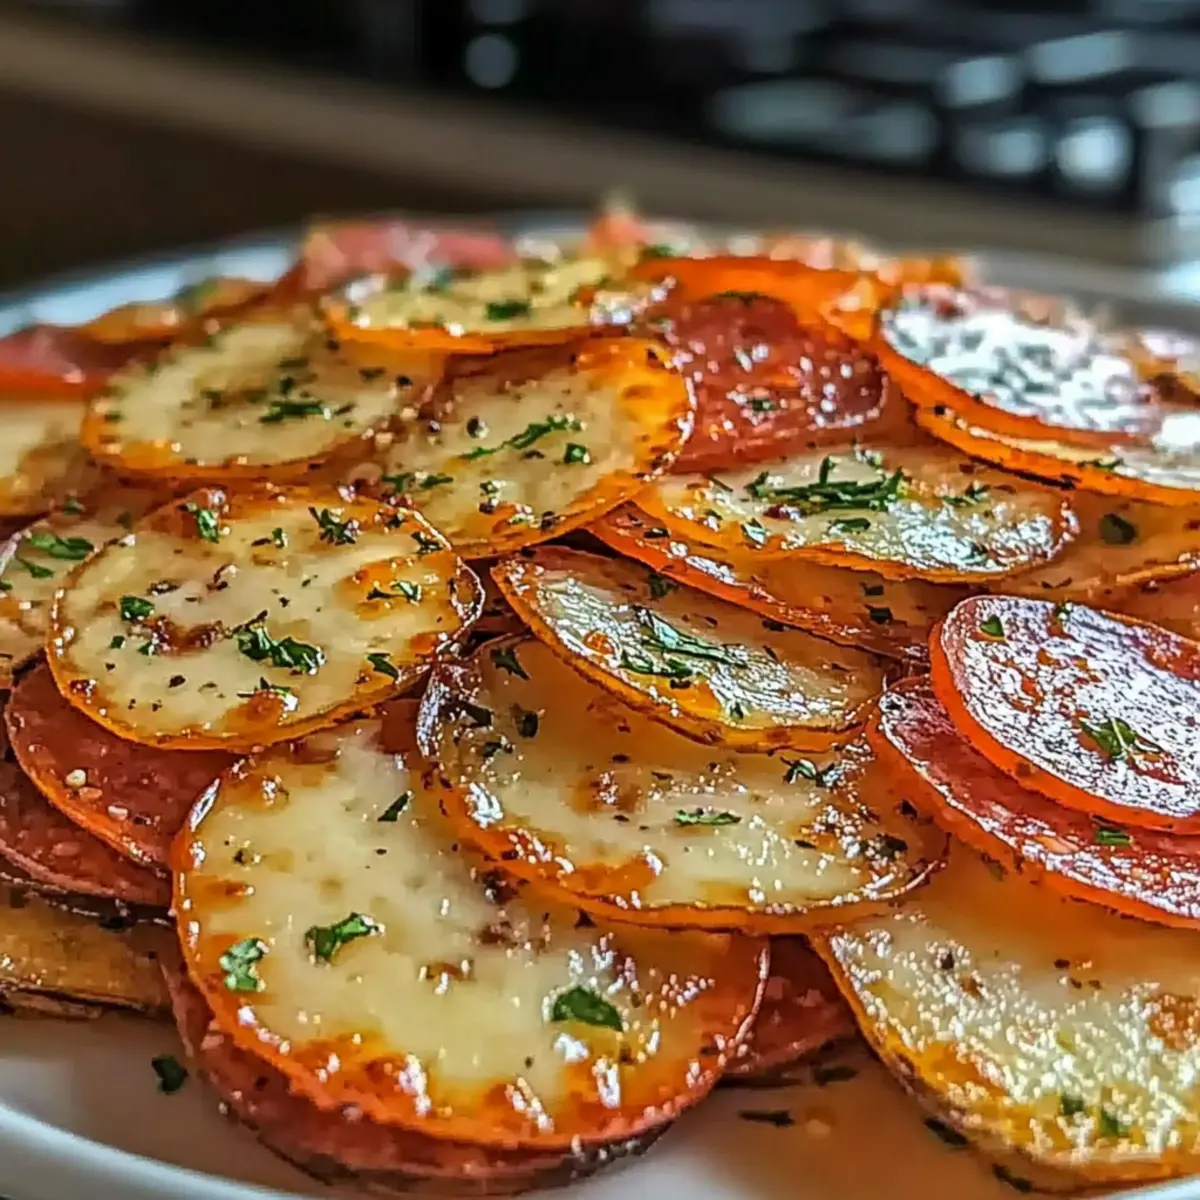
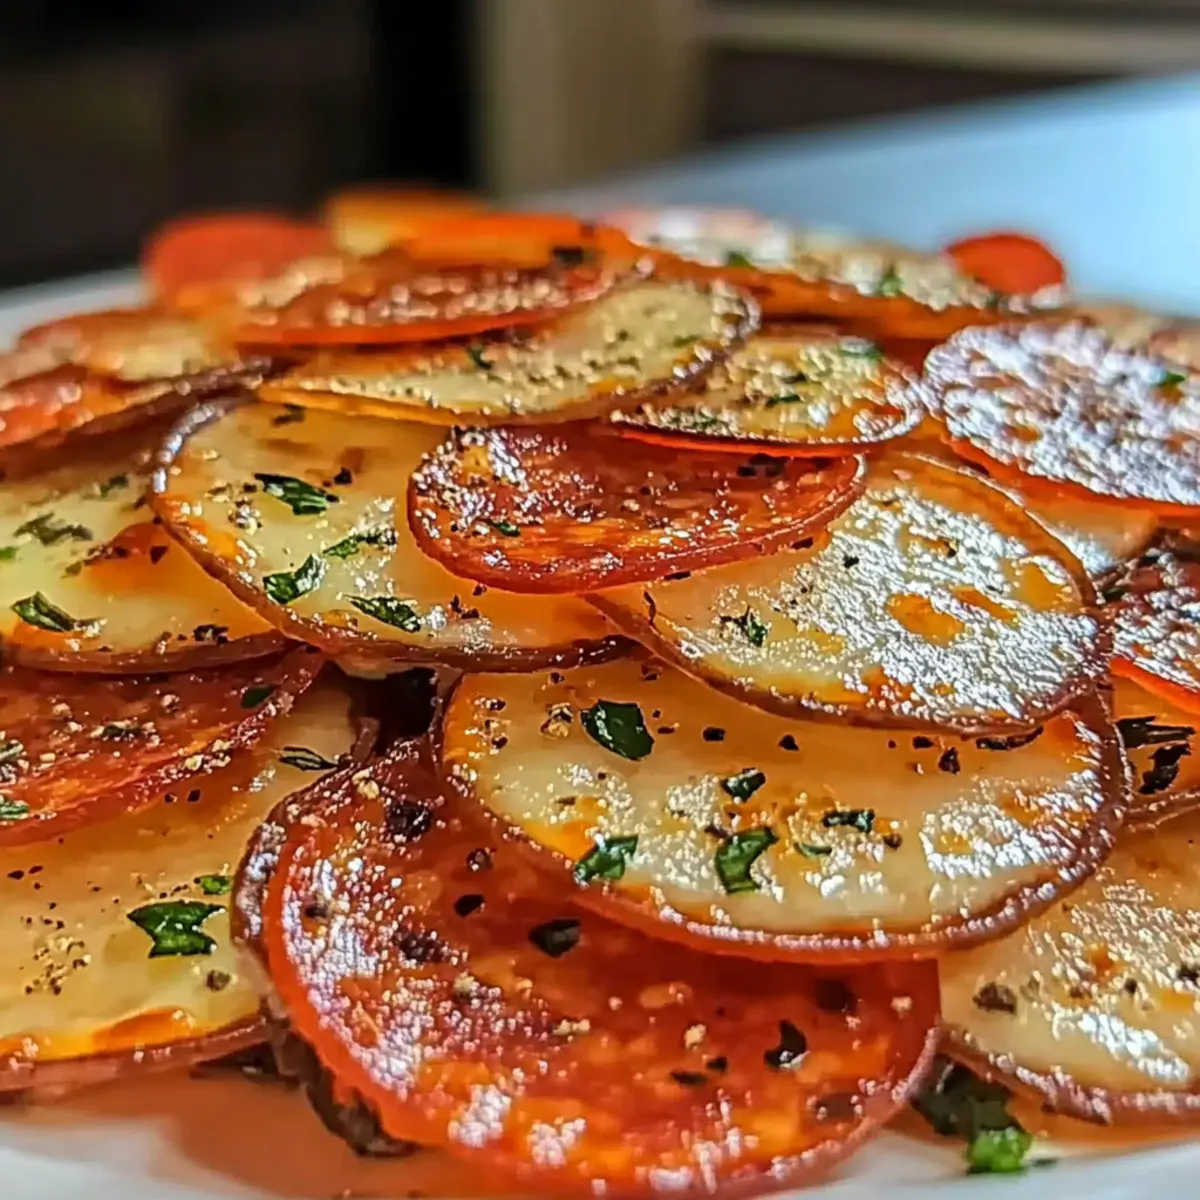
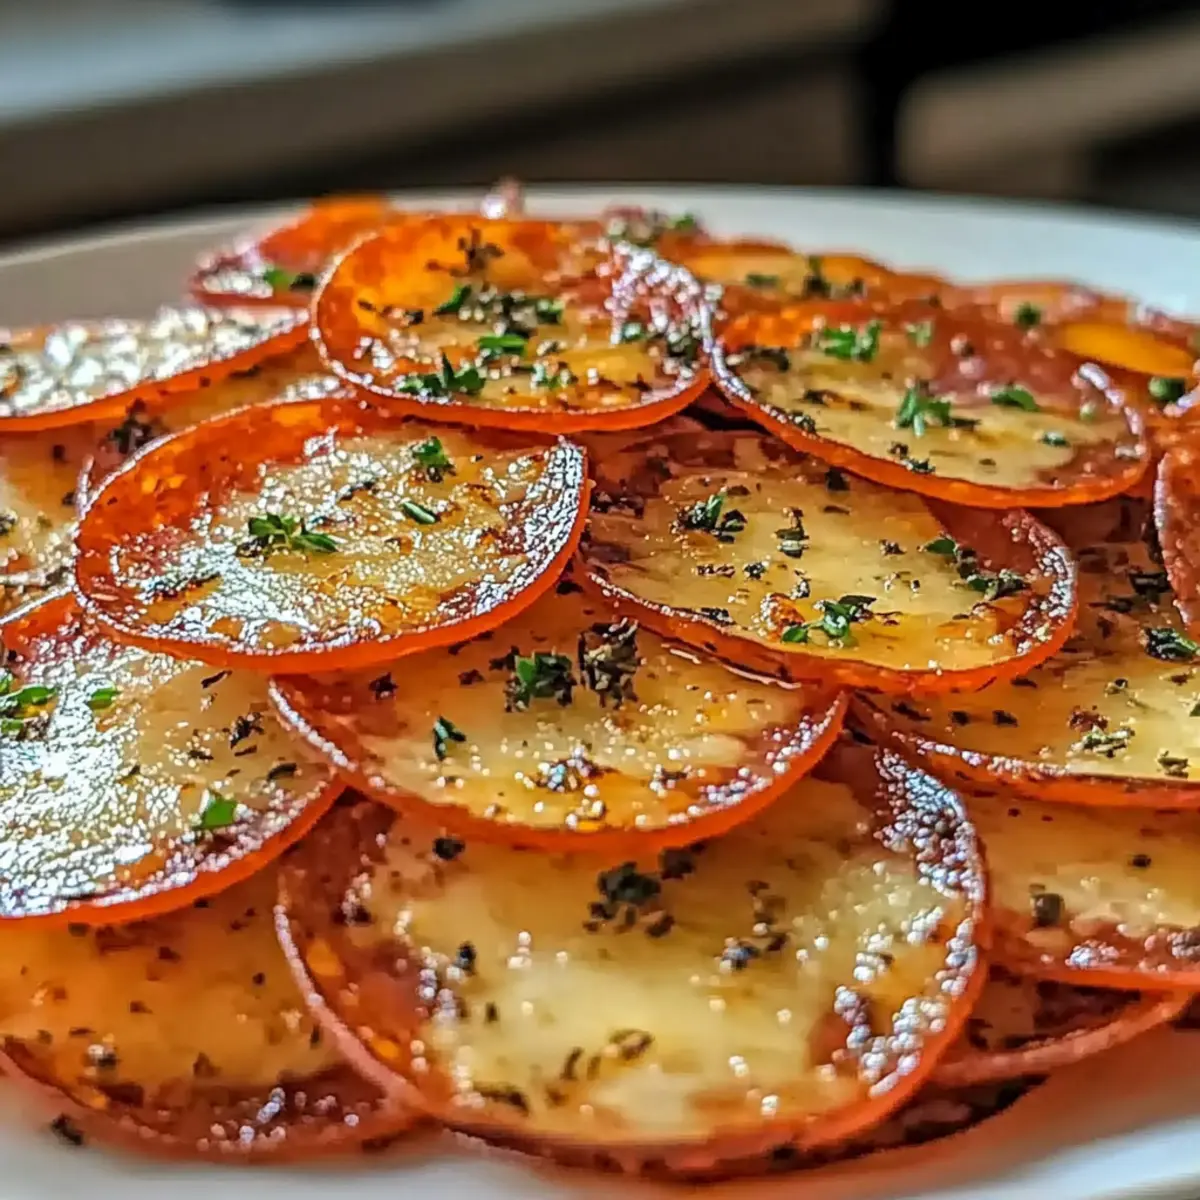
These Pepperoni Cheese Crisps are a delicious, keto-friendly snack that’s easy to whip up and has endless variations!
Step‑by‑Step Instructions for Pepperoni Cheese Crisps: The Ultimate Guide to Making Them at Home
Step 1: Preheat Oven
Begin by preheating your oven to 375°F (190°C). While the oven is heating, grab a baking sheet and line it with parchment paper to prevent sticking. This preparation step is vital for achieving that perfect golden crisp on your Pepperoni Cheese Crisps!
Step 2: Combine Cheeses
In a medium-sized mixing bowl, combine shredded mozzarella, cheddar, and grated Parmesan cheese. Stir them together until they are evenly mixed, ensuring a delightful blend of textures and flavors. This cheesy mixture will be the delicious base for your crisps.
Step 3: Season the Cheese Mixture
Add Italian seasoning and garlic powder to your cheese blend. Toss everything together until the spices are thoroughly distributed throughout the cheeses. If you want a hint of heat, now is the time to add in those optional red pepper flakes for that extra kick!
Step 4: Prepare Pepperoni
Take your pepperoni slices and cut any larger ones in half if needed. This ensures they fit well with the cheese and bake evenly. The pepperoni is the star ingredient of your Pepperoni Cheese Crisps, adding a wonderful flavor that perfectly complements the cheeses.
Step 5: Arrange on Baking Sheet
Place the pepperoni slices on the prepared baking sheet in a single layer, making sure they are spaced slightly apart. This spacing allows the heat to circulate around each slice, promoting even crisping. Give your baking sheet a little shake if the slices need adjusting; this helps prevent sticking.
Step 6: Top with Cheese Mixture
Generously sprinkle your cheese mixture over each slice of pepperoni, making sure to cover them well. The cheese will melt and bubble up during baking, creating that mouthwatering crispy texture we love. Aim for enough cheese to create a crunchy topping without overwhelming the pepperoni beneath.
Step 7: Bake
Slide the baking sheet into your preheated oven and bake for about 8 to 10 minutes. Keep an eye on your Pepperoni Cheese Crisps as they bake; look for the cheese to become melted and golden, while the edges of the pepperoni crisp up beautifully.
Step 8: Cool on Baking Sheet
Once they have reached that perfect golden hue, remove the baking sheet from the oven and let the crispy delights cool for a few minutes. This cooling period allows the crisps to firm up and become extra crunchy.
Step 9: Transfer to Wire Rack
Carefully transfer your Pepperoni Cheese Crisps to a wire rack. This step is crucial for preventing moisture from collecting underneath, which can make them soggy. Let them cool completely before serving to enjoy their optimal crunch!
Step 10: Serve and Store
Serve your fresh Pepperoni Cheese Crisps immediately, optionally garnished with fresh parsley for a pop of color. If you have leftovers, store them in an airtight container at room temperature for up to three days. Enjoy reheating them in a toaster oven or air fryer to restore that delightful crunch.
How to Store and Freeze Pepperoni Cheese Crisps
Room Temperature: Allow your Pepperoni Cheese Crisps to cool completely before storing. They can last up to 3 days in an airtight container at room temperature for optimal crunch.
Fridge: If you prefer to keep them fresh longer, store in the fridge for up to a week. Just make sure they’re in an airtight container to prevent moisture.
Freezer: For longer storage, freeze the crisps in a single layer on a baking sheet until solid, then transfer to a freezer-safe bag. They can last for up to 3 months.
Reheating: Reheat your Pepperoni Cheese Crisps in a toaster oven or air fryer at 350°F (175°C) for 3-5 minutes to regain their delightful crunch.
What to Serve with Pepperoni Cheese Crisps
Imagine indulging in a delightful snack spread that perfectly complements these crunchy cheese bites, elevating your enjoyment to new heights.
-
Zesty Marinara Sauce: A classic pairing that adds a tangy and savory dip, enhancing the rich flavors of the cheese and pepperoni. Perfect for a satisfying crunch with every bite!
-
Fresh Veggie Platter: Crisp cucumbers, cherry tomatoes, and bell peppers bring a refreshing contrast to the hearty cheese crisps, ensuring a balance of textures and flavors. This adds a beautiful pop of color to your gathering!
-
Garlic Herb Dip: Mixing creamy sour cream with garlic and fresh herbs creates a decadent dip that contrasts wonderfully with the crispiness of your cheese bites, inviting everyone to double-dip with delight.
-
Olive Tapenade: The salty brininess of this spread enhances the savory notes in the Pepperoni Cheese Crisps, pairing beautifully with a glass of wine for a more elevated snacking experience.
-
Sparkling Water with Lemon: A refreshing drink option that cleanses the palate while complementing the savory snacks. The zesty lemon provides a bright kick that ties the meal together beautifully.
-
Cheese and Charcuterie Board: Serve alongside a variety of cured meats and cheeses to create a stunning board. This makes for a visually appealing and interactive way to enjoy your crisps, pleasing guests and family alike!
Pepperoni Cheese Crisps Variations & Substitutions
Feel free to unleash your inner chef and customize these cheese crisps to suit your cravings!
- Cheese Swap: Replace mozzarella with gouda for a firmer, richer flavor. This twist will elevate the cheese experience!
- Veggie Infusion: Mix in finely chopped bell peppers or spinach for a pop of color and added nutrition. It’s an easy way to sneak in some greens!
- Pesto Base: Spread a thin layer of pesto under the cheese before baking for an aromatic flavor boost. This adds a herby richness that’s simply delightful.
- Herb Alternatives: Swap Italian seasoning for herbes de Provence for a floral note that brightens each bite. It’s a fresh take that you’ll love!
- Heat Variation: Add more red pepper flakes or minced jalapeños for an extra spicy kick. Turn up the heat for those who crave a little fire!
- Cheese Medley: Combine cheddar, mozzarella, and blue cheese for a robust flavor explosion. Each crunch will tell a deliciously unique story!
- Protein Switch: For a lighter option, use turkey pepperoni instead of traditional pepperoni without compromising taste. It’s a great way to keep it guilt-free!
- Crunchy Topping: Sprinkle some crushed nuts or seeds on top for added texture and crunch. It introduces an exciting crunch that pairs wonderfully with the cheese!
No matter how you choose to customize, these Pepperoni Cheese Crisps will always be a hit. For more delicious ideas, try pairing them with savory dishes like my Bbq Chicken Homemade or serve alongside delightful treats like Fireworks Oreo Cheesecake for an unforgettable spread!
Make Ahead Options
These Pepperoni Cheese Crisps are perfect for meal prep, allowing you to enjoy a satisfying snack without the last-minute fuss! You can prepare the cheese mixture and seasonings, then refrigerate it for up to 24 hours ahead of time. Also, slice the pepperoni in advance and store it in an airtight container. When you’re ready to bake, simply top the prepared pepperoni with the cheese mixture and bake as directed. This ensures that your crisps are just as delicious and crispy as if they were made fresh, making weeknight snacking a breeze! Enjoy the time-saving benefits and have these tasty bites on hand whenever cravings hit!
Expert Tips for Pepperoni Cheese Crisps
-
Spacing Matters: Ensure even spacing of pepperoni slices to allow for proper crisping; overcrowding can lead to uneven textures and sogginess.
-
Watch the Oven: Keep a close eye on your crisps while baking! The cheese can over-brown quickly, so remove them at the first sign of golden perfection.
-
Flavor Experimentation: Don’t hesitate to experiment with additional seasonings like onion powder or smoked paprika; adding variety helps customize your Pepperoni Cheese Crisps to your taste!
-
Alternative Cheeses: Feel free to substitute mozzarella with firmer cheeses like gouda for a different texture, or add a layer of pesto under the cheese for more depth of flavor.
-
Proper Cooling: Allow the crisps to cool completely on a wire rack; this prevents moisture from making them soggy and keeps them crunchy!
Pepperoni Cheese Crisps Recipe FAQs
What type of cheese should I use for the best results?
Absolutely! I recommend using a combination of shredded mozzarella, cheddar, and grated Parmesan for a balance of gooeyness and flavor. You can swap mozzarella for provolone for added stretch or choose gouda for a firmer texture. Feel free to get creative and experiment with your favorite cheese blends!
How long can I store the leftover Pepperoni Cheese Crisps?
You can keep your Pepperoni Cheese Crisps in an airtight container at room temperature for up to 3 days. For even longer freshness, store them in the fridge, where they’ll last for about a week. Make sure they’re sealed well to prevent any moisture from ruining their crunch!
Can I freeze my Pepperoni Cheese Crisps?
Very much so! To freeze your crisps, lay them out in a single layer on a baking sheet and place them in the freezer until solid. Once frozen, transfer them to a freezer-safe bag, ensuring you remove as much air as possible. They can be stored this way for up to 3 months. When you’re ready to enjoy them, simply reheat in the oven or air fryer to restore their crispiness!
What if my crisps don’t turn out crispy?
No worries at all! If your Pepperoni Cheese Crisps aren’t crispy, it might be due to overcrowding on the baking sheet; proper spacing allows heat to circulate. Next time, ensure the pepperoni slices are evenly spaced and avoid using too much cheese, which can lead to sogginess. Adjusting the baking time slightly may also improve the crispiness—just keep a close eye during the last few minutes!
Are Pepperoni Cheese Crisps suitable for a keto diet?
Absolutely! These Pepperoni Cheese Crisps are a fantastic keto-friendly snack option. They are low in carbs and high in protein, making them perfect for anyone following a low-carb diet. Just check your ingredient labels to avoid any hidden carbs, especially in pre-packaged cheeses or pepperoni.
Can I use turkey pepperoni instead of regular pepperoni?
Yes, indeed! Turkey pepperoni is a lighter option that still provides excellent flavor and texture. It’s a great alternative if you’re looking to reduce fat content without sacrificing taste. Plus, it’s a wonderful way to customize your Pepperoni Cheese Crisps while keeping them deliciously satisfying!
Pepperoni Cheese Crisps: Your Ultimate Guide to Homemade Joy
Ingredients
Equipment
Method
- Preheat your oven to 375°F (190°C) and line a baking sheet with parchment paper.
- In a medium mixing bowl, combine shredded mozzarella, cheddar, and grated Parmesan cheese.
- Add Italian seasoning and garlic powder to the cheese blend and mix thoroughly.
- Cut larger pepperoni slices in half for even baking.
- Arrange pepperoni slices on the baking sheet, ensuring they are spaced apart.
- Sprinkle the cheese mixture generously over each slice of pepperoni.
- Bake in the oven for about 8 to 10 minutes until cheese is melted and golden.
- Remove from the oven and let cool for a few minutes to firm up.
- Transfer to a wire rack to cool completely before serving.
- Serve immediately, optionally garnished with fresh parsley.