

As I was flipping through my favorite Halloween recipes, I stumbled upon an idea that sparked both nostalgia and excitement: Cheesy Pizza Skulls! These little delights are not just another Halloween party food; they’re a mash-up of crispy pizza dough and a variety of scrumptious fillings that you can customize to suit everyone from meat lovers to veggie enthusiasts. What I love most about these creations is how quickly they come together, making them perfect for last-minute gatherings or family movie nights. Plus, they’re a fun way to engage kids in the kitchen while creating a spooky atmosphere. Are you ready to dive into crafting these adorable treats that are sure to turn any gathering into a festive feast? Let’s get started!
Why Are Halloween Pizza Skulls a Hit?
Customization, Your friends and family will adore the ability to personalize their own skulls and choose unique flavors! Quick to Prepare, These magical treats can be whipped up in no time, making them a go-to option for busy schedules. Kid-Friendly Fun, Engaging children in the kitchen creates lasting memories and a love for cooking. Perfect Party Snack, They’re visually stunning and delicious, ensuring your Halloween spread is the star of the show! Serve them with your favorite dips for added excitement!
Halloween Pizza Skulls Ingredients
Get ready to create these spooky delights!
For the Skulls
- Pre-made Pizza Dough – A quick base; feel free to use homemade dough for a personal touch.
- Pizza Sauce – Essential for flavor; swap it with marinara or Alfredo for a fun twist.
- Shredded Mozzarella Cheese – Offers gooey texture; try cheddar or a vegan cheese for alternatives.
For the Fillings
- Cooked Sausage (8 oz) – Adds robust flavor; ground turkey or chicken makes a great substitute.
- Mini Pepperoni (6 oz) – A classic topping; replace with diced bell peppers for a vegetarian option.
- Black Olives (sliced) – Introduces briny notes; feel free to swap in jalapeños or spinach.
- Sliced Ham (chopped) – Additional protein; turkey or tofu can work as excellent substitutes.
- Crispy Bacon (crumbled) – For crunch and flavor; simply omit for a vegetarian version.
- Mini Italian Meatballs – Protein-packed; lentil mixtures serve as a delicious meat alternative.
- Cooked Corn Kernels – Sweetness and texture; zucchini makes a lovely substitute.
- Fresh Herbs (basil, parsley) – Enhances freshness; dried herbs can do in a pinch.
For the Topping
- Parmesan Cheese – Adds a salty kick; omit or use nutritional yeast for a dairy-free option.
Gather these ingredients, and you’ll be well on your way to delighting your guests with the ultimate Halloween Pizza Skulls!
Step‑by‑Step Instructions for Halloween Pizza Skulls
Step 1: Prepare Pan
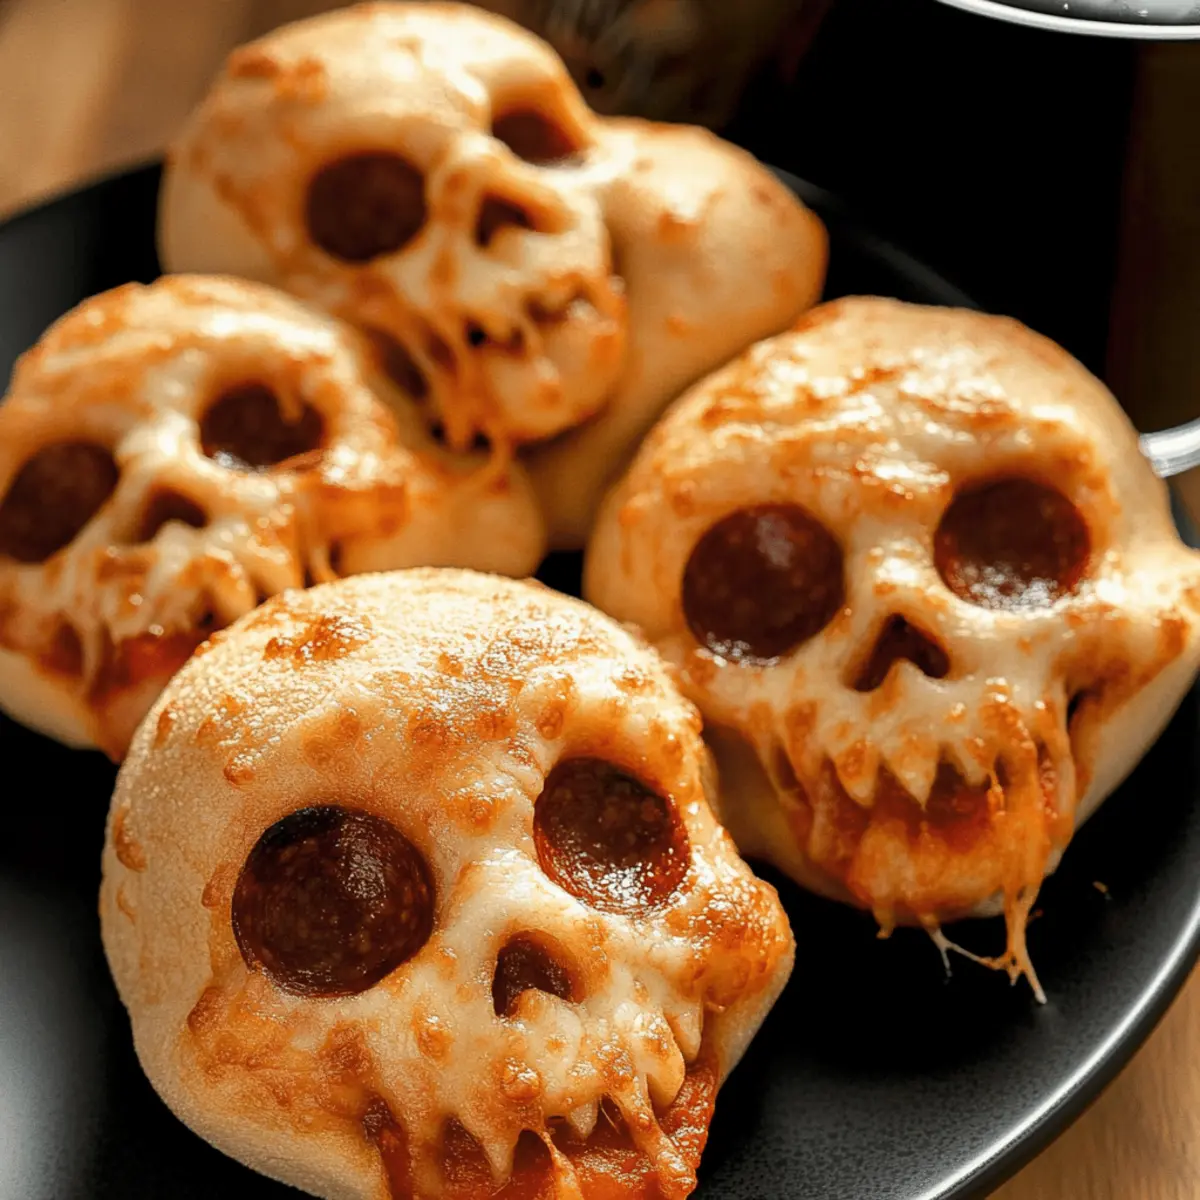
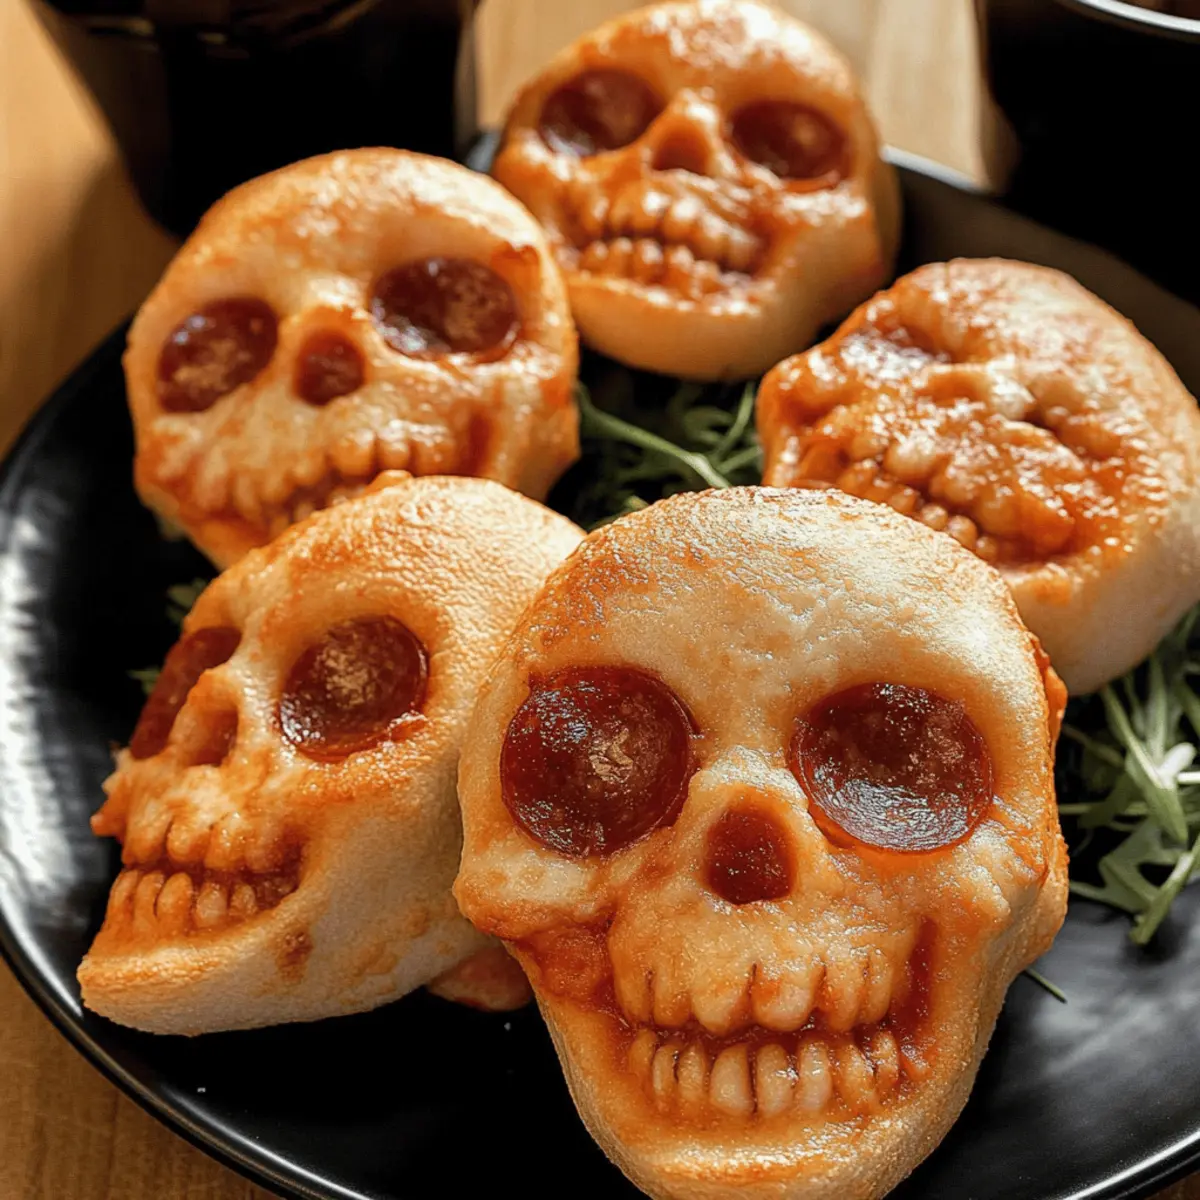
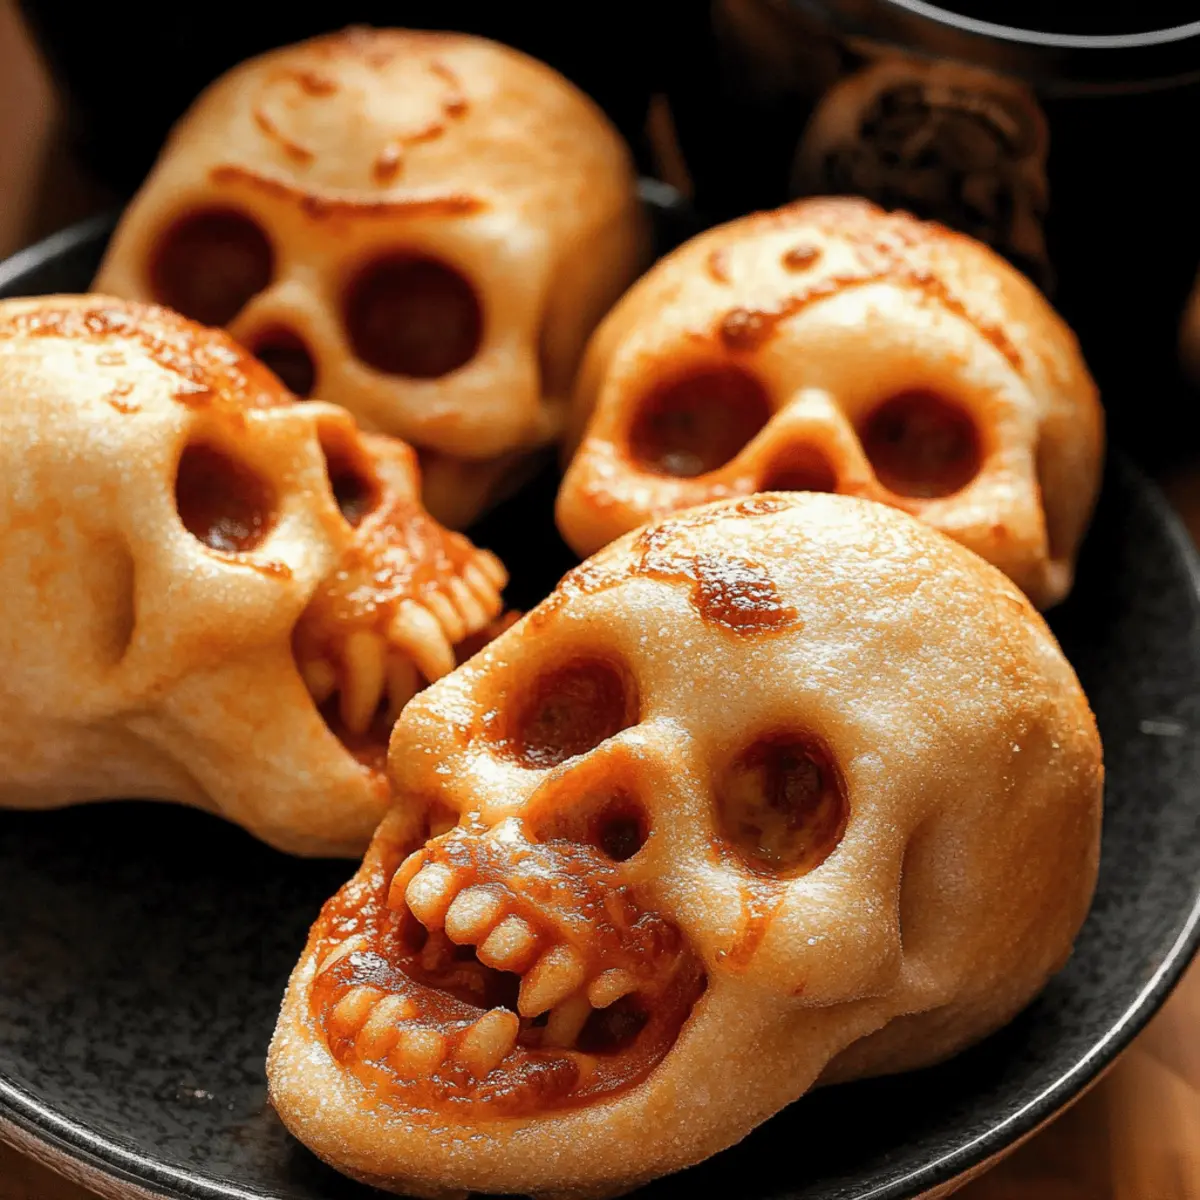
Begin by preheating your oven to 400°F (200°C). While that’s warming up, take your skull baking tin and generously spray it with cooking spray. This step is crucial to ensure the Halloween Pizza Skulls release easily once baked, so cover every nook and cranny for best results.
Step 2: Roll Dough
On a clean countertop lightly dusted with flour, roll out your pre-made pizza dough to about ¼ inch thick. Use a sharp knife or pizza cutter to slice the dough into six rectangular pieces, which will form the base of your spooky skulls. Make sure the dough is evenly rolled out for consistent baking and texture.
Step 3: Fill Skulls
Gently place each rectangle of dough into the skull cavity of your prepared tin. Layer the base with a spoonful of pizza sauce, followed by a generous sprinkle of shredded mozzarella cheese. Add your choice of fillings, such as mini pepperoni, black olives, and cooked sausage, before drizzling a bit more pizza sauce on top for extra flavor.
Step 4: Seal and Refrigerate
Fold the dough flaps over the filling to create a sealed pocket shape. Pinch the edges thoroughly to ensure nothing spills out during the baking process. Once sealed, place the tins in the refrigerator while the oven finishes preheating. This helps the dough firm up for a better crust.
Step 5: Bake
With your oven now ready, carefully remove the prepared skull tins from the refrigerator. Place them in the preheated oven and bake the Halloween Pizza Skulls for 16 to 20 minutes. Watch closely for a golden-brown color on top, which indicates they are ready to enjoy!
Step 6: Cool and Serve
After baking, remove the skulls from the oven and let them cool in the tin for about 5 minutes. This allows the cheese to set slightly, making it easier to unmold them. Once they’re cool enough to handle, gently pop them out of the tin and serve warm, accompanied by marinara sauce for dipping and a sprinkle of fresh herbs for brightness.
How to Store and Freeze Halloween Pizza Skulls
Fridge: Store any leftover Halloween Pizza Skulls in an airtight container for up to 3 days. This keeps them fresh and ready for quick reheating.
Freezer: For longer storage, freeze the assembled (but unbaked) pizza skulls in a single layer on a baking sheet before transferring them to a freezer-safe bag for up to 2 months.
Reheating: To reheat, bake frozen skulls directly from the freezer at 400°F (200°C) for an extra 5-10 minutes, ensuring a crispy exterior and gooey filling.
Prep Ahead: Assembling these skulls ahead of time makes them ideal for spontaneous gatherings—just pull them out, bake, and enjoy!
What to Serve with Cheesy Halloween Pizza Skulls
Create a festive spread that elevates your spooky treats into a delightful dining experience for all ages!
-
Crispy Garlic Bread: This buttery, garlicky side offers a wonderful crunch that complements the cheesy filling of the pizza skulls. Perfect for dipping too!
-
Mixed Green Salad: A refreshing salad with crisp vegetables and a light vinaigrette provides balance to the richness of the Halloween Pizza Skulls. The freshness will brighten up your plate.
-
Pumpkin Soup: Velvety and warm, this flavorful soup adds a seasonal touch to your meal. Its sweetness pairs beautifully with the savory skulls, creating a harmonious fall dish.
-
Marinara Dipping Sauce: Serve these alongside a bowl of homemade or store-bought marinara for an interactive experience! Dipping brings extra flavor and fun.
-
Chili: A bowl of hearty chili offers a cozy, spicy contrast to the cheesy goodness of the skulls. This comforting combination makes for a filling meal.
-
Apple Cider: For a festive drink, serve warm apple cider. Its sweet and spicy undertones bring out the seasonal flavors, making it a perfect beverage pairing.
-
Chocolate Ghost Cupcakes: Indulge in some spooky sweets after your savory feast! These dark chocolate delights add a touch of whimsy and end your meal on a sweet note.
Make Ahead Options
These Cheesy Halloween Pizza Skulls are a fantastic choice for meal prep, making them perfect for busy weeknights or party planning! You can assemble the skulls and refrigerate them for up to 24 hours before baking. To do this, prepare the filling as usual, seal the dough, and place the filled skulls in the fridge. This helps maintain their quality, ensuring they are just as delicious when baked. When you’re ready to serve, simply preheat your oven and bake the skulls for 16-20 minutes until golden brown. If you’re looking to prep even further ahead, you can freeze assembled skulls for up to 3 months; just bake them directly from frozen, adjusting the cooking time accordingly. Happy cooking!
Expert Tips for Halloween Pizza Skulls
-
Grease Thoroughly: Make sure to generously grease the baking pan to prevent your Halloween Pizza Skulls from sticking and ensure easy removal after baking.
-
Don’t Overfill: Avoid the temptation to pack in too much filling; overfilling can cause the dough to burst, leading to a messy outcome.
-
Consider Dough Types: While pre-made pizza dough is convenient, experimenting with crescent or gluten-free dough options can yield delightful results tailored to your guests’ needs.
-
Watch Baking Time: Keep a close eye on the baking process; every oven is unique, and you want the skulls to be golden brown and not overcooked.
-
Enjoy Variety: Embrace the customized nature of the recipe by letting guests mix and match their favorite fillings; this adds a personal touch and fun to your Halloween gathering.
Halloween Pizza Skulls Variations
Feel free to unleash your creativity with these delightful twists that will dazzle your taste buds!
-
Gluten-Free Dough:
Use gluten-free pizza dough for a delicious alternative that doesn’t sacrifice flavor or texture. -
Spicy Kick:
Add diced jalapeños to the filling for a fiery surprise that will elevate your Halloween feast! -
BBQ Chicken:
Swap out traditional toppings for shredded BBQ chicken and red onion for a smoky twist that screams flavor. -
Vegetarian Delight:
Load up on fresh spinach, mushrooms, and bell peppers for a vibrant, veggie-packed version that even meat-lovers will adore. -
Sweet Treat:
Transform your pizza skulls into a dessert by using a sweet dough and filling them with apple or pumpkin pie filling. -
Cheese Lovers:
Mix different cheeses like gouda, cheddar, or feta for a cheese explosion within your skulls. -
Herb Infusion:
Incorporate fresh herbs like thyme or oregano into your filling to enhance the flavor profile with aromatic goodness. -
Mini Muffin Size:
Make bite-sized versions using a mini muffin tin for fun appetizers that are perfect for kids’ parties, or simply for a lighter snack.
Feel free to explore and mix these variations with your favorite dips, like ranch or a spicy aioli, for an added layer of fun!

Halloween Pizza Skulls Recipe FAQs
How do I choose the right dough for my Halloween Pizza Skulls?
Absolutely! You can use pre-made pizza dough for convenience, but consider homemade dough for a more personal touch. If you’re looking for a twist, crescent dough or gluten-free options can also be delightful. Just ensure the dough is rolled evenly to maintain consistent baking.
What’s the best way to store leftover Halloween Pizza Skulls?
Very good question! Store any leftover Halloween Pizza Skulls in an airtight container in the refrigerator for up to 3 days. This helps keep them fresh and allows for quick reheating anytime you crave a tasty snack.
Can I freeze assembled Halloween Pizza Skulls?
Indeed! For long-term storage, you can freeze the assembled (but unbaked) pizza skulls. Place them on a baking sheet in a single layer until firm, then transfer to a freezer-safe bag. They can be frozen for up to 2 months and baked directly from frozen. Just add an extra 5-10 minutes to the baking time at 400°F (200°C).
What should I do if my pizza skulls are overflowing while baking?
No worries! If your Halloween Pizza Skulls overflow, it usually means they were overfilled, which can happen. For the next batch, try filling them with just enough ingredients to ensure a snug fit without excessive stuffing. Additionally, you can catch any drips on a baking sheet for easier cleanup.
Are there any dietary considerations for Halloween Pizza Skulls?
Certainly! This recipe is highly customizable to accommodate different dietary needs. You can replace ingredients like sausage and bacon with plant-based alternatives to create a vegetarian option, or use gluten-free dough to make it suitable for those with gluten sensitivities. Always double-check ingredient labels to avoid allergens like dairy or specific toppings.
Spooktacular Halloween Pizza Skulls - Fun and Customizable Treats
Ingredients
Equipment
Method
- Preheat the oven to 400°F (200°C) and spray the skull baking tin with cooking spray.
- Roll out pre-made pizza dough to about ¼ inch thick and cut into six rectangular pieces for the skulls.
- Place each rectangle of dough into the skull cavity, add pizza sauce, mozzarella cheese, and desired fillings.
- Fold the dough over the filling to seal and refrigerate while the oven preheats.
- Bake the skulls for 16-20 minutes until golden brown.
- Cool the skulls in the tin for about 5 minutes, then unmold and serve warm with marinara for dipping.