

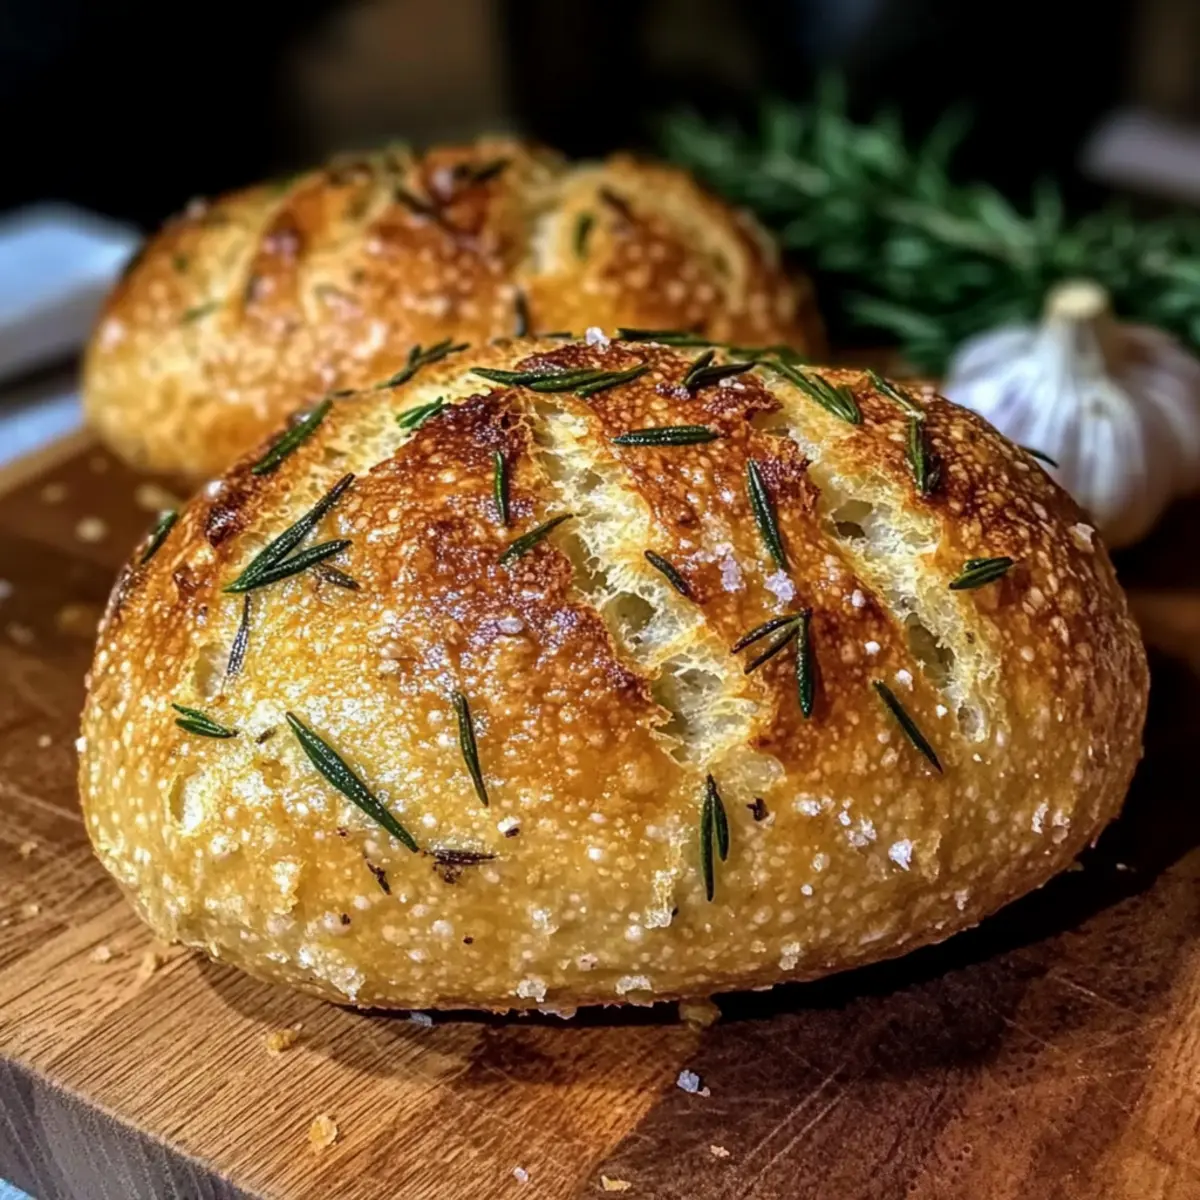
As I walked through the farmer’s market last weekend, the scent of fresh garlic and herbs wafted through the air, instantly igniting my desire to bake something special. That’s when I stumbled upon the idea of making a Homemade Garlic Rosemary Bread, a treat that merges the comforting aroma of roasted garlic with the earthy notes of rosemary. This Garlic Rosemary Bread Recipe is perfect for anyone looking to elevate their meals—from cozy weeknight dinners to elegant gatherings. The best part? It’s incredibly easy to whip up with just a handful of ingredients you likely have in your pantry. Plus, the delightful crunch on the outside paired with a fluffy interior makes it an irresistible crowd-pleaser that’s sure to earn you compliments. Ready to fill your home with a heavenly fragrance? Let’s dive into the world of simple, homemade baking!
Why is Garlic Rosemary Bread a Must-Try?
Irresistible aroma: The moment you walk into your kitchen, the fragrant blend of garlic and rosemary will transport you to a cozy bistro.
Easy to make: With just a handful of pantry staples, you’ll be amazed at how simple homemade bread can be!
Perfect for pairing: This bread is an ideal companion for soups and salads—consider it the ultimate sidekick to your favorite dishes.
Versatile variations: Feel free to experiment by adding cheese or sun-dried tomatoes for a unique twist. You’ll never want to settle for store-bought again!
Crowd-pleaser: Bring this delightful bread to your next gathering and watch as your friends and family rave about your baking skills. Get ready for the compliments!
Garlic Rosemary Bread Ingredients
For the Bread
• All-Purpose Flour – Provides structure; whole wheat flour can be used for a nuttier flavor.
• Warm Water – Activates the yeast; ensure it’s warm, not hot, to avoid killing the yeast.
• Active Dry Yeast – Essential for leavening; use fresh yeast for the best rise.
• Salt – Enhances flavor and balances the taste profile; don’t skip this!
• Fresh Garlic – Infuses rich flavor; fresh is best, but dried can be a quick substitute.
• Fresh Rosemary – Adds herbal notes to the bread; use half the amount if replacing with dried.
• Olive Oil – Contributes to moisture and flavor; can swap for melted butter for richness.
Enjoy the delightful experience of baking this Garlic Rosemary Bread Recipe!
Step‑by‑Step Instructions for Garlic Rosemary Bread Recipe
Step 1: Prepare Dough
In a mixing bowl, combine 1 cup of warm water with 2 teaspoons of active dry yeast. Let the mixture sit for about 5 minutes until it becomes frothy, indicating that the yeast is activated. This is the first step toward creating your irresistible Garlic Rosemary Bread!
Step 2: Combine Ingredients
Next, add 3 cups of all-purpose flour, 1 teaspoon of salt, 2 tablespoons of olive oil, 3 cloves of chopped fresh garlic, and 2 tablespoons of chopped fresh rosemary to the yeast mixture. Stir with a wooden spoon until a soft dough forms, ensuring all the ingredients are well incorporated.
Step 3: Knead the Dough
Transfer the dough to a floured surface and knead it vigorously for about 10 minutes. You want the dough to become smooth and elastic. This step develops the gluten, which is crucial for the fluffy texture of your Garlic Rosemary Bread.
Step 4: First Rise
Place the kneaded dough into a lightly greased bowl and cover it with a kitchen towel. Allow it to rise in a warm, draft-free area for about 1 hour or until it has doubled in size. This is where the magic happens, and your bread starts to take shape!
Step 5: Shape & Second Rise
Once the dough has risen, punch it down gently to release the air, then shape it into a loaf. Place the shaped dough on a baking sheet lined with parchment paper and cover it with the towel again. Let it rise for an additional 30 minutes until it puffs up slightly.
Step 6: Bake
Preheat your oven to 425°F (220°C). Place a shallow dish of water on the lower rack to create steam, which helps to achieve a crispy crust. Bake the Garlic Rosemary Bread for 25 to 30 minutes until the crust is golden brown and the loaf sounds hollow when tapped on the bottom.
Step 7: Cool
Once baked, remove the bread from the oven and transfer it to a wire rack. Allow it to cool completely before slicing. This final step ensures the bread retains its fluffy interior and doesn’t become gummy, making it ready for serving alongside your favorite dishes.
Make Ahead Options
These Garlic Rosemary Bread creations are perfect for busy weeknights and meal prep enthusiasts! You can prepare the dough up to 24 hours in advance; simply follow the steps up to the first rise, then cover the bowl with plastic wrap and refrigerate it. This allows the flavors to develop beautifully while keeping the dough fresh. When you’re ready to bake, remove the dough from the fridge, let it sit at room temperature for about 30 minutes before shaping and proceeding with the second rise. To maintain that delightful texture, ensure you don’t skip the cooling step after baking, as this prevents the bread from becoming gummy. Enjoy restaurant-quality Garlic Rosemary Bread with minimal effort!
What to Serve with Homemade Garlic Rosemary Bread
Indulge in a beautifully crafted meal that will entice your taste buds and warm your heart.
- Savory Tomato Soup: The rich flavors and smooth texture of tomato soup pair perfectly, making every dip of your hot bread irresistible.
- Classic Caesar Salad: Crisp romaine and tangy dressing complement the earthy notes of rosemary, creating a refreshing balance in every bite.
- Creamy Potato Gratin: The decadent layers of cheese and potatoes work harmoniously, while the garlic from the bread enhances this comforting dish.
- Grilled Vegetables: Smoky, charred veggies add a colorful touch and a burst of flavor, offering a delightful contrast to the fluffy interior of the bread.
- Marinated Olives: A bowl of tangy olives acts as a marvelous appetizer, inviting you to savor the garlic goodness with each taste.
- Balsamic Glaze Drizzle: A sweet-tart balsamic reduction over the bread amplifies the flavors, transforming each slice into a gourmet experience.
- Dry Red Wine: A glass of full-bodied red wine enhances the aromatic qualities of the bread while elevating your dining experience to new heights.
- Chocolate Fondue: End your meal on a sweet note by pairing leftover bread with warm chocolate fondue for a delectable dessert twist.
How to Store and Freeze Garlic Rosemary Bread
Room Temperature: Wrap the bread in a clean kitchen towel and keep it at room temperature for up to 2 days. This helps retain its crusty exterior.
Fridge: Avoid refrigerating the bread as it can dry out quickly. Instead, store it at room temperature for a fresher taste.
Freezer: Slice the Garlic Rosemary Bread and store the pieces in an airtight container or freezer bag for up to 3 months. Toast slices directly from the freezer for a quick treat!
Reheating: To bring back the crunch, reheat the thawed bread in the oven at 350°F (175°C) for about 10 minutes. Enjoy that homemade flavor again!
Expert Tips for Garlic Rosemary Bread
-
Check Your Yeast: Ensure the active dry yeast is fresh and active before starting. If it doesn’t froth after mixing with warm water, it’s likely expired.
-
Knead Well: Knead the dough thoroughly until it’s smooth and elastic. Failing to develop the gluten properly can result in a dense loaf instead of a light Garlic Rosemary Bread.
-
Warm Environment: Let your dough rise in a warm place, but avoid drafts. A cozy environment promotes great fermentation, ensuring your bread doubles in size.
-
Steam for Crunch: For that sought-after crispy crust, place a shallow dish of water in the oven while baking. It creates steam that enhances your bread’s texture.
-
Cool Completely: Allow the bread to cool on a wire rack before slicing. Cutting too soon could lead to a gummy texture, spoiling your delicious Garlic Rosemary Bread experience.
Garlic Rosemary Bread Recipe Variations
Invite your culinary creativity to shine as you explore delightful twists to this classic recipe!
- Herb Swaps: Try substituting fresh rosemary with thyme or oregano for a new flavor profile.
- Cheesy Delight: Add 1 cup of grated cheese like Parmesan or mozzarella to elevate the bread to a cheesy garlic delight.
- Savory Add-Ins: Mix in sun-dried tomatoes or olives for a Mediterranean flair that adds both color and flavor.
- Garlic Lovers: For a richer garlic experience, roast the garlic first for a sweet, caramelized undertone in every bite.
- Gluten-Free: Use a gluten-free all-purpose flour blend to cater to dietary needs without sacrificing taste.
- Sourdough Base: Incorporate a sourdough starter in place of active dry yeast for a tangy twist and lovely texture.
- Spice It Up: Add a pinch of red pepper flakes or fresh chopped chili for a delightful kick that brightens every slice.
- Sweet Touch: Experiment with a touch of honey or maple syrup for a slight sweetness that complements the savory garlic perfectly.
Whether you’re pairing your bread with a cozy bowl of soup, like this Garlic Butter Salmon or enjoying it with a fresh salad, the possibilities are endless! Don’t hesitate to make it your own; that’s the joy of homemade cooking!

Garlic Rosemary Bread Recipe FAQs
How do I choose the right garlic for this recipe?
Absolutely! When selecting garlic, look for firm bulbs without any soft spots or mold. The cloves should be plump and tightly packed. If they have started sprouting green shoots, you can still use them; just remove the sprout. Fresh garlic provides the best flavor, but if you’re in a pinch, you can substitute with granulated garlic at about half the amount.
How should I store leftover Garlic Rosemary Bread?
To keep your bread fresh, wrap it in a clean kitchen towel and store it at room temperature for up to 2 days. If you need to store it for longer, I recommend slicing it and placing the pieces in an airtight container or freezer bag, where it can last for up to 3 months. Just make sure to toast the frozen slices directly from the freezer for a quick and delicious snack!
Can I freeze Garlic Rosemary Bread?
Yes! Freezing is a fantastic option to preserve the goodness of your Garlic Rosemary Bread. After slicing, place the pieces in a single layer on a baking sheet and put them in the freezer for a couple of hours. Once frozen, transfer the slices into a freezer bag to protect them from freezer burn. They will stay fresh for up to 3 months.
What should I do if my bread doesn’t rise?
Very few things can be more frustrating than flat bread! If your dough isn’t rising, first ensure that your yeast is fresh. If it’s expired, it won’t provide enough lift. The water you use to activate the yeast should be warm, around 100°F (37°C); too hot can kill the yeast. If bread still doesn’t rise, try placing it in a warmer area or near a heat source to encourage fermentation.
Is there a way to customize this Garlic Rosemary Bread for dietary needs?
Definitely! If you’re looking for a gluten-free version, you can use a 1-to-1 gluten-free baking flour. For those watching their sodium intake, try reducing the salt by half without sacrificing too much flavor; the garlic and rosemary add a wonderful profile on their own. Always be mindful of potential allergies by checking labels for any pre-packaged ingredients.
How can I ensure my Garlic Rosemary Bread has a crispy crust?
To achieve that irresistible crunchy crust, place a small oven-safe dish filled with water on the bottom rack of your oven while baking. The steam created will help develop a lovely crust. Additionally, make sure to bake the bread until it’s golden brown and sounds hollow when tapped to indicate doneness. The aroma alone will be a treat for your senses!
Irresistible Garlic Rosemary Bread Recipe for Cozy Nights
Ingredients
Equipment
Method
- In a mixing bowl, combine 1 cup of warm water with 2 teaspoons of active dry yeast. Let the mixture sit for about 5 minutes until it becomes frothy.
- Next, add 3 cups of all-purpose flour, 1 teaspoon of salt, 2 tablespoons of olive oil, 3 cloves of chopped fresh garlic, and 2 tablespoons of chopped fresh rosemary. Stir with a wooden spoon until a soft dough forms.
- Transfer the dough to a floured surface and knead it vigorously for about 10 minutes until smooth and elastic.
- Place the kneaded dough into a lightly greased bowl, cover it with a kitchen towel, and allow it to rise in a warm area for about 1 hour.
- Once risen, punch the dough down to release air, shape it into a loaf, and let it rise again for 30 minutes on a baking sheet lined with parchment paper.
- Preheat your oven to 425°F (220°C). Place a shallow dish of water on the lower rack and bake the bread for 25 to 30 minutes until golden brown.
- Remove the bread from the oven and transfer it to a wire rack to cool completely before slicing.