

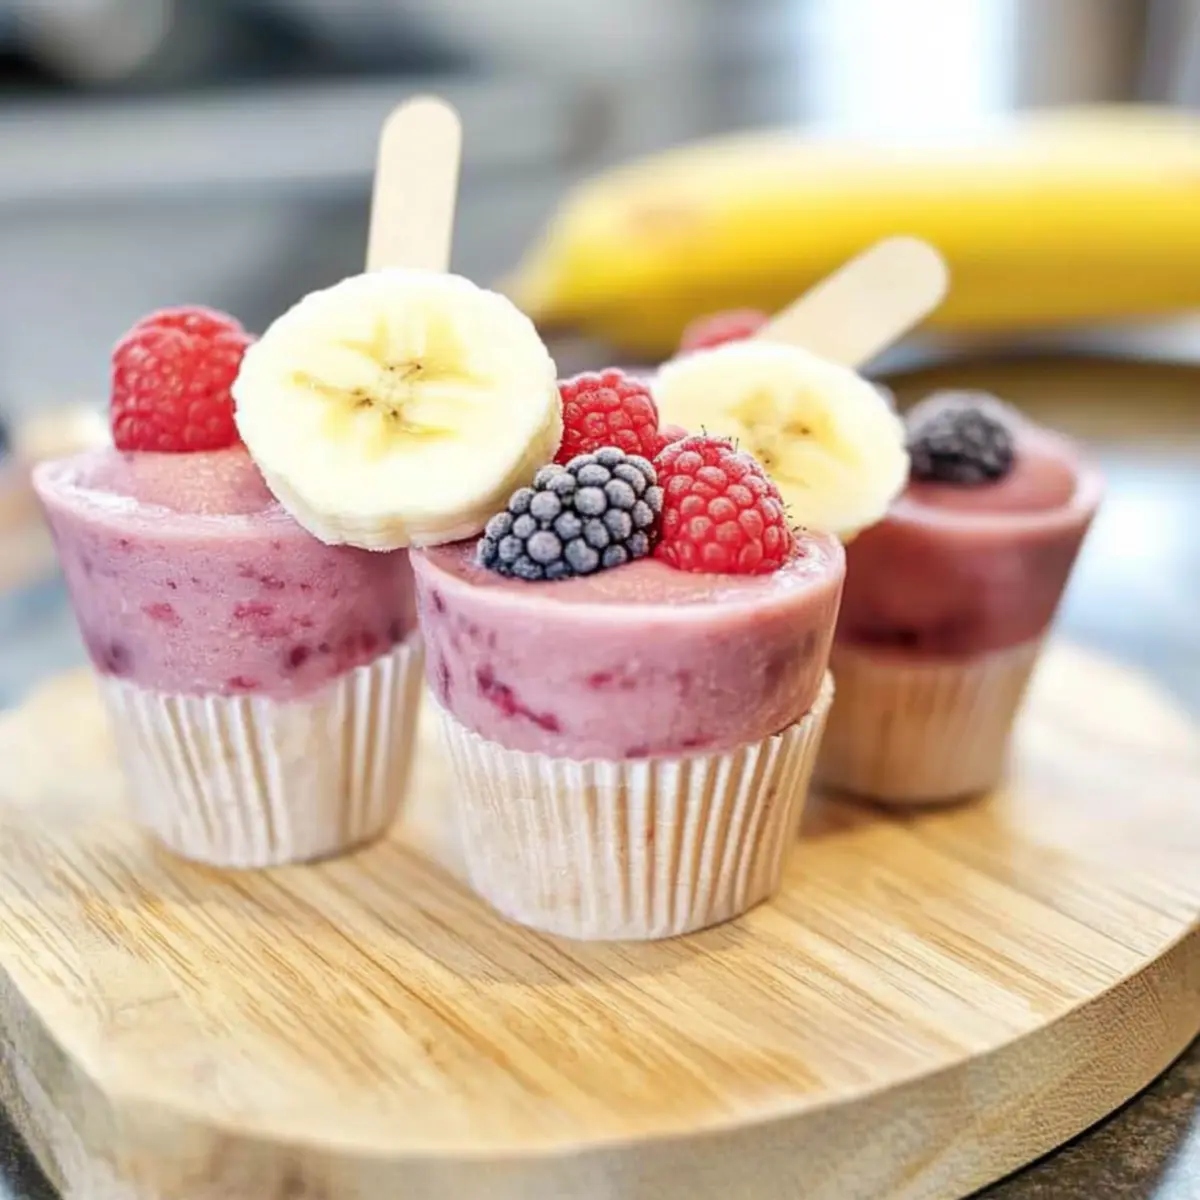
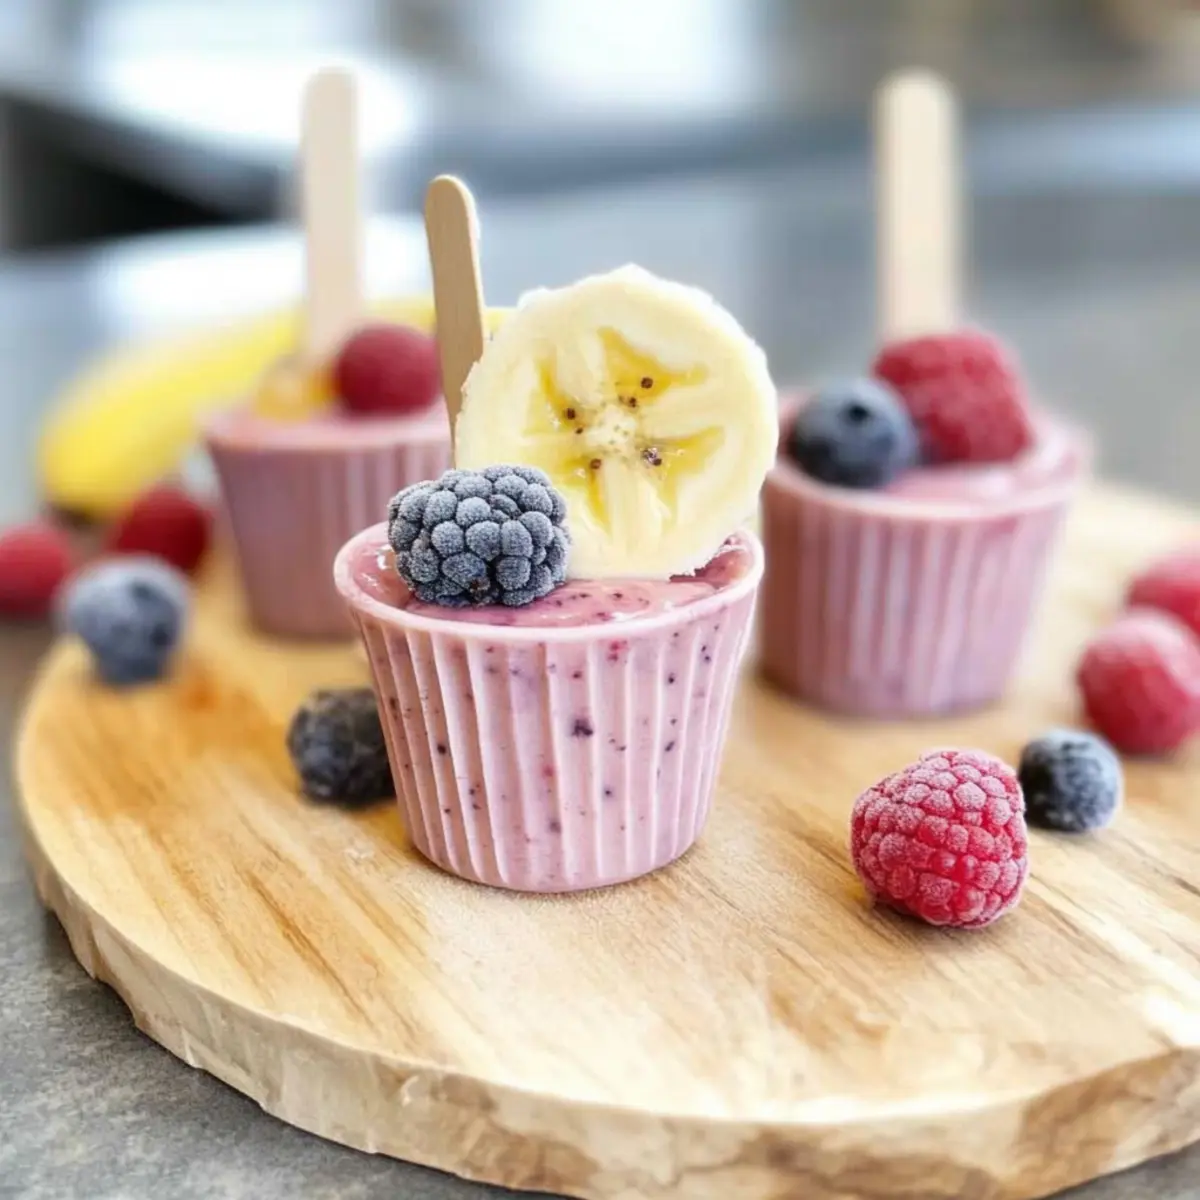
It’s a hot summer day, and the kids are bouncing off the walls, begging for something cool and sweet. Enter my Guilt-Free Frozen Yogurt Pops, the perfect solution to keep them entertained and happy! With just four wholesome ingredients, these frozen treats combine creamy yogurt and juicy mixed berries for a refreshing snack that you can feel good about serving. These pops are not only gluten-free and vegetarian, but they also offer a healthier alternative to sugary store-bought options—plus, they’re super fun to make together! Whether you use bananas to sweeten or swap in different berries for a custom flavor, these pops are bound to become a summer favorite. Curious how simple it is to whip up a batch that will impress both kids and adults alike? Let’s dive into the recipe!
Why Are Frozen Yogurt Pops a Must-Try?
Easy to Make: The process is so straightforward; you’ll only need a high-powered blender and some paper cups!
Healthy Indulgence: With just four wholesome ingredients, you can whip up a delightfully guilt-free treat perfect for summer.
Customizable Flavors: Get creative with your favorite fruits—mango, peach, or even chocolate variations are just a blender away!
Kid-Friendly: Not only do these pops look amazing, but kids love to help make them, turning snack time into a fun family activity.
Refreshing and Satisfying: Each pop is creamy, flavorful, and low in calories, making them a delightful alternative to store-bought snacks. Enjoy them alongside some fresh fruit or granola for an even better experience!
Frozen Yogurt Pops Ingredients
• Get ready to blend up some fun!
For the Pops
- Plain Yogurt – Provides creaminess and a slight tartness; Greek yogurt can be substituted for a thicker texture.
- Medium Banana – Acts as a natural sweetener and adds creaminess; can be replaced with applesauce for a different texture.
- Mixed Frozen Berries – Adds a burst of flavor and color; any mixture can be used based on availability or preference.
- Honey – Sweetens the mixture; maple syrup or agave nectar are great vegan alternatives.
Step‑by‑Step Instructions for Frozen Yogurt Pops
Step 1: Blend the Ingredients
In a high-powered blender, combine the plain yogurt, medium banana, mixed frozen berries, and honey. Blend on high for about 1-2 minutes until the mixture is completely smooth and creamy, with no chunks remaining. Pause occasionally to scrape down the sides and ensure an even consistency. The vibrant colors should be well integrated, creating a luscious fruit medley.
Step 2: Prepare the Cups
Gather your paper cups and carefully divide the smooth yogurt mixture evenly among them, filling each cup about three-quarters full to avoid spills. This ensures enough room for expansion as the mixture will freeze. You can use a measuring cup or a spoon for easy pouring, ensuring that each cup captures the fruity goodness of your Frozen Yogurt Pops.
Step 3: Insert Popsicle Sticks
Tear off small squares of aluminum foil and place one over each cup, pressing it down slightly to create a snug fit. Use a skewer or small knife to poke a hole in the center of the foil, then gently insert a popsicle stick into each hole, ensuring it stands upright. This step will help keep the sticks in place and make for easier removal once fully frozen.
Step 4: Optional Banana Slices
If you wish to enhance flavor and add a surprising twist, take a few banana slices and place one in the bottom of each cup before adding the yogurt mixture. This optional step adds an extra layer of sweetness and complements the mixed berries in your Guilt-Free Frozen Yogurt Pops, offering a delicious surprise as you enjoy each bite.
Step 5: Freeze the Pops
Carefully place the cups in the freezer and allow the pops to freeze for at least 4-5 hours, or until they are completely solid. To check for doneness, gently press on the top of a pop with your finger; it should feel firm and not mushy. The longer you let them freeze, the more refreshing they will be, perfect for a hot summer day.
Step 6: Serve and Enjoy
Once your Frozen Yogurt Pops are fully frozen, remove them from the freezer. To easily release the pops, run warm water over the outside of the cups for a few seconds. Gently pull the sticks to remove the popsicles. Serve these delicious, fruity treats immediately, or keep them stored in airtight containers in the freezer for up to a week to enjoy whenever cravings strike!
Storage Tips for Frozen Yogurt Pops
Fridge: Store any leftovers in the fridge for up to 3 days. However, these pops are best enjoyed frozen for maximum flavor and texture.
Freezer: For longer-lasting treats, keep your Frozen Yogurt Pops in airtight containers in the freezer for up to a week.
Reheating: If serving from frozen, simply run warm water over the outside of the cup for a few seconds to easily release the pops.
Wrapping: To maintain freshness, wrap individual pops in plastic wrap before placing them in a container if you plan to store them beyond a week.
Expert Tips for Frozen Yogurt Pops
-
Blender Choice: Use a high-powered blender: This helps achieve a smooth and creamy consistency; avoid using lower-powered blenders that may leave chunks.
-
Filling Cups: Don’t overfill the cups: Fill each cup about three-quarters full to prevent spillage as the mixture expands during freezing.
-
Flavor Tweaks: Get creative with flavors: Don’t hesitate to mix different fruits or add cocoa for chocolatey pops, making your Frozen Yogurt Pops uniquely yours.
-
Banana Substitution: Use alternative sweeteners: If bananas aren’t your thing, applesauce or maple syrup can be great substitutes, allowing flexibility in your recipe.
-
Freezing Time: Be patient when freezing: Ensure you freeze for at least 4-5 hours for perfectly solid pops; checking too soon may lead to mushiness.
Frozen Yogurt Pops Variations & Substitutions
Feel free to get creative with the flavors and ingredients in your Frozen Yogurt Pops, making them even more delightful!
- Dairy-Free: Swap the yogurt for coconut yogurt for a creamy texture without dairy.
- Fruit Frenzy: Replace mixed frozen berries with ripe mango or peach for a tropical twist.
- Sweetness Level: Instead of honey, try stevia or a ripe date for a natural sweetener alternative.
- Chocolate Delight: Blend in a couple of tablespoons of cocoa powder or chocolate chips for an indulgent chocolatey taste.
- Nutty Crunch: Fold in some chopped nuts or granola after blending for added texture and crunch.
- Zesty Twist: Add a splash of lime or lemon juice to enhance the fruity flavors and add a refreshing zing.
- Herbaceous Notes: A hint of fresh mint or basil can elevate your pops, giving them a refreshing herbal flavor.
- Spicy Kick: If you enjoy a little heat, try adding a pinch of cayenne or some finely grated ginger for an exciting flavor boost.
Feel inspired by these variations and make your Frozen Yogurt Pops one-of-a-kind! If you’re looking for more fun ideas, check out this delicious Peach and Raspberry Frozen Yogurt recipe, or learn about other healthy summer snacks like Fruit-Infused Water to complement your treats!
Make Ahead Options
These Guilt-Free Frozen Yogurt Pops are fantastic for meal prep, allowing you to save time on busy summer days! You can blend the yogurt, banana, mixed frozen berries, and honey up to 24 hours in advance, storing the mixture in the refrigerator until you’re ready to pour it into cups. When you’re set to make the pops, simply divide the mixture into paper cups, insert popsicle sticks, and freeze for 4-5 hours. To maintain quality, ensure the pops are tightly covered during freezing to prevent crystallization. After freezing, run warm water over the cups to easily release the pops when it’s time to serve your delicious treat!
What to Serve with Frozen Yogurt Pops
A sunny afternoon calls for delightful pairings that elevate your refreshing yogurt pops to a full-fledged summer feast!
-
Fresh Fruit Salad: A medley of seasonal fruits adds a burst of natural sweetness that complements the yogurt pops beautifully. Use berries, melons, or tropical fruits for a colorful and nutritious side.
-
Granola Parfait: Layer crunchy granola with yogurt and fruit for a delightful textural contrast, creating a wholesome snack that your family will love. This makes for a fun breakfast option too!
-
Coconut Whipped Cream: A fluffy topping drizzled over the pops brings a tropical flair and creamy richness that pairs perfectly with the tartness of the yogurt.
-
Chocolate Dipping Sauce: A quick melt of dark or milk chocolate creates a indulgent dip that adds a delightful sweetness. Simply dip the yogurt pops before serving for a fun twist!
-
Berry Smoothies: Blend up a refreshing berry smoothie using similar ingredients to your yogurt pops for a cohesive and tasty treat! Serve with straws for an appealing party vibe.
-
Sparkling Lemonade: A bubbly beverage with a hint of citrus will keep everyone refreshed while enhancing the fruity flavors of the pops. Try making a homemade version with fresh lemons and sparkling water.
-
Minty Infused Water: Offer a refreshing drink option, infusing water with fresh mint leaves and cucumber slices to cleanse the palette between bites of sweet and creamy pops.
-
Nut Butter Dippers: Add a small bowl of almond or peanut butter for an extra protein boost. This complements the sweetness of the pops, creating a satisfying snack experience.
Make your summer gathering extra special by pairing these delightful options with your Frozen Yogurt Pops!
Frozen Yogurt Pops Recipe FAQs
How do I choose the best fruit for my Frozen Yogurt Pops?
Absolutely! When selecting your mixed frozen berries, look for vibrant colors and a pleasant aroma. Ensure there are no dark spots all over the berries, as this can indicate overripeness. Fresh fruit is a wonderful option as well—choose fruits that are slightly firm and colorful. If you want something unique, consider trying seasonal fruits for the best flavor!
What’s the best way to store leftover Frozen Yogurt Pops?
Very! To keep your pops fresh, store them in an airtight container in the freezer for up to a week. I often wrap individual pops in plastic wrap before placing them in a container; this adds an extra layer of protection against freezer burn and helps maintain the pops’ vibrant flavors!
Can I freeze these pops for longer?
Absolutely! While I recommend eating them within a week for the best taste, you can keep your Frozen Yogurt Pops in the freezer for up to a month. Just ensure they’re well-wrapped or stored in a tightly sealed container to maintain their texture and flavor.
What should I do if my pops are difficult to remove from the cups?
Don’t worry! If your pops aren’t coming out easily, run warm water over the outside of the cup for just a few seconds. This will help loosen them without melting them too much. Gently pull on the popsicle sticks, and they should slide out smoothly.
Are these pops suitable for children with allergies?
Very! The Frozen Yogurt Pops can be made allergy-friendly depending on your ingredient choices. For dairy allergies, simply swap out plain yogurt for a non-dairy yogurt alternative made from coconut, almond, or soy. For sweeteners, agave nectar or additional fruit works if you’re avoiding honey. Always check the labels on your ingredients to ensure they are safe for your little ones!
Delicious Frozen Yogurt Pops for Guilt-Free Summer Fun
Ingredients
Equipment
Method
- In a high-powered blender, combine the plain yogurt, medium banana, mixed frozen berries, and honey. Blend on high for about 1-2 minutes until smooth and creamy.
- Gather your paper cups and divide the yogurt mixture evenly among them, filling each cup about three-quarters full.
- Tear aluminum foil into squares, press one over each cup, poke a hole in the center, and insert popsicle sticks.
- Optionally, place banana slices in the bottom of each cup before adding the yogurt mixture.
- Place the cups in the freezer and allow them to freeze for at least 4-5 hours until solid.
- To release the pops, run warm water over the outside of the cups for a few seconds.