

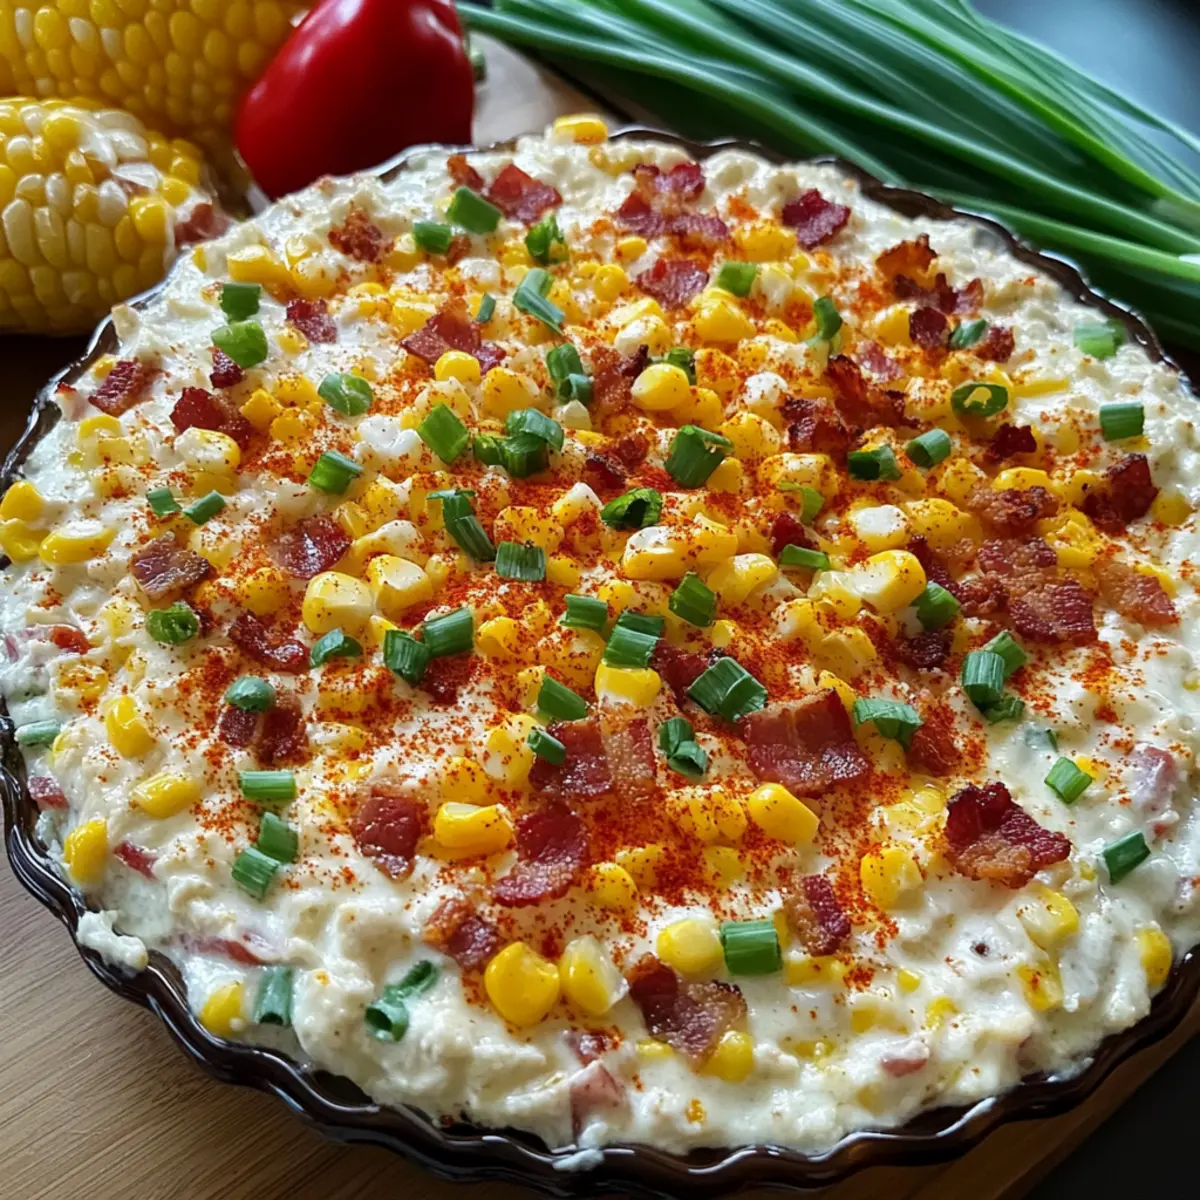
As I flipped through my old cookbooks, I stumbled upon a treasure that sparked a delightful memory: the Spicy Sailor’s Dip. This creamy, fiery appetizer seamlessly merges the richness of cream cheese with the zest of green chilies, creating a dip that is simply irresistible. Perfect for game day or cozy gatherings, it’s incredibly easy to whip up and can be prepped ahead of time for stress-free entertaining. With adjustable spiciness to suit every palate, this dish invites everyone to dive in with their favorite tortilla chips or fresh veggies. Curious to see how this dip can become the star of your next get-together? Let’s dive into the recipe!
Why is Spicy Sailor’s Dip a must-try?
Flavor Explosion: This dip combines creamy richness with zesty heat, making it a standout appetizer.
Beginner-Friendly: Simple steps make it perfect, even for novice cooks.
Adjustable Heat: With modifiable spice levels, everyone can enjoy it to their liking.
Make Ahead: Prep it in advance and bake just before serving, keeping stress at bay.
Crowd-Pleaser: It’s suitable for any gathering, from game days to cozy nights, satisfying diverse tastes.
Pair it with Smoked Salmon Dip or serve alongside some Spicy Shrimp Burritos for an irresistible spread!
Spicy Sailor’s Dip Ingredients
For the Dip
• Cream Cheese – Provides a smooth, velvety base that melds beautifully with the other ingredients.
• Sour Cream – Adds tangy brightness and lighter texture, balancing the heaviness of cream cheese.
• Sharp Cheddar Cheese – Melts into gooey goodness, contributing sharp flavor and an irresistible cheese pull.
• Bacon – Offers smoky, salty crunch that contrasts with the creamy elements.
• Canned Corn – Injects bursts of natural sweetness and pop, enhancing the dip’s texture.
• Green Chilies – Infuses mild heat and subtle vegetal notes, distributing spice evenly throughout the dip.
• Red Bell Pepper – Adds sweetness and crunchy texture while brightening the dish.
• Green Onions – Provides fresh, sweet crunch and a pop of color with every bite.
• Smoked Paprika – Lends warm, smoky depth to enhance the overall complexity of the dip.
• Cayenne Pepper – Adds a fiery kick that keeps things interesting; adjust to preference for your Spicy Sailor’s Dip.
• Salt and Black Pepper – Essential seasonings that bring all flavors into harmonious balance.
Step‑by‑Step Instructions for Spicy Sailor’s Dip
Step 1: Preheat the Oven
Begin by preheating your oven to 350°F (175°C). This temperature ensures the Spicy Sailor’s Dip bakes evenly and develops a golden, bubbly top. While the oven heats up, prepare your ingredients to streamline the mixing process and keep things moving smoothly.
Step 2: Mix Creamy Base
In a large mixing bowl, combine the cream cheese and sour cream. Using a hand mixer or a spatula, blend them together until the mixture is entirely smooth and creamy — this usually takes about 2-3 minutes. The smooth texture will serve as the perfect base for your dip, making it luscious and velvety.
Step 3: Incorporate Cheeses and Bacon
Once your creamy base is ready, stir in the sharp cheddar cheese and crispy bacon bits. Make sure the cheeses are evenly distributed for every bite of your Spicy Sailor’s Dip to be cheesy and delicious. This step contributes both flavor and richness, so mix thoroughly until everything is well combined.
Step 4: Add Vegetables and Spices
Next, fold in the canned corn, green chilies, smoked paprika, and cayenne pepper. These ingredients bring layers of flavor and varying textures to the dip. Make sure to mix until all the spices and veggies are evenly incorporated, ensuring that each scoop delivers a delightful mix of creaminess and heat.
Step 5: Final Touches
Now it’s time to add the red bell pepper and green onions for a boost of color and crunch. Sprinkle in salt and black pepper to taste, enhancing the flavors of your Spicy Sailor’s Dip. Gently mix everything together until well combined, ensuring all ingredients are evenly distributed throughout the dip.
Step 6: Prepare for Baking
Transfer your dip mixture into a greased 9-inch baking dish, smoothing the top with a spatula. This allows for even baking and ensures the dip gets beautifully golden-brown on top. Prepare your cooking space, set aside some tortilla chips or bread for serving, and get ready for the next delicious step.
Step 7: Bake to Perfection
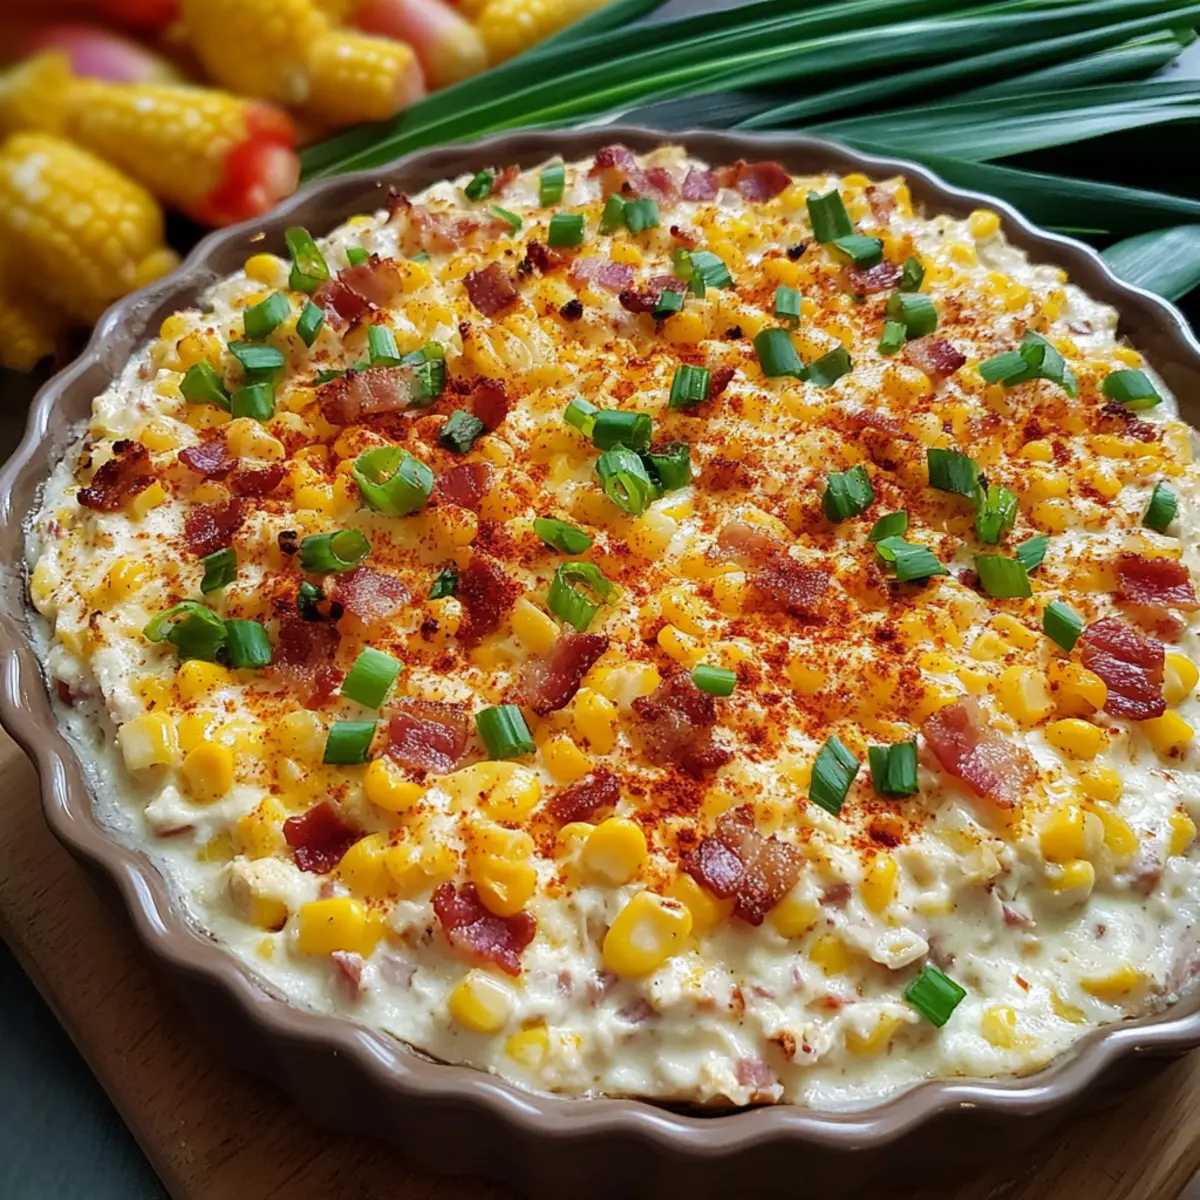
Place the baking dish in your preheated oven and bake for 20-25 minutes. Keep an eye on the dip as it cooks; look for a bubbling surface and a lightly golden crust on top. This indicates that the Spicy Sailor’s Dip is heated through and ready to be enjoyed!
Step 8: Cool and Serve
Once baked, remove the dish from the oven and let it cool slightly for about 5 minutes. This brief cooling period helps the flavors set and makes dipping easy. Serve your Spicy Sailor’s Dip warm with a selection of tortilla chips, pita wedges, or vegetable sticks for a delightful appetizer everyone will love!
How to Store and Freeze Spicy Sailor’s Dip
Fridge: Store any leftover Spicy Sailor’s Dip in an airtight container for up to 3–4 days. Ensure it’s completely cooled before sealing to maintain freshness.
Freezer: For longer-lasting storage, freeze your dip in airtight containers or freezer bags for up to 2 months. Make sure to label them with the date to keep track.
Reheating: To reheat, thaw overnight in the refrigerator, then bake in the oven at 350°F (175°C) until warmed through and bubbly, usually about 15-20 minutes.
Make-Ahead Tip: Prepare the dip in advance and store it unbaked in the fridge for up to a day, then simply pop it in the oven when ready to serve.
Expert Tips for Spicy Sailor’s Dip
-
Smooth Base: Ensure the cream cheese and sour cream are blended until completely smooth to avoid any lumps in your Spicy Sailor’s Dip.
-
Watch the Time: Keep an eye on your dip while baking; overcooking can lead to a dry texture. Look for a light golden color on top.
-
Adjusting Heat: Start with a small amount of cayenne pepper and taste as you mix. You can always add more spice to suit your preferences.
-
Ingredient Quality: Use high-quality cheeses and bacon for the best flavor. Fresh ingredients will enhance the overall taste of the dip.
-
Cool Before Serving: Allow the dip to cool for about 5 minutes after baking. This helps it firm up slightly, making it easier for dipping.
Make Ahead Options
These Spicy Sailor’s Dip is perfect for busy home cooks who want to save time without sacrificing flavor! You can prepare the entire dip mixture up to 24 hours in advance by combining the cream cheese, sour cream, cheddar, bacon, corn, chilies, and spices in a baking dish. Cover tightly with plastic wrap or foil and refrigerate until you’re ready to bake. This method keeps the dip fresh and just as delicious, preventing the ingredients from losing their vibrant flavors. When you’re ready to serve, simply remove it from the fridge, let it sit for about 15 minutes to reach room temperature, then bake according to the instructions for 20-25 minutes. Enjoy a hassle-free appetizer that will delight your guests!
Spicy Sailor’s Dip: Variations to Try
Feel free to get creative and personalize your dip with these delightful variations that will tantalize your taste buds!
-
Greek Yogurt: Substitute sour cream with Greek yogurt for a protein boost and tangy twist.
-
Cheese Variety: Switch sharp cheddar for Monterey Jack or pepper jack for a unique flavor profile. Each cheese brings its own character, creating endless possibilities!
-
Heat Level: Adjust the cayenne pepper to your liking; try adding finely chopped jalapeños for a bolder kick. This dip can easily transform into a fiery delight!
-
Vegetable Boost: Add diced jalapeños or black olives for an extra layer of flavor and texture. These ingredients deepens the taste experience, enhancing the overall enjoyment.
-
Herb Infusion: Stir in fresh herbs like cilantro or parsley before serving for a bright, fresh touch. It not only adds color but also a garden-fresh aroma that elevates the experience.
-
Low-Cal Version: Use reduced-fat cream cheese and sour cream to lighten the dish without sacrificing flavor. You can indulge guilt-free while still enjoying that creamy goodness!
-
Spicy Shrimp Twist: For a fun twist, fold in some sautéed shrimp to create a seafood version of your Spicy Sailor’s Dip. It pairs wonderfully with the existing flavors for a delicious upgrade.
Pair it with some Cheesy Buffalo Chicken for a perfect match, or try it alongside your favorite tortilla chips for a delightful snacking experience!
What to Serve with Spicy Sailor’s Dip
Gather your loved ones and get ready to enjoy a cozy, flavor-packed experience that feels like a warm hug.
- Crunchy Tortilla Chips: These provide a satisfying crunch that contrasts beautifully with the creamy dip, making each bite irresistible.
- Pita Wedges: Soft and pillowy, pita wedges complement the delicious spices while adding a lighter texture to your spread.
- Fresh Veggie Sticks: Serve an assortment of carrots, cucumbers, and bell peppers for a refreshing crunch that balances the dip’s richness.
- Savory Garlic Bread: The buttery flavors and crunchy texture of garlic bread pair wonderfully with each cheesy scoop of the Spicy Sailor’s Dip.
- Zesty Coleslaw: A tangy coleslaw adds a refreshing note, enhancing the savory flavors of the dip, perfect for picnics or barbecues.
- Mini Meatballs: These flavorful bites serve as a great pairing option, allowing guests to enjoy the dip with a delightful protein addition.
- Sparkling Lemonade: A glass of refreshing lemonade cuts through the richness, elevating your appetizer experience with a burst of citrus.
- Chocolate-Covered Strawberries: For dessert, the sweet, juicy strawberries create a lovely contrast after indulging in the spicy dip.
Spicy Sailor’s Dip Recipe FAQs
How do I choose ripe ingredients for Spicy Sailor’s Dip?
Absolutely! When selecting your ingredients, particularly the red bell pepper and green chilies, look for vibrant colors and firm textures. Avoid any bell peppers with dark spots or softness, as these indicate overripeness. Fresh green onions should be crisp and bright green, which adds flavor and crunch to your dip.
How long can I store leftover Spicy Sailor’s Dip?
You can store leftover Spicy Sailor’s Dip in an airtight container in the refrigerator for up to 3–4 days. Make sure the dip has cooled completely before sealing, as any residual heat can create moisture, leading to sogginess. It’s best enjoyed fresh, but it will still taste great reheated!
Can I freeze Spicy Sailor’s Dip?
Absolutely! For longer storage, you can freeze your dip in airtight containers or heavy-duty freezer bags for up to 2 months. When you’re ready to enjoy it again, thaw the dip in the refrigerator overnight. To reheat, place it in a preheated oven at 350°F (175°C) for about 15-20 minutes until warmed through. Always make sure to label your containers with the date!
What should I do if my dip turns out too thick or lumpy?
Very! If your Spicy Sailor’s Dip ends up too thick after baking, it can often be smoothed out by adding a splash of milk or cream and gently mixing it before serving. If lumps occur during the mixing phase, using a hand mixer can help achieve the creamy, lump-free texture that makes this dip so delightful. Just take a few minutes to blend until smooth before transferring to the baking dish!
Are there any dietary considerations for pets or allergies when making this dip?
Of course! This Spicy Sailor’s Dip contains dairy and bacon, which can be harmful to pets like dogs and cats. Make sure to keep it out of their reach. If you have guests with allergies, be mindful of common allergens like dairy and gluten in the serving options. A great alternative is to use gluten-free chips or veggies for dipping!
Spicy Sailor’s Dip: Creamy Comfort for Your Next Party
Ingredients
Equipment
Method
- Preheat your oven to 350°F (175°C).
- In a large mixing bowl, combine the cream cheese and sour cream. Blend until smooth.
- Stir in the sharp cheddar cheese and crispy bacon bits until well combined.
- Fold in the canned corn, green chilies, smoked paprika, and cayenne pepper.
- Add the red bell pepper and green onions, and sprinkle with salt and black pepper.
- Transfer the mixture into a greased 9-inch baking dish.
- Bake for 20-25 minutes until bubbly and golden on top.
- Allow to cool for about 5 minutes before serving with tortilla chips or veggies.