

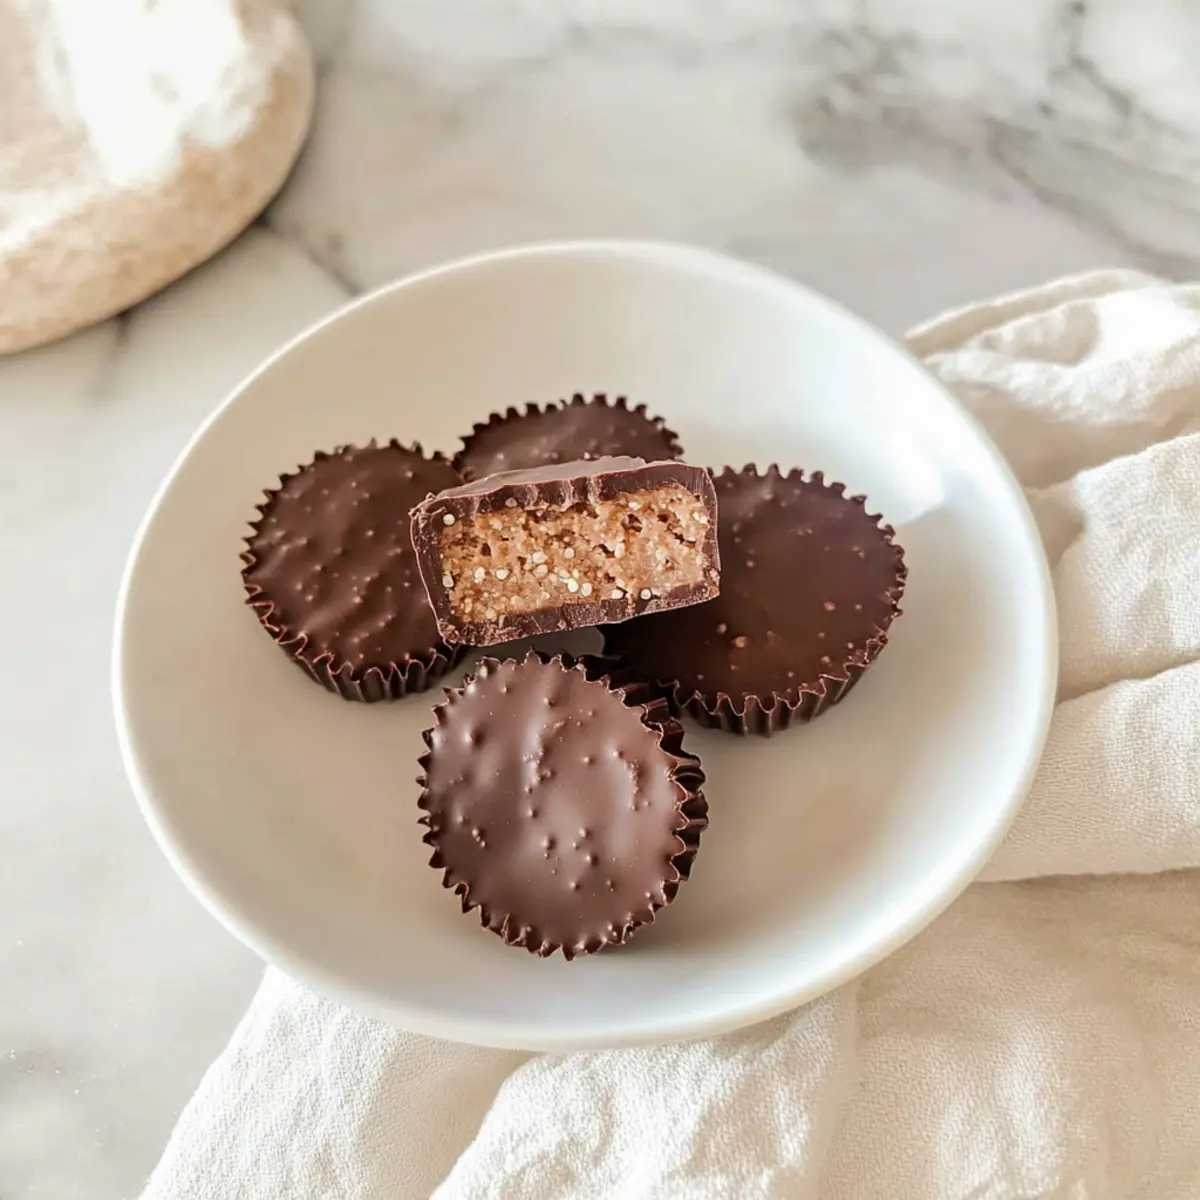
As I stood in my kitchen, an exciting culinary adventure awaited me: crafting Quinoa Crunch Peanut Butter Cups! This delightful no-bake recipe is where creamy peanut butter embraces the rich decadence of dark chocolate, all while introducing a satisfying crunch with quinoa crisps. It’s hard to believe something so irresistibly tasty can also be gluten-free and vegan! Not only do these cups make for a perfect treat, but they also serve as a guilt-free snack that can easily be enjoyed any time of day. Plus, the quick prep time means you can whip them up in no time, satisfying those sweet cravings without the fuss. Are you ready to dive into this delicious world of homemade indulgence?
Why Are These Cups a Must-Try?
Flavorful Layers: The rich combination of creamy peanut butter and luscious dark chocolate creates a mouthwatering treat that will make your taste buds dance.
Nutritious Crunch: Quinoa crisps add delightful crunchiness while keeping everything gluten-free and vegan!
No-Bake Ease: Whip these up in no time without turning on the oven—perfect for those hot summer days or impromptu snack cravings.
Versatile Treat: Swap ingredients easily! Try almond butter or different sweeteners for a unique twist.
Crowd-Pleasing Delight: These peanut butter cups are sure to impress your friends and family at gatherings, just like my Garlic Butter Salmon or Crispy Chicken Cucumber Lettuce wraps.
Quinoa Crunch Peanut Butter Cups Ingredients
Get ready to indulge in these delicious and nutritious treats!
For the Chocolate Layer
- Dark Chocolate – Provides richness and sweetness; use dairy-free chocolate for a completely vegan version.
- Coconut Oil – Helps to smooth the chocolate mixture; substitute with vegetable oil for similar results.
For the Peanut Butter Filling
- Peanut Butter – Adds creaminess and nutty flavor; for the best taste, opt for all-natural or homemade.
- Maple Syrup – Naturally sweetens the filling; you can replace it with agave syrup if desired, though honey is not vegan.
- Coconut Flour – Thickens the filling, giving it the right texture; almond flour can also be used for a different flavor profile.
For the Crunch
- Quinoa Crisps – Creates a satisfying crunch; feel free to substitute with crushed nuts or puffed rice for a variation.
Embrace the incredible flavors and textures of these Quinoa Crunch Peanut Butter Cups as you craft your own delicious treats!
Step‑by‑Step Instructions for Quinoa Crunch Peanut Butter Cups
Step 1: Melt Chocolate
Start by combining dark chocolate chips and coconut oil in a microwave-safe bowl. Microwave in 30-second intervals, stirring well between each session to ensure even melting. Your mixture should become smooth and glossy without any lumps—this will be the decadent shell of your Quinoa Crunch Peanut Butter Cups.
Step 2: Prepare Chocolate Mixture
Once melted, mix in the peanut butter and quinoa crisps to the chocolate mixture, stirring until everything is well combined. The quinoa crisps should be evenly coated, adding a delightful crunch to your treats. Set this mixture aside while you prepare the peanut butter filling, ensuring it remains warm and pliable.
Step 3: Make Peanut Butter Filling
In a separate bowl, combine your creamy peanut butter with maple syrup, mixing thoroughly until you have a smooth consistency. Gradually fold in the coconut flour until the mixture thickens, creating a luscious filling that should be thick enough to hold its shape. This will serve as the delightful center for your Quinoa Crunch Peanut Butter Cups.
Step 4: Assemble Cups
Pour about 1/2 tablespoon of the chocolate mixture into silicon cupcake liners, making sure to spread it evenly along the bottom. The chocolate should create a solid layer at the base, providing a rich foundation for your peanut butter filling. This step ensures each Quinoa Crunch Peanut Butter Cup starts off with a delicious chocolatey flavor.
Step 5: Add Filling
Next, take about 1 teaspoon of the peanut butter mixture, rolling it into a ball and gently flattening it. Carefully place it in the center of each chocolate-filled liner. The filling should sit nicely atop the chocolate base, ready to be sealed in with more chocolate for a delightful balance of flavors and textures.
Step 6: Finish with Chocolate
Top each filled cup with the remaining chocolate mixture, ensuring it covers the peanut butter filling completely. Use a spatula or spoon to smooth the surface if necessary, creating a uniform layer. This final coating will encase the filling beautifully and add that irresistible chocolate layer to your Quinoa Crunch Peanut Butter Cups.
Step 7: Chill Until Firm
Place the assembled cups in the freezer for about 30 minutes or until they are firm to the touch. This chilling step not only solidifies the chocolate but also helps meld the flavors together. Once ready, the cups will be ready to pop out of their liners, revealing a stunning treat.
Step 8: Serve
After they have set, gently remove the Quinoa Crunch Peanut Butter Cups from the silicon liners. Serve them chilled for a refreshing snack or dessert that’s sure to impress. Enjoy immediately or store in an airtight container, ensuring they remain a delightful and nutritious treat any time you’re craving something sweet.

What to Serve with Quinoa Crunch Peanut Butter Cups
There’s something special about creating a delightful spread that perfectly complements these vegan and gluten-free bites!
-
Fresh Fruit Salad: A vibrant mix of seasonal fruits adds a refreshing contrast, balancing the rich peanut butter cups with juicy sweetness.
-
Coconut Yogurt Parfait: Layer with creamy coconut yogurt and granola for a delightful contrast of textures, enhancing the indulgence of the Quinoa Crunch Peanut Butter Cups.
-
Chia Seed Pudding: Serve alongside a light chia pudding topped with berries for a nutritious, pleasant crunch that pairs harmoniously with the chocolatey flavor.
-
Matcha Green Tea: A warm cup of matcha provides an earthy, slightly bitter note that beautifully offsets the sweet richness of the cups, balancing the flavors perfectly.
-
Chocolate-Covered Strawberries: For an elegant touch, these bite-sized treats echo the chocolate theme while offering a burst of fresh flavor.
-
Almond Milk Shake: With its creamy consistency and subtle sweetness, a refreshing almond milk shake rounds out the taste experience with a smooth finish.
-
Cinnamon-Spiced Nuts: Crunchy, spiced nuts add a delightful texture and warm flavor that complement the nuttiness of the peanut butter cups.
-
Decadent Espresso: A strong espresso shot can elevate the dessert experience, creating a delightful play between flavors that will keep you returning for more!
Expert Tips for Quinoa Crunch Peanut Butter Cups
- Smooth Chocolate: Ensure your chocolate is fully melted and mixed to avoid a grainy texture—stir well for that silky finish.
- Use Silicone Liners: Opt for silicone cupcake liners for easy removal and minimal cleanup, making the whole process simple and mess-free.
- Mix It Up: Don’t hesitate to experiment with other nut butters or sweeteners; swapping can lead to exciting new variations of these quinoa crunch peanut butter cups!
- Watch the Chilling Time: Make sure to chill the cups long enough for them to set completely; under-chilling can cause them to lose their shape.
- Store Properly: Keep them in an airtight container in the freezer for up to 60 days, ensuring your delicious snacks stay fresh and guilt-free.
Quinoa Crunch Peanut Butter Cups Variations
Customize your Quinoa Crunch Peanut Butter Cups to suit your cravings and dietary needs!
-
Nut Butter Swap: Substitute peanut butter with almond or cashew butter for a unique twist on flavor.
-
Sweetener Alternatives: Replace maple syrup with agave syrup for a lighter sweetness or use honey if not vegan.
-
Flavor Infusion: Enhance the filling with a splash of vanilla extract or a sprinkle of sea salt for a gourmet touch.
-
Crunch Upgrade: Use crushed nuts, such as almonds or hazelnuts, instead of quinoa crisps for a delightful crunch.
-
Chocolate Choice: Opt for milk chocolate or white chocolate for a different taste sensation; just ensure it pairs well with your filling!
-
Add-Ins Galore: Fold in mini chocolate chips or dried fruits into the peanut butter filling for extra texture and flavor.
-
Coconut Twist: Incorporate shredded coconut with the chocolate mixture for an island-inspired treat, pairing beautifully with the rich peanut butter.
-
Guilt-Free Indulgence: For a low-carb version, substitute coconut flour for almond flour, giving you more nutty goodness—perfect for a nourishing snack!
Feel inspired? You can also explore delicious ideas like Red White Cups or create your own variation of my Seared Garlic Butter Steak for a complete menu transformation!
How to Store and Freeze Quinoa Crunch Peanut Butter Cups
Room Temperature: Keep your Quinoa Crunch Peanut Butter Cups at room temperature for up to 2 days; ensure they are in an airtight container to maintain freshness.
Fridge: Store in the refrigerator for up to 30 days; make sure they’re covered to prevent them from absorbing any odors while they stay cool and delicious.
Freezer: For longer storage, freeze them for up to 60 days in an airtight container; this is the best way to enjoy these treats anytime you desire!
Reheating: If you prefer to enjoy them slightly softened, let them sit at room temperature for 5-10 minutes before serving.
Make Ahead Options
These Quinoa Crunch Peanut Butter Cups are a fantastic option for meal prep enthusiasts looking to save time during busy weeks! You can easily prepare the chocolate layer and peanut butter filling up to 3 days in advance. Simply melt and combine the chocolate mixture, and mix the peanut butter filling; store them separately in airtight containers in the refrigerator. When you’re ready to create your delicious treats, simply assemble the cups by pouring the chocolate into liners, adding the filling, and topping with more chocolate. Freeze them for about 30 minutes to set, and they’ll be just as tasty as if made fresh! This way, you can enjoy your homemade snacks without the wait.
Quinoa Crunch Peanut Butter Cups Recipe FAQs
What type of chocolate should I use for the best flavor?
I recommend using high-quality dark chocolate for a rich and decadent flavor. If you want to keep it vegan, opt for dairy-free chocolate. Just make sure to check the label for any hidden dairy ingredients!
How should I store the Quinoa Crunch Peanut Butter Cups?
You can keep your Quinoa Crunch Peanut Butter Cups in an airtight container at room temperature for up to 2 days. If you want them to last longer, store them in the refrigerator for up to 30 days or freeze them for up to 60 days—just remember to keep them airtight!
Can I freeze these peanut butter cups? How do I do it?
Absolutely! To freeze your Quinoa Crunch Peanut Butter Cups, place them in a single layer in an airtight container, separating layers with parchment paper if needed. They can be frozen for up to 60 days. When you’re ready to enjoy, just let them sit at room temperature for about 5-10 minutes to soften slightly before munching!
What should I do if the chocolate isn’t melting smoothly?
If your chocolate isn’t melting well, it might be heating too fast. Make sure to microwave in 30-second intervals, stirring well in between. If it still looks grainy, try adding a splash of coconut oil to help smooth it out as you stir.
Are there any allergy concerns with this recipe?
This recipe is nut-friendly if made with nut-free spreads. However, it contains peanuts and chocolate, which are common allergens. If cooking for someone with allergies, consider substituting the peanut butter for a sunflower seed butter or another nut-free option, and always check the ingredient labels for potential allergens.
Quinoa Crunch Peanut Butter Cups: A Delicious No-Bake Snack
Ingredients
Equipment
Method
- Melt dark chocolate and coconut oil in a microwave-safe bowl, stirring every 30 seconds until smooth.
- Mix peanut butter and quinoa crisps into the melted chocolate until evenly combined.
- Combine peanut butter with maple syrup until smooth, then fold in coconut flour until thickened.
- Pour half a tablespoon of chocolate mixture into silicone liners for the base layer.
- Form a teaspoon of peanut butter mixture into a ball, flatten it, and place it on top of the chocolate base.
- Cover the peanut butter filling with the remaining chocolate mixture, smoothing the top.
- Chill in the freezer for about 30 minutes until firm.
- Remove from liners and serve chilled.