

As autumn’s colorful leaves swirl to the ground, my kitchen fills with the delightful scents of pumpkin spice and sweet nostalgia. I can’t help but smile as I whip up a batch of no-bake Pumpkin Rice Krispie Treats, perfect for capturing that seasonal joy. These treats not only offer a fun, easy recipe ideal for any cooking enthusiast, but they’re also a crowd-pleaser at Halloween and Thanksgiving gatherings. With their adorable pumpkin shape and crunchy texture, these little bites of happiness will have everyone reaching for seconds. Plus, the no-bake aspect means you can throw them together in a jiffy, leaving more time for cozy family moments. Curious how to create these festive delights? Let’s dive in!
Why Make Pumpkin Rice Krispie Treats?
Simplicity at Its Best: This no-bake recipe is incredibly easy to follow, making it perfect for both novice cooks and seasoned chefs alike.
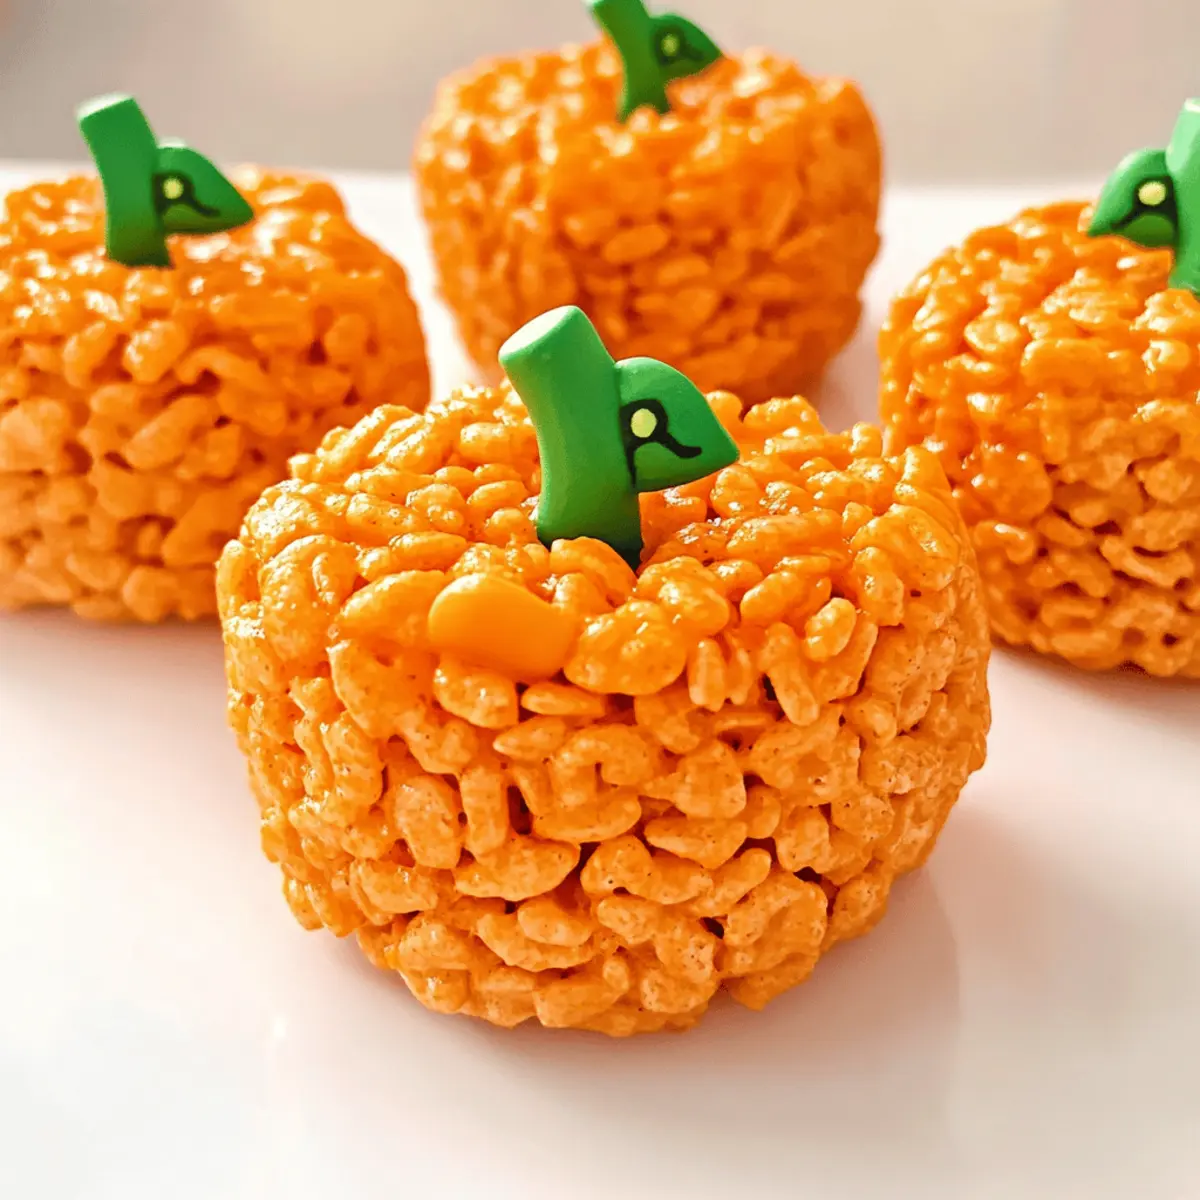
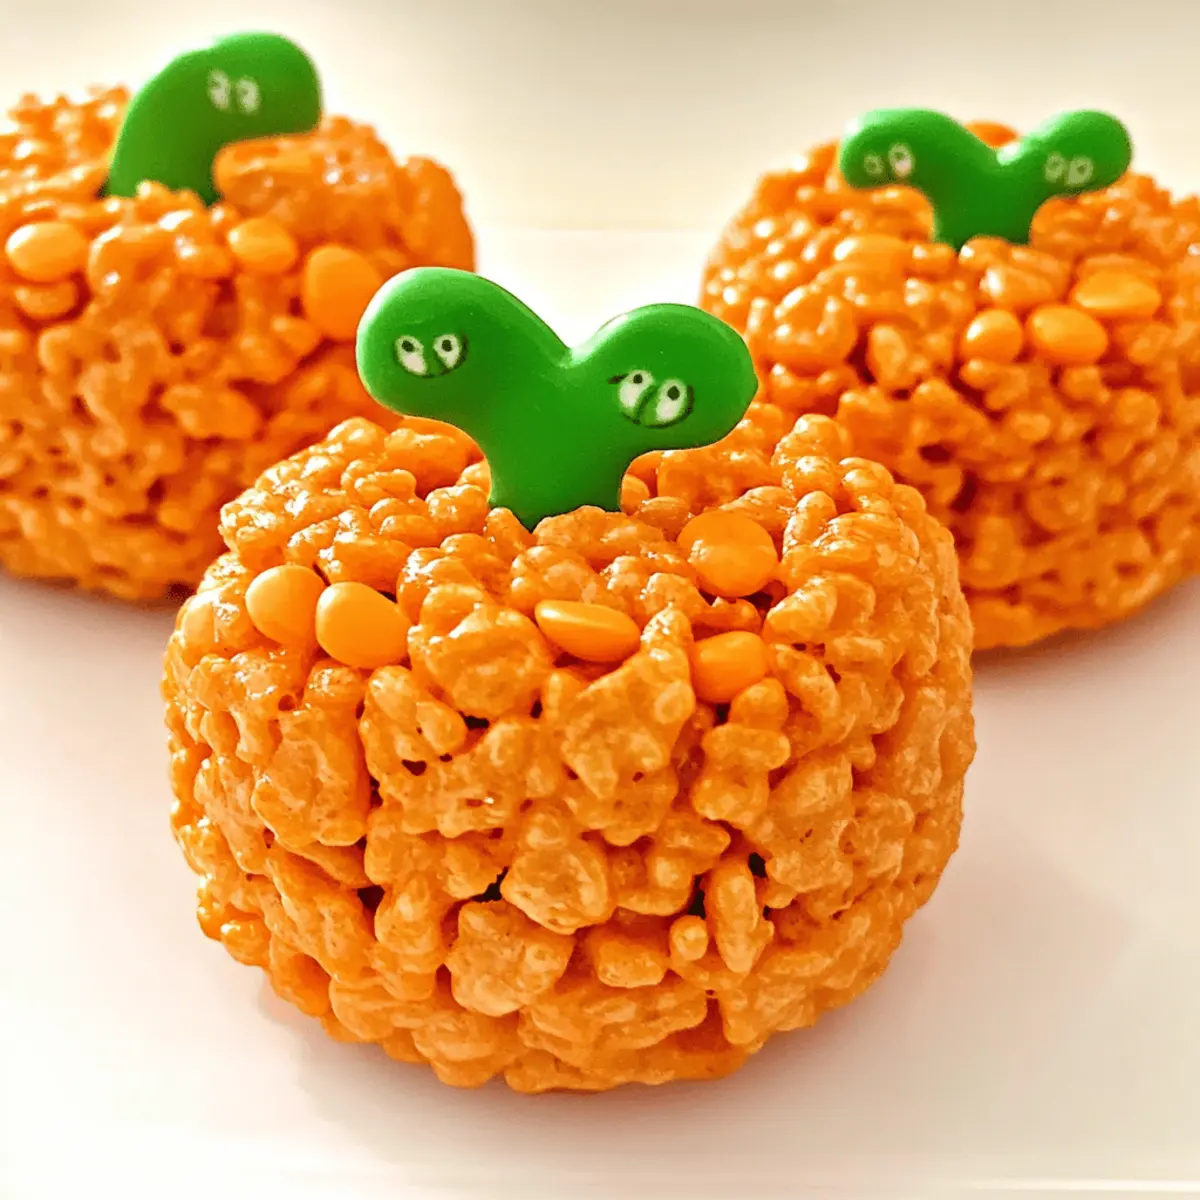
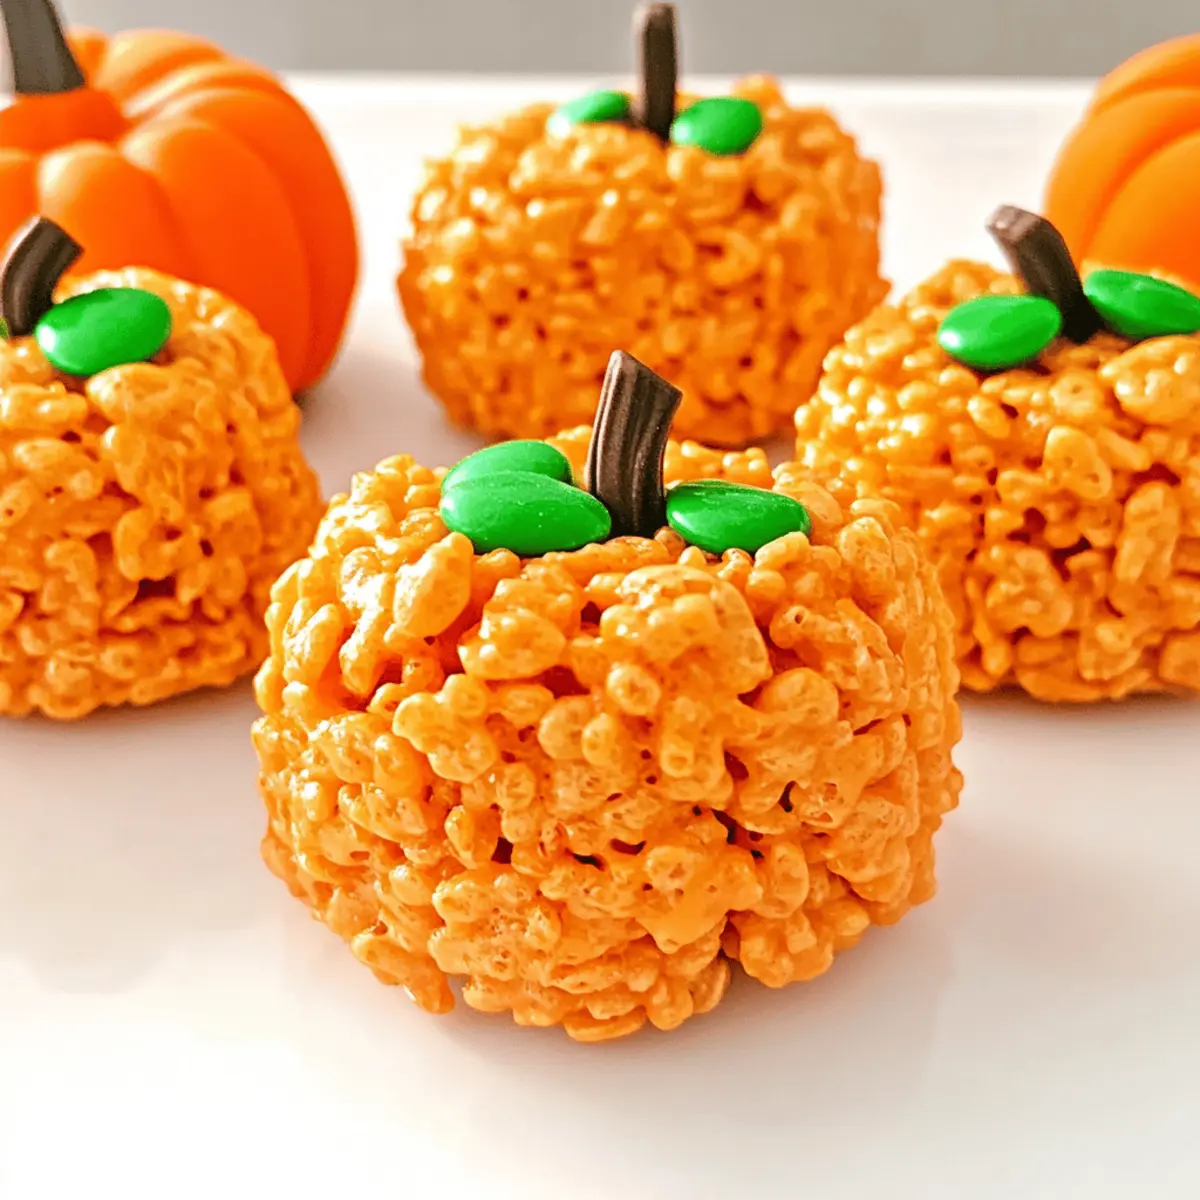
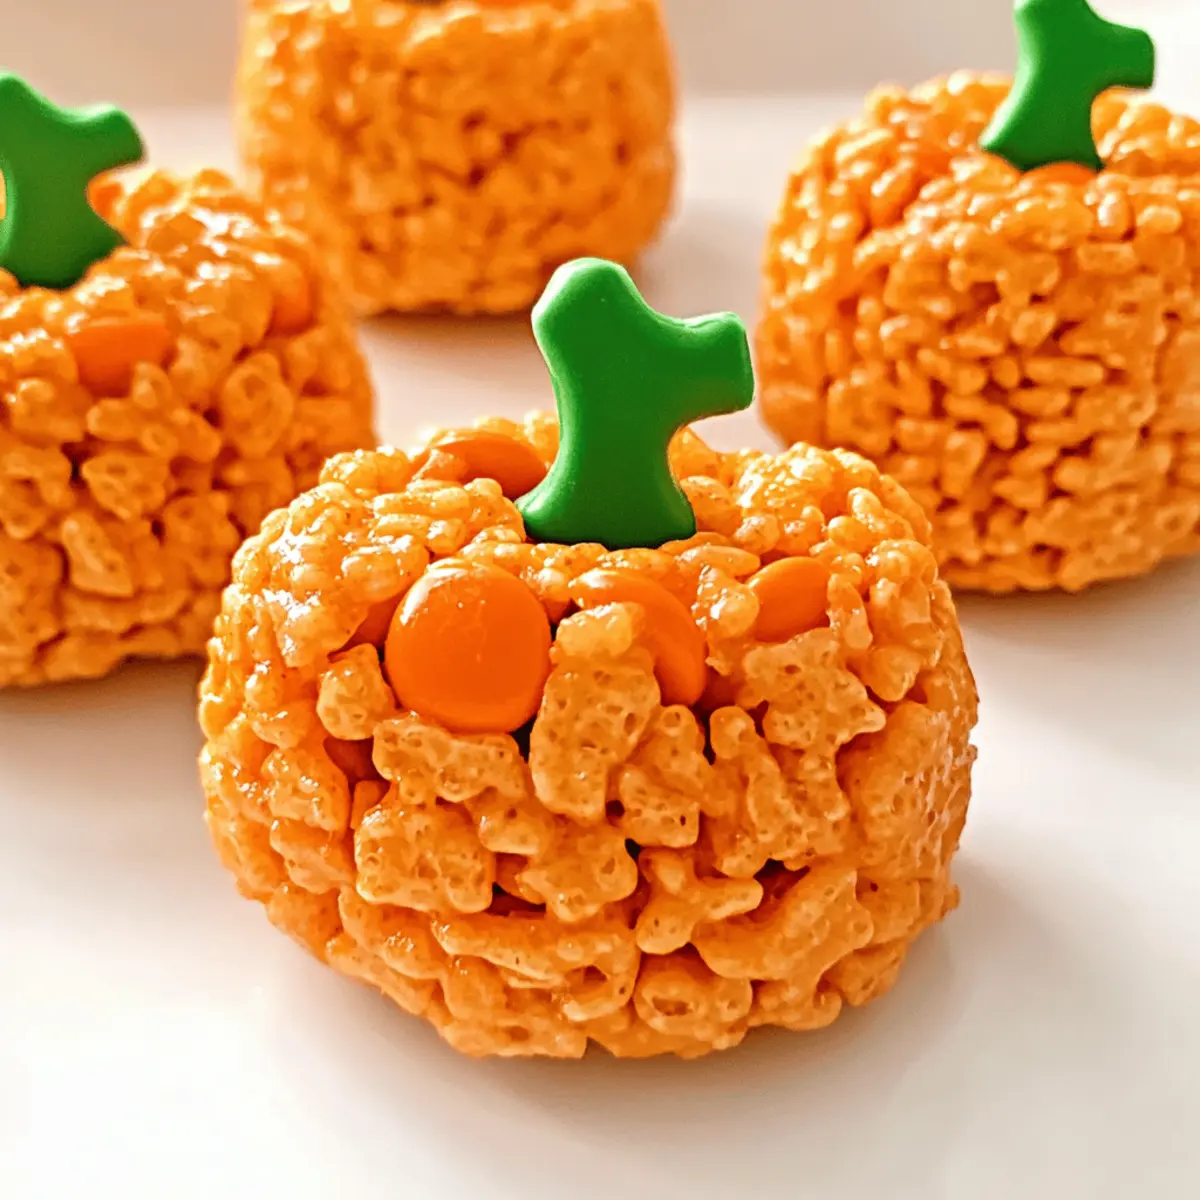
Adorable Aesthetics: Shaped like pumpkins and decorated with a Tootsie Roll stem, these treats are a hit with kids and adults, ensuring smiles all around.
Crowd-Pleaser: Perfect for Halloween parties, classroom treats, or Thanksgiving dessert tables, they are guaranteed to disappear quickly!
Flavorful Twist: The buttery marshmallow base combined with crispy rice cereal creates a delightful texture that’s hard to resist.
Versatility: Get creative with mix-ins like chocolate chips or peanut butter cups for an extra layer of fun! For more inspiration, check out my Smothered Chicken Rice or Steak Queso Rice recipes for satisfying family meals.
Pumpkin Rice Krispie Treats Ingredients
For the Base
• Rice Krispies Cereal – Provides the base structure and crunch; substitute with any other puffed rice cereal for a different flavor.
• Miniature Marshmallows – Offers sweetness and sticky texture to bind the treats; if unavailable, regular marshmallows can be cut into smaller pieces.
• Unsalted Butter – Adds richness and flavor; can be replaced with margarine for a dairy-free version.
For the Color
• Orange Gel Food Coloring – Used to achieve the classic pumpkin color; optional, can be omitted for a more traditional look.
For the Decoration
• Tootsie Roll Candies – Serves as the “stem” for the pumpkin shape; substitute with chocolate fudge or chocolate-covered almonds if needed.
• Green M&M Candies – Represents the “leaves” of the pumpkin; any green candy or even green icing can serve as a replacement.
Step‑by‑Step Instructions for Pumpkin Rice Krispie Treats
Step 1: Melt the Butter
In a large pot over medium heat, add 4 tablespoons of unsalted butter. Stir frequently until the butter is completely melted, taking about 3-4 minutes. This step sets the base for your Pumpkin Rice Krispie Treats, ensuring a rich and buttery flavor.
Step 2: Melt the Marshmallows
Once the butter is melted, pour in 10 ounces of miniature marshmallows. Keep stirring continuously for about 4-5 minutes until the marshmallows have fully melted and blended with the butter. You’ll achieve a smooth, glossy mixture—this is the sweet glue that holds your treats together.
Step 3: Add Food Coloring
Remove the pot from heat and stir in several drops of orange gel food coloring. Mix well until the desired pumpkin hue is achieved, about 1-2 minutes. This step not only enhances the color of your Pumpkin Rice Krispie Treats but also adds a festive touch to the mixture.
Step 4: Combine with Rice Krispies
Gradually fold in 6 cups of Rice Krispies cereal into the warm marshmallow mixture. Stir gently until every piece is evenly coated without crushing the cereal, which should take about 2-3 minutes. The mixture will become thick and sticky, which is just what you want for shaping your treats.
Step 5: Shape the Treats
With your hands sprayed lightly with non-stick cooking spray, take portions of the mixture and roll them into balls, creating approximately 10 pumpkin shapes. Aim for roughly 2-inch diameter balls, ensuring they are rounded and firm enough to stand.
Step 6: Insert the Stems
Take a Tootsie Roll candy and gently press it into the center of each pumpkin-shaped ball to serve as the stem. This should take about 1-2 minutes for all treats. The stems give your Pumpkin Rice Krispie Treats their charming appearance, making them even more festive.
Step 7: Add the Leaves
Finish off your treats by sticking a green M&M on top of each pumpkin as a leaf. Press gently until it sticks, which should take around 1 minute. These little touches make your Pumpkin Rice Krispie Treats inviting and whimsical, perfect for any autumn gathering.
Step 8: Allow to Set
Place the shaped treats onto a parchment-lined baking sheet, allowing them to set at room temperature for about 60 minutes. This will help them firm up nicely, ensuring they hold their shape and are easy to handle. Enjoy the anticipation as the delightful aroma fills your kitchen!
How to Store and Freeze Pumpkin Rice Krispie Treats
Room Temperature: Keep your Pumpkin Rice Krispie Treats stored in an airtight container at room temperature for up to 2 weeks. They’ll stay delicious and chewy!
Fridge: If you prefer a firmer texture, store the treats in the fridge in an airtight container for up to a week, but allow them to come to room temperature before serving.
Freezer: For longer storage, freeze the treats individually wrapped in plastic wrap and placed in an airtight container for up to 2-3 months. Thaw before serving at room temperature.
Reheating: There’s no need to reheat these no-bake treats! Simply enjoy them at room temperature for the best texture and flavor.
Expert Tips for Pumpkin Rice Krispie Treats
-
Spray Your Hands: To prevent sticking, always use non-stick cooking spray on your hands before shaping the mixture. It makes rolling much easier!
-
Uniform Size: Using a cookie scoop ensures that each pumpkin shape is uniform, helping them set evenly. Aim for about 2 inches in diameter.
-
Work Quickly: Marshmallow mixtures can harden once cooled; shape your Pumpkin Rice Krispie Treats swiftly to maintain that perfect form.
-
Customize Colors: Feel free to swap the orange gel food coloring for other shades, making your treats as vibrant or subtle as you’d like.
-
Storage Savvy: Store leftover treats in an airtight container at room temperature for up to 2 weeks. They’ll stay fresh and tasty for all your fall gatherings!
What to Serve with Pumpkin Rice Krispie Treats
As autumn festivities unfold, the right accompaniments can elevate your beloved treats into a memorable feast.
- Warm Apple Cider: This cozy drink complements the fall flavors, providing a comforting sip alongside your treats. It’s the perfect blend of sweetness and spice.
- Creamy Butternut Squash Soup: Its silky texture and subtle sweetness harmonize well with the crunchy rice treats, perfect for balancing flavors at a gathering.
- Spiced Pumpkin Muffins: Bring in more pumpkin goodness! These muffins add a lovely moistness and a touch of cinnamon that complements the treats.
- Sweet Potato Wedges: Roasted to perfection, they offer a savory contrast to the sweetness of the treats, making for a well-rounded autumn meal.
- Caramel Dip: Pair your treats with this luscious dip for an exciting twist. The rich caramel adds a delightful richness that both kids and adults will adore.
- Vanilla Ice Cream: A scoop of creamy ice cream alongside your Pumpkin Rice Krispie Treats creates a delectable combination of warm and cold, sweet and crunchy.
- Maple Pecan Pie: For dessert lovers, this classic autumn pie adds a festive touch that pairs well with the treats and rounds out the meal.
- Hot Chocolate: An indulgent, chocolaty drink perfectly contrasts the crisp texture of the Pumpkin Rice Krispie Treats, making for a delightful combination.
- Chai Tea: The warm spices in chai provide a comforting beverage option that enhances the savory notes of the season, complementing the sweet treats beautifully.
Pumpkin Rice Krispie Treats Variations
Feel free to unleash your creativity and personalize these treats with delightful variations!
-
Peanut Butter Bliss: Stir in chopped peanut butter cups for a delicious twist that adds extra richness. Everyone loves that combo of chocolate and pumpkin flavors!
-
Mini Chocolate Chips: Add mini chocolate chips to the mixture for an extra layer of sweetness. It’s a simple way to make these pumpkin treats even more tempting!
-
Colorful Treats: Swap the orange gel food coloring for other vibrant shades. Get artistic and make spooky purple or chartreuse treats to embrace Halloween spirit!
-
Frosted Fun: Instead of Tootsie Rolls, use frosting to pipe on whimsical vines and leaves. This adds a decorative flair that elevates your pumpkins’ charm!
-
Crispy Additions: Mix in crushed graham crackers or pretzels for added crunch and an unexpected flavor twist. The salty-sweet combination will be a hit with your family!
-
Spiced Up: Enhance the flavor by adding a teaspoon of pumpkin spice to the mixture. It’ll evoke those cozy autumn vibes with every bite.
-
Nutty Variation: Incorporate finely chopped nuts, like walnuts or pecans, for a satisfying crunch. They’ll add depth while providing a wonderful texture contrast.
-
Vegan Option: Replace the butter with coconut oil and use vegan marshmallows for a completely plant-based treat, allowing everyone to enjoy these delicious goodies!
No matter which variation you choose, these adorable treats are sure to be a fall favorite. For more delightful recipes, like my Honey BBQ Chicken Rice Skillet or a comforting Chicken Rice Casserole, keep exploring the kitchen for more tasty inspirations!
Make Ahead Options
These no-bake Pumpkin Rice Krispie Treats are wonderful for meal prep! You can prepare the pumpkin balls up to 24 hours in advance; simply shape them and store them in an airtight container at room temperature. To ensure they stay fresh and maintain their delightful texture, keep them away from heat and moisture. Add the Tootsie Roll stems and green M&M leaves right before serving for the best presentation. When it’s time to enjoy your treats, just set them out for about 10 minutes to soften slightly, and you’ll have delicious, festive snacks ready to wow your guests with minimal fuss!
Pumpkin Rice Krispie Treats Recipe FAQs
What type of Rice Krispies cereal should I use for this recipe?
Absolutely! You can use any puffed rice cereal, but I recommend classic Rice Krispies for the best crunch. If you’re feeling adventurous, try a flavored version like cocoa rice cereal for a chocolatey twist!
How long can I store Pumpkin Rice Krispie Treats?
These delightful treats can be stored at room temperature in an airtight container for up to 2 weeks. If you choose to refrigerate them, they can last for about a week but may become firmer. Just let them warm up to room temperature for a softer bite!
Can I freeze Pumpkin Rice Krispie Treats?
Yes! To freeze, individually wrap each Pumpkin Rice Krispie Treat in plastic wrap, then place them in an airtight container. They can be frozen for up to 2-3 months. When you’re ready to enjoy, simply thaw them at room temperature for a delicious treat.
What if my marshmallow mixture hardens while I’m shaping?
Very! If the marshmallow mixture hardens, return it to low heat in the pot while stirring. Add a tablespoon of water or butter to help loosen it up. This should only take a few minutes; be careful not to overheat!
Are these treats suitable for kids with allergies?
Great question! These treats contain butter and marshmallows, which may not be suitable for dairy allergies. For a dairy-free version, substitute margarine for butter and ensure you use allergy-friendly marshmallows. Always double-check ingredient labels to be safe!
Can I customize the shapes of the treats?
You bet! While these treats are designed to look like pumpkins, you can shape them into other festive forms, such as ghosts or leaves, especially if you’re looking to match the season. Just use your hands to mold them as you like!
Delicious Pumpkin Rice Krispie Treats for Fall Fun
Ingredients
Equipment
Method
- In a large pot over medium heat, add 4 tablespoons of unsalted butter. Stir frequently until completely melted, about 3-4 minutes.
- Pour in 10 ounces of miniature marshmallows and stir continuously for 4-5 minutes until fully melted and blended.
- Remove from heat and stir in orange gel food coloring until the desired pumpkin hue is achieved, about 1-2 minutes.
- Gradually fold in 6 cups of Rice Krispies cereal until evenly coated, about 2-3 minutes.
- With hands sprayed with non-stick cooking spray, roll the mixture into approximately 10 pumpkin-shaped balls, about 2 inches in diameter.
- Press a Tootsie Roll candy into the center of each pumpkin ball as the stem.
- Stick a green M&M candy on top of each pumpkin as a leaf.
- Place on a parchment-lined baking sheet and allow to set at room temperature for about 60 minutes.