

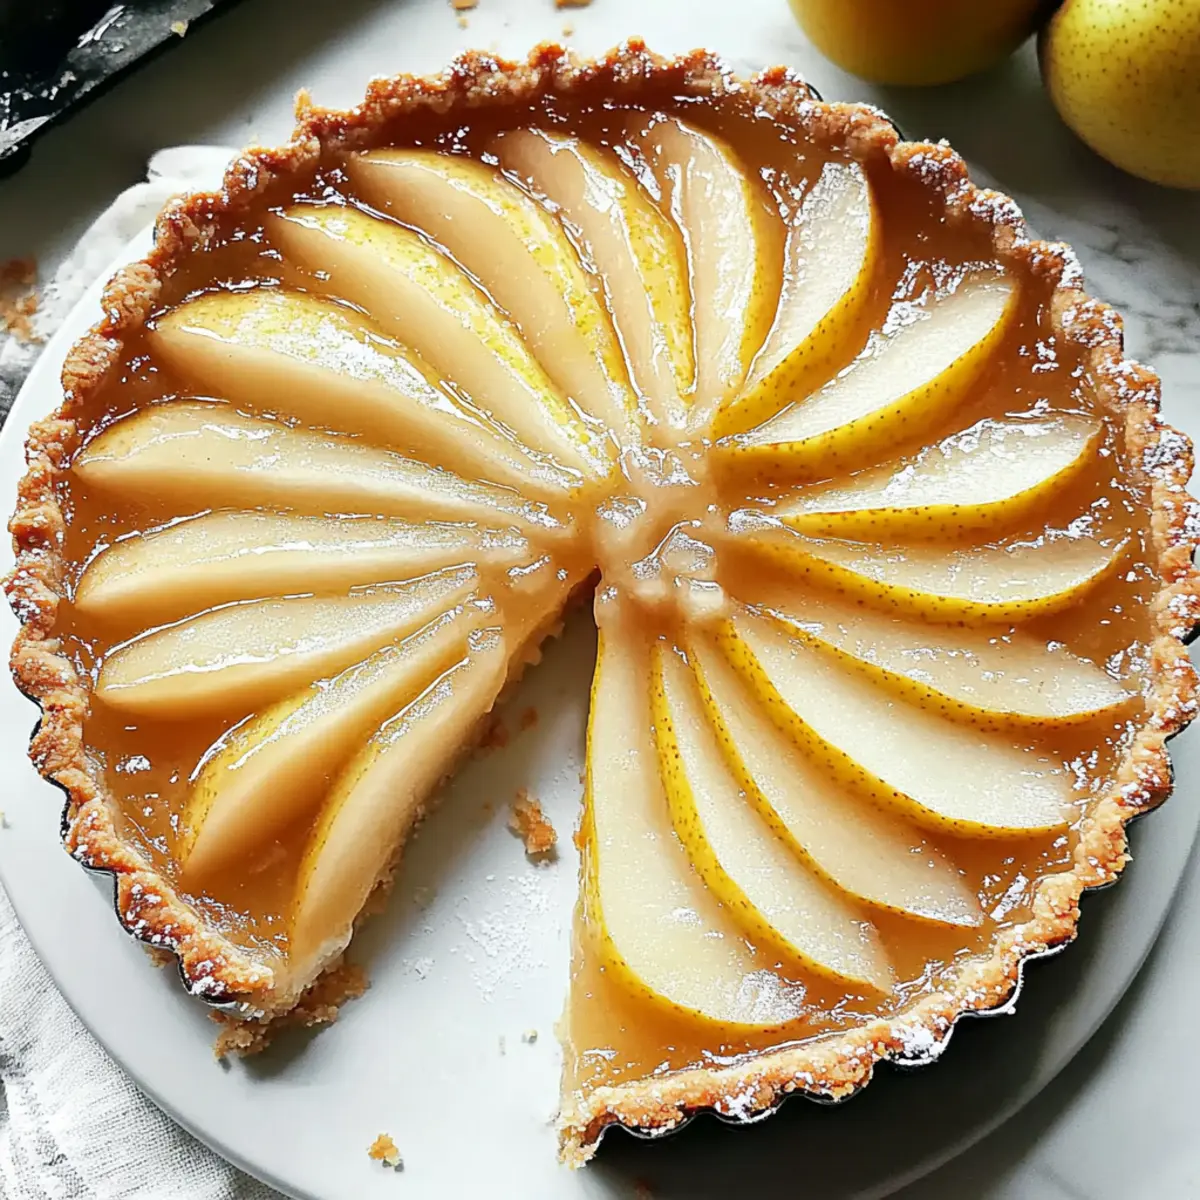
Crisp autumn air fills the kitchen as I pull this Easy Low-Sugar Pear Tart from the oven, its golden crust shimmering under the warm light. The soothing aroma of cinnamon and buttery pastry wraps around me, instantly lifting my spirits. This irresistible pear tart not only looks impressive, but it’s also a breeze to prepare, making it an ideal dessert for gatherings or cozy evenings at home. With a deliciously creamy cream cheese filling and a low-sugar option, this tart is adaptable for nearly any dietary need while still satisfying those sweet cravings. It’s the perfect way to celebrate the season’s bounty, inviting friends and family to share in the warmth of homemade goodness. Curious how this simple recipe can transform ripe pears into a comforting dessert? Let’s dive into the details!
Why is This Tart Irresistible?
Simplicity at Its Best: The recipe is easy to follow, making it accessible for both beginner and seasoned bakers alike.
Rich, Creamy Filling: The blend of cream cheese and cinnamon creates a luscious texture that perfectly complements the pears.
Adaptable for Everyone: With options for low-sugar, dairy-free, and even vegan variations, this tart caters to various dietary preferences.
Crowd-Pleasing Delight: Perfect for gatherings, this tart not only tastes amazing but also looks stunning on any dessert table.
Comfort in Every Bite: Each slice evokes the essence of autumn, wrapping you in warmth and nostalgia.
Serving ideas? Try pairing it with a scoop of vanilla ice cream or with a side of fresh berries for added flair! If you’re loved for your desserts, don’t miss out on other favorites like Coffee Cake Cookies to impress your guests!
Irresistible Pear Tart Ingredients
For the Crust
• Butter – Provides a rich, flaky crust; use margarine for a dairy-free option.
• Sugar – Adds sweetness and balances flavors; substitute with a sugar alternative for a low-sugar version.
• Ground Cinnamon – Enhances flavor with a warm spice element; can be replaced with nutmeg if desired.
• All-Purpose Flour – Forms the structure of the crust; whole wheat flour can be a healthier alternative.
• Chopped Walnuts – Adds texture and nutty flavor to the crust; substitute with pecans or almonds if preferred.
For the Filling
• Reduced-Fat Cream Cheese – Creates a creamy filling; can be swapped with regular or vegan cream cheese.
• Egg – Binds the filling; for a vegan option, use flaxseed meal mixed with water as an alternative.
• Vanilla Extract – Imparts flavor; optional but recommended for depth.
For the Topping
• Canned Sliced Pears – Primary fruit; fresh pears can be used for enhanced flavor.
• Additional Ground Cinnamon – For topping; mix with sugar to enhance the caramelization of pears.
With these simple yet flavorful ingredients, you’ll soon discover how easy it is to make this irresistible pear tart that brings warmth to your home!
Step‑by‑Step Instructions for Irresistible Pear Tart
Step 1: Preheat the Oven
Begin by preheating your oven to 425°F (220°C). This initial high temperature will help create a perfectly golden and flaky crust. While the oven heats, gather your ingredients and ensure the butter is cool and soft for mixing next.
Step 2: Prepare the Crust
In a large mixing bowl, combine softened butter, sugar, and ground cinnamon. Use a fork or pastry blender to mix until crumbly, which should take about 2-3 minutes. Gradually add in all-purpose flour and chopped walnuts, mixing until the dough holds together. Press the mixture evenly into the bottom and up the sides of a greased 9-inch tart pan.
Step 3: Make the Filling
In another bowl, beat the reduced-fat cream cheese until smooth—aim for about 2 minutes to avoid lumps. Gradually blend in the sugar, then add the egg and vanilla extract, mixing until fully combined and creamy. Pour this luscious filling into your prepared crust, spreading it evenly with a spatula.
Step 4: Arrange the Pears
Next, take your canned sliced pears (or fresh, if using) and layer them beautifully over the cream cheese filling, creating a pleasing pattern. For added flavor and texture, sprinkle a mixture of ground cinnamon and sugar over the pears. This will enhance their natural sweetness as they bake.
Step 5: Bake the Tart
Carefully place the tart in the preheated oven. Bake at 425°F for 10 minutes first, which helps the crust set. After that, reduce the temperature to 350°F (175°C) and continue baking for an additional 15-20 minutes, or until the pears are tender and the tart is golden brown.
Step 6: Cool and Refrigerate
Once baked, remove the tart from the oven and allow it to cool at room temperature for about 1 hour. This cooling time helps set the cream cheese filling. For the best flavor and texture, refrigerate the tart for at least 2 hours before serving, which allows all the delicious components to meld beautifully.
Make Ahead Options
These irresistible pear tarts are a fantastic option for meal prep enthusiasts! You can prepare the crust and filling up to 24 hours in advance. To do this, prepare the crust and press it into the tart pan, then cover it tightly with plastic wrap and refrigerate. For the filling, mix up the cream cheese, sugar, egg, and vanilla, then store in an airtight container in the fridge. When you’re ready to bake, spread the filling over the crust, layer the pears, and sprinkle with cinnamon-sugar before popping it in the oven. This way, you’ll have a delightful dessert with minimal effort, perfect for those busy weeknights!
Irresistible Pear Tart Variations
Feel free to let your creativity shine as you customize this delightful pear tart to suit your taste preferences and dietary needs!
- Fresh Pears: Swap canned sliced pears for fresh ones to enhance the tart’s flavor and texture. The juicy freshness elevates each bite!
- Nutty Crust: Experiment with different nuts like pecans or almonds instead of walnuts to add unique flavors and textures. Each nut brings its own charm to the tart!
- Gluten-Free Option: Use almond flour or a gluten-free blend to cater to those avoiding gluten without sacrificing taste. Baking can be inclusive!
- Sugar Alternatives: Substitute traditional sugar with your favorite low-sugar sweetener such as stevia or monk fruit for a diet-friendly delight. Enjoy the sweetness without the guilt!
- Spice It Up: Add a pinch of nutmeg or ginger to the filling for an extra layer of warmth and depth. Each spice brings a cozy twist to the tart!
- Cream Cheese Alternatives: For a vegan version, replace reduced-fat cream cheese with a plant-based variety that you love. Creaminess can be plant-powered!
- Add Zest: Infuse some lemon or orange zest into the filling for a bright, citrusy note that pairs wonderfully with the pears. A zesty surprise can enliven the dessert experience!
- Layer It On: Top the tart with a crumble of oatmeal or granola for added crunch and flavor. This twist adds a wonderful texture contrast!
Whether you want to enrich the taste or accommodate specific dietary preferences, these variations will help create a special version of this Ground Beef Stroganoff or keep things light with some Truffle Bites Bake. Enjoy making this tart your own!
Expert Tips for Irresistible Pear Tart
• Cool Butter: Ensure your butter is cool and softened before mixing for an ideal flaky crust. It’s crucial for texture!
• Smooth Filling: Use room temperature cream cheese to prevent lumps in your filling; beat well until creamy and smooth.
• Refrigerate: Allow the tart to chill after baking for at least 2 hours. This helps the filling set, ensuring clean and neat slices.
• Hot Knife Cutting: For perfect presentation, use a hot, dry knife to slice through the tart, which maintains clean edges and showcases the layers.
• Fresh Pear Option: If you have fresh pears on hand, swap them with canned pears for a more vibrant flavor profile. This makes your irresistible pear tart even better!
How to Store and Freeze Irresistible Pear Tart
Refrigerator: Keep the tart covered in the fridge for up to 4 days to maintain its creamy filling and freshness. This ensures you can enjoy your dessert throughout the week.
Freezer: For longer storage, freeze the tart for up to 2 months. Wrap it tightly in plastic wrap and aluminum foil to prevent freezer burn.
Thawing: When ready to serve, thaw the frozen tart overnight in the refrigerator. This helps retain its texture and flavor.
Reheating: If you prefer it warm, gently reheat individual slices in the microwave for about 15-20 seconds, or enjoy it chilled for a refreshing treat.
What to Serve with Easy Low-Sugar Pear Tart
As you slice into this delectable treat, think about how to create an unforgettable experience with these perfect pairings.
- Whipped Cream: A light, airy dollop that adds a creamy contrast to the tart and enhances the sweetness of the pears.
- Vanilla Ice Cream: Rich and indulgent, the cold scoop melts into the warm tart, creating a delightful blend of temperatures and flavors.
- Caramel Sauce: Drizzle this sweet, buttery topping over each slice for an added layer of decadence that complements the pears beautifully.
- Fresh Berries: Bright and juicy, strawberries or raspberries infuse a burst of freshness, balancing the tart’s sweetness with a touch of acidity.
- Herbal Tea: A warm cup of chamomile or mint tea provides a soothing accompaniment, making it perfect for a cozy evening.
- Sliced Almonds: Toasted, crunchy slivers introduce a nutty flavor and delightful texture that enhances each bite of the tart.
- Honey Drizzle: A touch of honey not only uplifts flavors but also serves as a natural sweetener for those seeking a light touch.
- Chocolate Shavings: For chocolate lovers, a sprinkle of dark chocolate adds sophistication and a rich contrast to the creamy filling.
- Mint Leaves: Fresh mint leaves garnish your dessert, bringing a touch of freshness and vibrancy to the presentation.
Irresistible Pear Tart Recipe FAQs
How do I choose the perfect pears for the tart?
Absolutely! Look for ripe pears that yield slightly to gentle pressure when squeezed. Varieties like Bosc or Anjou offer great flavor and texture. Avoid pears with dark spots or bruises, as they may be overripe.
How should I store the pear tart?
Keep your irresistible pear tart covered in the refrigerator for up to 4 days. This helps maintain the creamy filling’s freshness and flavor. Make sure it’s wrapped tightly to avoid absorbing odors from other foods.
Can I freeze the pear tart?
Yes, you can! Wrap the tart tightly in plastic wrap and then in aluminum foil to prevent freezer burn and keep it fresh. It can be frozen for up to 2 months. To enjoy, thaw it overnight in the refrigerator before serving.
What if the filling is lumpy after mixing?
If your filling is lumpy, don’t worry! Ensure the cream cheese is at room temperature before mixing. Beat it for about 2 minutes until it’s creamy and smooth before adding other ingredients. If needed, blend again until fully combined.
Are there any dietary concerns I should be aware of with this tart?
Yes, for those with dietary restrictions, the tart is adaptable! You can use dairy-free cream cheese for a vegan option and substitute an egg with a mixture of 1 tablespoon of flaxseed meal and 2.5 tablespoons of water. Always double-check ingredient labels for allergens.
Irresistible Pear Tart with Creamy Crust for Cozy Evenings
Ingredients
Equipment
Method
- Preheat your oven to 425°F (220°C). Gather your ingredients and ensure the butter is cool and soft for mixing.
- In a large mixing bowl, combine softened butter, sugar, and ground cinnamon. Mix until crumbly, about 2-3 minutes. Gradually add flour and walnuts, mixing until the dough holds together. Press evenly into a greased tart pan.
- Beat the reduced-fat cream cheese until smooth for about 2 minutes. Blend in sugar, egg, and vanilla extract until creamy. Pour into the prepared crust.
- Layer the canned sliced pears over the cream cheese filling, creating a pleasing pattern. Sprinkle ground cinnamon and sugar over the pears.
- Bake at 425°F for 10 minutes, then reduce the temperature to 350°F (175°C) and bake for an additional 15-20 minutes, until the tart is golden brown.
- Allow the tart to cool at room temperature for 1 hour, then refrigerate for at least 2 hours before serving.