

As I walked through the neighborhood on a crisp October evening, the glow of jack-o’-lanterns and the laughter of kids in costumes reminded me of the joy that Halloween brings. This year, I’m excited to share my recipe for Halloween Mini Pizzas! Perfect for a festive gathering or a cozy family night, these creative bites are incredibly easy to whip up and fun to customize. You can make spooky ghost faces, wrap your mummies in cheese, or carve out jack-o’-lanterns—all in mere minutes. Each mini pizza is not only a canvas for creativity but also a crowd-pleaser that combines cheesy goodness with a delightful crunch. So, are you ready to elevate your Halloween festivities with a touch of homemade magic? Let’s dive in!
Why will kids love Halloween Mini Pizzas?
Kid-friendly creativity: These spooky mini pizzas invite children to unleash their imaginations by designing their own ghostly faces or mummy wraps.
Quick and easy: You can get these festive treats ready in just a few minutes, which is perfect for busy families!
Flavor-packed: With ooey-gooey cheese and tasty toppings, each bite bursts with flavor that both kids and adults will enjoy.
Customizable: Toppings are versatile, allowing for healthy twists – try veggie designs or opt for cheesy classics! For ideas on sweet variations, check out our delightful Patriotic Mini Cheesecakes.
Party pleaser: Whether it’s a Halloween bash or a simple family dinner, these mini pizzas cater to all tastes and ages, making them a hit every time!
Halloween Mini Pizzas Ingredients
• Prepare for spooky creativity!
For the Pizza Base
- Mini Pizza Crusts – Choose store-bought for ease or make them from scratch for extra love.
- Pizza Sauce – A classic staple that adds moisture; mix it up with garlic butter for a twist!
For the Toppings
- Shredded Mozzarella Cheese – The gooey goodness that melts perfectly over the base; consider blending with cheddar for a richer flavor.
- Mozzarella Cheese Slices – Perfect for ghostly shapes; use cookie cutters if you want to create fun designs!
- Pepperoni – A savory favorite; for a vegetarian option, swap with your choice of colorful veggies.
- Black Olives – Ideal for making “eyes” on your spooky creations; capers or pimentos work as fun alternatives too.
- Orange Bell Pepper – Cut into jack-o’-lantern faces; you can get creative with other veggies like zucchini for varied colors.
These Halloween Mini Pizzas are not only fun to create, but they also bring flavor-filled excitement to any Halloween gathering!
Step‑by‑Step Instructions for Halloween Mini Pizzas
Step 1: Preheat the Oven
Begin by preheating your oven to 400°F (200°C). This ensures a perfectly crispy crust for your delicious Halloween Mini Pizzas. While the oven warms up, line a baking sheet with parchment paper to prevent sticking and make cleanup a breeze.
Step 2: Arrange the Pizza Crusts
Once your oven is preheated, place the mini pizza crusts on the prepared baking sheet, leaving enough space between them. Using a spoon or a spatula, spread pizza sauce evenly over each crust, ensuring a generous layer that will bring moisture and flavor to your Halloween Mini Pizzas.
Step 3: Create Ghost Pizzas
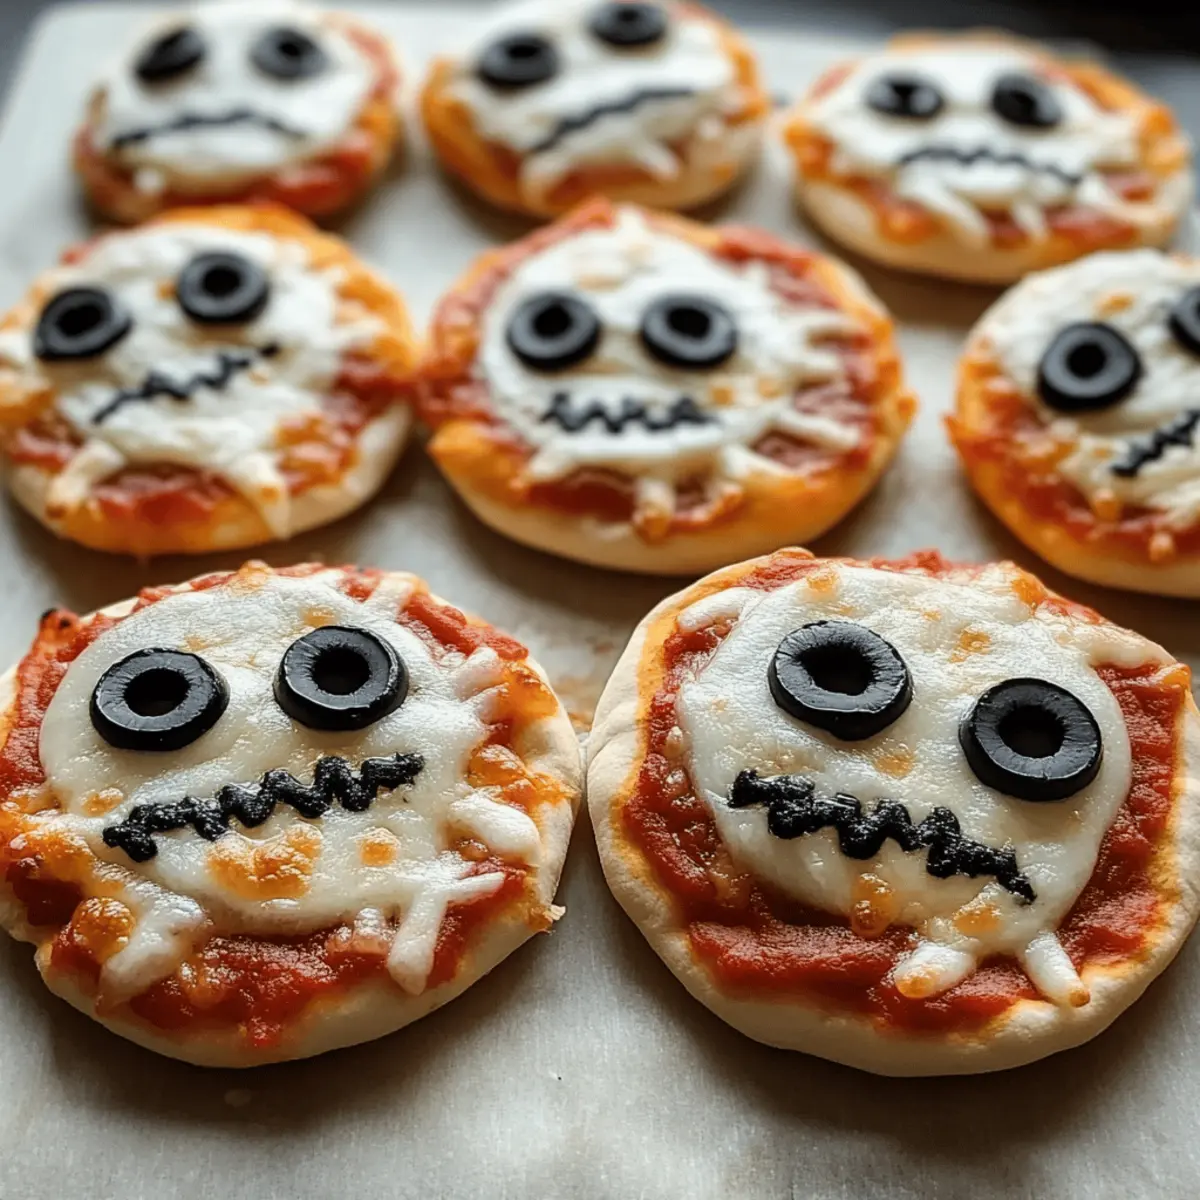
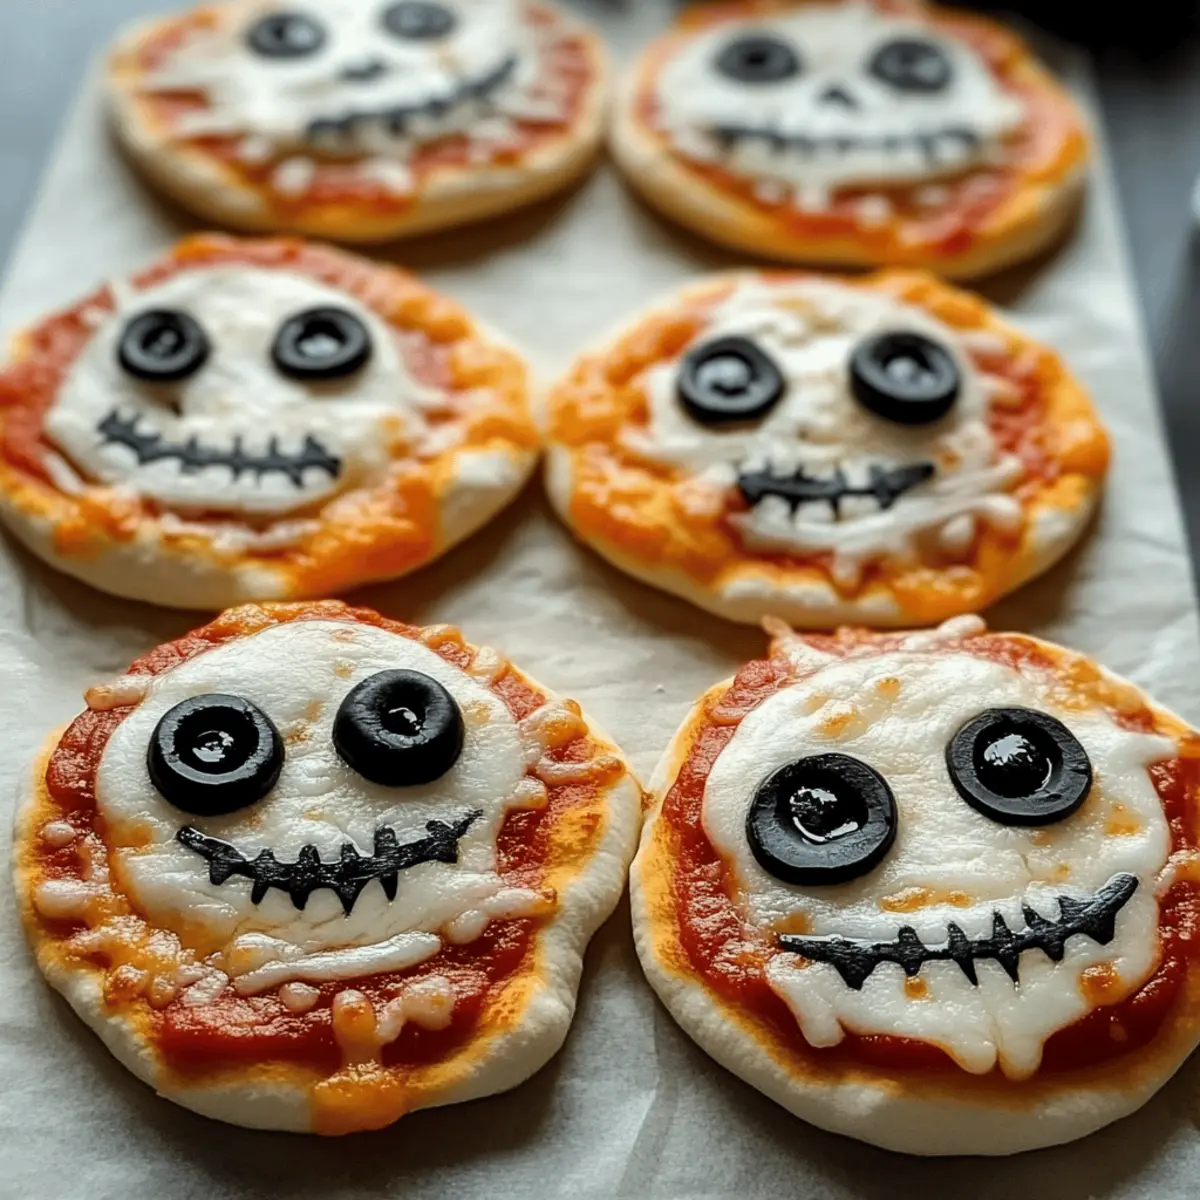
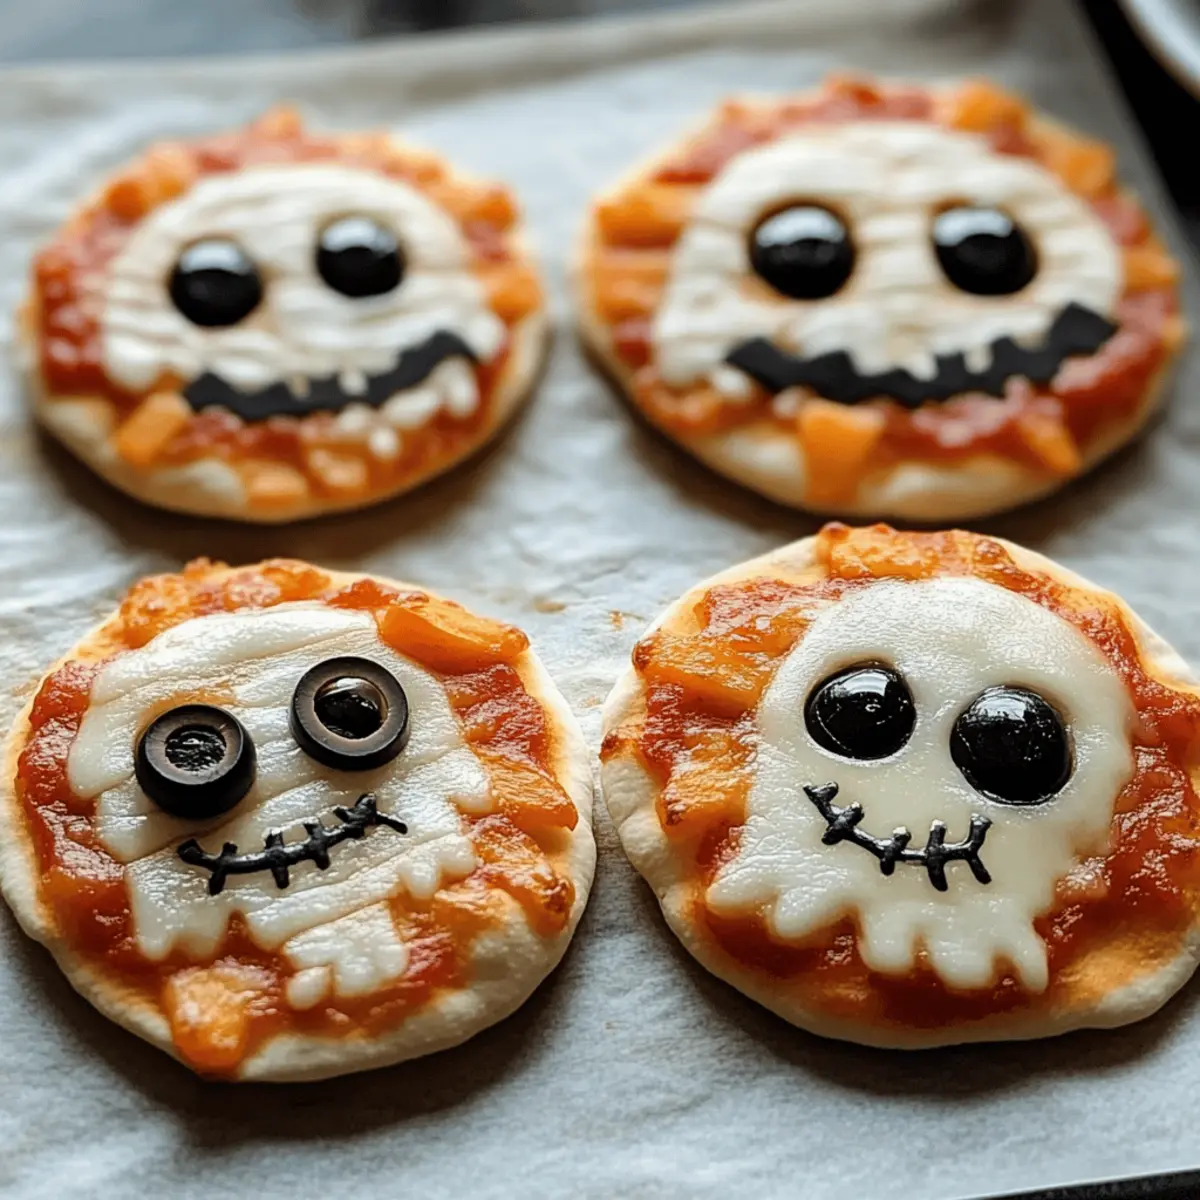
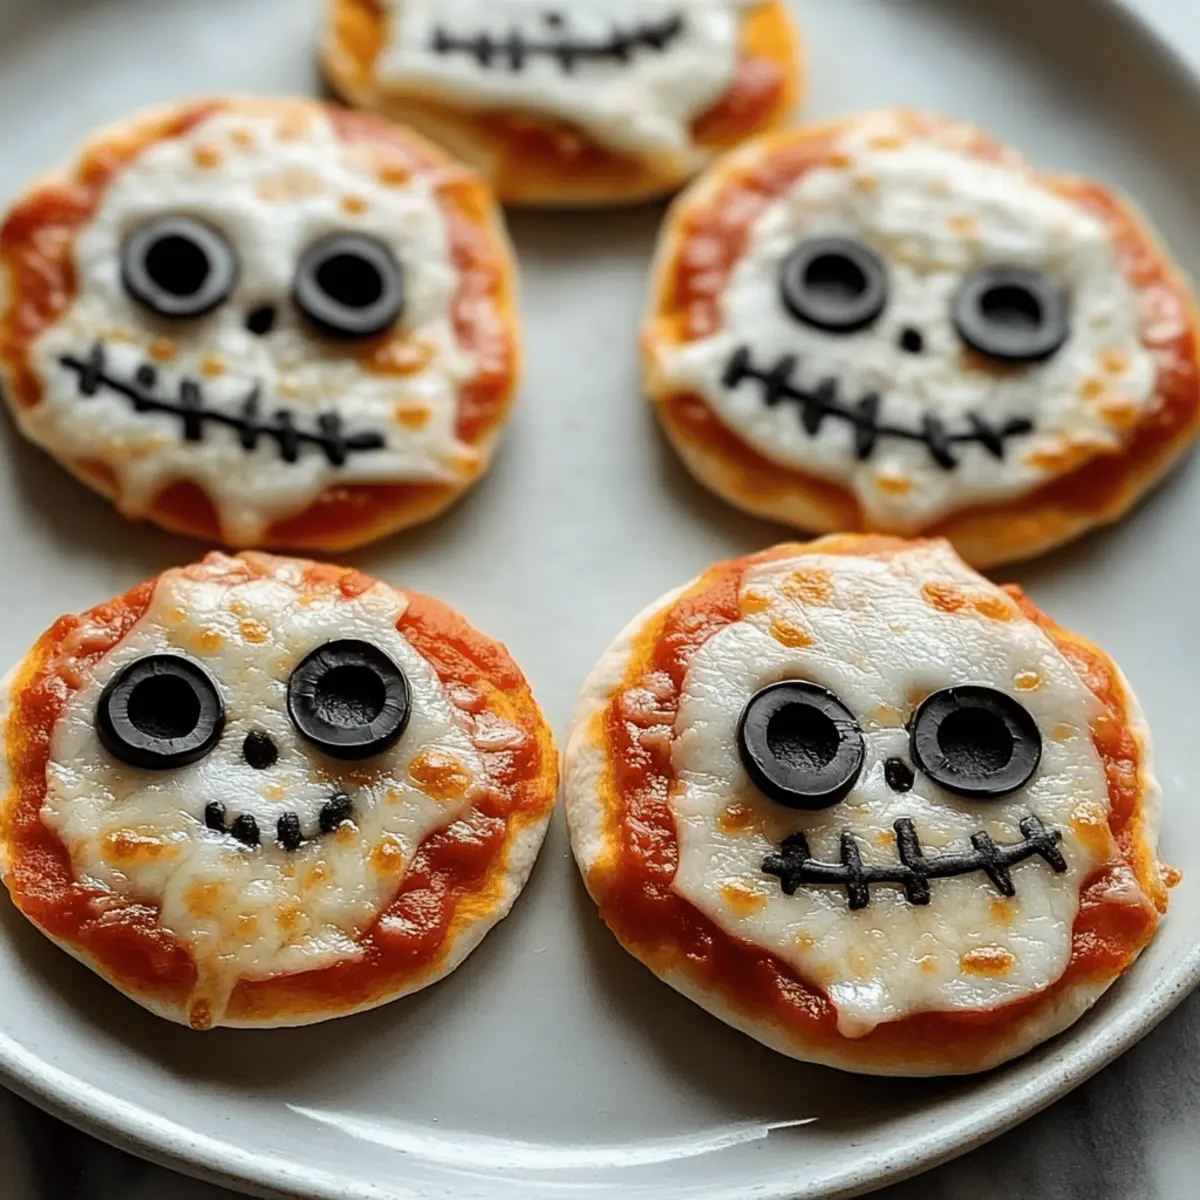
For the ghost-themed mini pizzas, take mozzarella cheese slices and cut them into fun ghost shapes using cookie cutters or a sharp knife. Place these cheese ghosts on the saucy pizza base. Add black olive pieces as eyes to bring your spooky mini pizzas to life with eerie character!
Step 4: Assemble Mummy Pizzas
Next, let’s channel some mummies! Lay mozzarella cheese strips criss-cross over the pizza sauce, creating a bandage effect. Leave enough space in the middle for the black olives, which will serve as mummy eyes. The cheese will melt and create an inviting, gooey masterpiece while it bakes.
Step 5: Form Jack-O’-Lantern Pizzas
Now it’s time to create the jack-o’-lantern pizzas! Sprinkle shredded mozzarella cheese generously over the sauce. Use orange bell pepper slices to form faces on each pizza—think of grinning jack-o’-lanterns. These vibrant decorations add to the festive feel of your Halloween Mini Pizzas.
Step 6: Bake to Perfection
Place the baking sheet into the preheated oven and bake for 8-10 minutes, or until the cheese is melted and bubbly, and the crust turns a lovely golden brown. Keep an eye on them to prevent burning—this is where you’ll see your culinary creations come to life!
Step 7: Serve Warm
Once your Halloween Mini Pizzas are baked to perfection, carefully remove the baking sheet from the oven. Let them cool for a minute or two before serving. Enjoy these delightful treats warm, perfect for sharing at Halloween gatherings with family and friends.
Halloween Mini Pizzas Variations You’ll Love
Feel free to get creative with your Halloween Mini Pizzas! Here are some fun ideas to customize these festive treats.
-
Cheese Swap: Replace mozzarella with cheddar or a mix of cheeses for a distinct flavor twist.
-
Sauce Variations: Use barbecue sauce or ranch dressing in place of pizza sauce for a zesty kick. This can really elevate the flavor profile!
-
Vegetarian Surprise: Switch out pepperoni for colorful bell peppers, mushrooms, or even artichoke hearts for a vibrant, veggie-packed option. It’s just as flavorful!
-
Spicy Kick: Add jalapeños or red pepper flakes to give your mini pizzas a delightful heat. This twist is great for those who love a fiery flavor!
-
Sweet Treats: Create dessert versions using a sweet pizza crust topped with Nutella, sliced strawberries, and a sprinkle of powdered sugar. A fun surprise for your Halloween gathering!
-
Gluten-Free: Substitute mini pizza crusts with gluten-free options or even cauliflower crust for those with dietary restrictions. Everyone can join in on the fun!
-
Themed Shapes: Get creative with cookie cutters to make fun shapes beyond ghosts and pumpkins—think spiders or bats! These designs will add an extra element of delight.
-
Crispy Crust: For extra crunch, brush the edges of the crust with olive oil and sprinkle with garlic powder before baking. This will enhance the flavor of your crust!
By personalizing your Halloween Mini Pizzas, you can ensure they satisfy every taste bud. If you’re also looking for sweet ideas, you might enjoy making some delightful treats like our festive Patriotic Mini Cheesecakes. Let your creativity shine in the kitchen this Halloween!
What to Serve with Halloween Mini Pizzas
Entice your guests with a variety of delicious accompaniments that elevate your Halloween feast and add festive flair.
- Crispy Salad: A refreshing crunch of mixed greens with a zesty vinaigrette balances the richness of the pizzas.
- Sweet Potato Fries: These deliciously crispy bites not only add sweetness but also complement the savory flavors of the mini pizzas.
- Pumpkin Soup: A warm, creamy soup brings a cozy fall vibe to your spread, making it perfect for chilly Halloween nights. The flavors intertwine beautifully!
- Fruit Kabobs: Colorful, fresh fruit on skewers puts a playful twist on a classic and adds sweetness that kids will love.
- Spooky Punch: Create a themed drink with a mix of fruit juices and seltzer, garnished with gummy worms for a spooky yet refreshing sip.
- Chocolate Halloween Bark: For dessert, this treat brings an irresistible sweetness decorated with festive sprinkles, perfect for satisfying any sweet tooth after the main event.
Expert Tips for Halloween Mini Pizzas
- Get Creative: Use assorted vegetables as toppings for added color and fun! Encourage kids to design their own spooky faces for their Halloween Mini Pizzas.
- Consistency Matters: Make sure the cheese is evenly distributed over the sauce; this helps achieve a perfect melt and prevents any crust from being overly dry.
- Watch the Clock: Keep an eye on the baking time to avoid overcooking. A toaster oven’s broil function for 1-2 minutes adds a lovely crisp without burning.
- Non-Stick Sheets: Light-colored baking sheets prevent sticking and promote even cooking. Grease them lightly or use parchment paper for easy release.
- Dietary Flexibility: Substitute pizza crust with gluten-free options or cauliflower crust for tailoring to dietary needs while keeping it delicious!
How to Store and Freeze Halloween Mini Pizzas
Fridge: Store leftover Halloween Mini Pizzas in an airtight container for up to 3 days. Reheat in the oven at 350°F (175°C) for about 10 minutes to restore crispiness.
Freezer: If you want to keep them longer, freeze unbaked mini pizzas on a baking sheet for a couple of hours until solid, then transfer to a freezer bag for up to 2 months.
Reheating: For frozen Halloween Mini Pizzas, bake directly from frozen at 400°F (200°C) for approximately 12-15 minutes or until heated through and cheese is bubbly.
Assembly Tip: To enjoy fresh pizzas regularly, prepare the mini pizzas in advance, freeze them, and pop them in the oven whenever a craving strikes!
Make Ahead Options
These Halloween Mini Pizzas are perfect for meal prep, making your spooky celebrations stress-free! You can assemble the mini pizzas (with sauce and toppings) up to 24 hours in advance and refrigerate them in an airtight container to maintain their freshness. To keep the crust from becoming soggy, consider storing the pizza crusts separately and adding the sauce and toppings just before baking. When you’re ready to enjoy them, simply preheat your oven and bake the pizzas for 8-10 minutes until the cheese is melted and bubbly. This clever meal prep hack allows you to whip up a fun Halloween treat quickly, so you can spend more time enjoying the festivities!
Halloween Mini Pizzas Recipe FAQs
How do I choose the best mini pizza crusts?
Absolutely! If you’re opting for store-bought mini pizza crusts, look for ones that are either thick or thin based on your preference. For a personal touch, consider making your own using simple dough recipes that you can find online. A homemade crust can add a special element to your Halloween Mini Pizzas.
How long can I store leftover Halloween Mini Pizzas?
You can store leftover Halloween Mini Pizzas in an airtight container in the fridge for up to 3 days. When you’re ready to enjoy them again, just reheat them in the oven at 350°F (175°C) for about 10 minutes for a crispy finish.
Can I freeze Halloween Mini Pizzas?
Yes, you can! To freeze them, simply assemble your mini pizzas without baking them first. Place them on a baking sheet in the freezer for a couple of hours until solid, then transfer them to a freezer bag or airtight container. They will keep well for up to 2 months.
What if the cheese doesn’t melt properly?
Very common! If the cheese doesn’t melt to your liking, you can try several adjustments. Make sure your oven is preheated to the correct temperature and resist the urge to open the oven door during baking, as this can affect the heat. Additionally, consider switching to a different cheese brand or blend that melts better, like a combination of mozzarella and gouda.
Are there any dietary concerns I should keep in mind?
Absolutely! If you’re making these Halloween Mini Pizzas for kids, keep allergies in mind, especially with cheese and pepperoni. Always check food labels for allergens, and if you have pets, be cautious as certain ingredients like onions or garlic in the sauces might not be safe for them. Alternatively, you can create vegetarian pizzas with a variety of colorful veggies for a healthy twist!
Halloween Mini Pizzas: Fun, Festive Treats Your Kids Will Love
Ingredients
Equipment
Method
- Preheat your oven to 400°F (200°C) and line a baking sheet with parchment paper.
- Place the mini pizza crusts on the prepared baking sheet and spread pizza sauce over each crust.
- Cut mozzarella cheese slices into ghost shapes and place them on the saucy pizza base. Add black olives as eyes.
- Lay mozzarella cheese strips criss-cross over the sauce, leaving space for black olives as mummy eyes.
- Sprinkle shredded mozzarella cheese over the sauce and use orange bell pepper slices to form jack-o'-lantern faces.
- Bake in the preheated oven for 8-10 minutes until cheese is melted and bubbly.
- Remove from the oven and let cool for a minute before serving warm.