

As the warm aroma of fresh pastries dances through my kitchen, I can’t help but feel a little spark of joy. Today, I’m excited to share my recipe for Gluten-Free Cruffins—a delightful fusion that marries the flaky, buttery layers of croissants with the sweet, comforting heart of muffins. These little wonders not only satisfy those craving a homemade treat but also accommodate gluten-free diets, ensuring everyone can indulge. With a variety of flavor adaptations, from classic cinnamon-sugar to a rich Nutella twist, these cruffins are a versatile addition to any brunch or snack table. Plus, they’re quick to whip up and perfect for freezing, so you can always have a delicious bite on hand. Ready to roll up your sleeves and create some flaky magic? Let’s dive into the world of Gluten-Free Cruffins together!
Why Are Gluten-Free Cruffins So Irresistible?
Decadent Flavor: Each bite is a delightful journey of buttery richness and sweet warmth, making them perfect for any palate.
Versatile Variations: From classic cinnamon-sugar to a decadent Nutella filling or zesty orange, you can tailor these delights to suit your mood or occasion.
Simple to Make: With just a few easy steps, you’ll create bakery-worthy treats right at home, perfect for novice cooks and seasoned chefs alike.
Perfect for Sharing: These cruffins are a surefire way to impress family and friends—everyone will be asking for seconds!
Store with Ease: Enjoy them freshly baked or freeze for later, making breakfast or snack time a breeze. Whether you want to try our easy cruffin recipe or explore more delicious gluten-free options, you’re in for a treat!
Gluten Free Cruffins Ingredients
For the Dough
• Active Dry Yeast – This helps activate the dough for a delightful rise; always check for gluten-free labeling.
• Cane Sugar (1 tbsp + ½ cup + ¼ cup for rolling) – This adds sweetness and activates the yeast; you can swap with coconut sugar for a lower glycemic option.
• Milk (1 cup) – Provides essential moisture and richness; feel free to use any non-dairy milk for a dairy-free version.
• Gluten-Free Flour Blend (3 cups) – This is the backbone of your dough; choose a blend that works well with yeast, like Cup4Cup, to achieve the best texture.
• Unsalted Butter (6 tbsp, frozen + 3 tbsp, melted) – Adds that rich, flaky layer; swap for a plant-based butter to keep it dairy-free.
• Salt (¼ teaspoon) – Enhances the overall flavor; sea salt is a fantastic substitute.
• Pure Vanilla Extract (1 teaspoon) – This gives a lovely depth of flavor; vanilla bean paste can also add an exciting twist.
• Ground Cinnamon (2 teaspoons + ½ teaspoon for rolling) – Infuses warmth into your cruffins; consider using nutmeg or pumpkin spice for variations.
For the Topping
• Cinnamon-Sugar Mixture – Roll warm cruffins in this for an irresistible sweet finish that complements the gluten-free cruffins beautifully.
With these ingredients, you’re all set to embark on a delicious baking adventure! Each layer is designed to bring out the best in your cruffins, creating a treat everyone will adore.
Step‑by‑Step Instructions for Gluten Free Cruffins
Step 1: Prepare the Yeast Mixture
Begin by warming 1 cup of milk to a gentle 110ºF. In a small bowl, combine the warm milk with 1 tablespoon of cane sugar and 2 teaspoons of active dry yeast, stirring lightly. Allow this mixture to sit for about 5 minutes until it becomes frothy, indicating the yeast is activated and ready to work its magic in your Gluten Free Cruffins.
Step 2: Combine Dry Ingredients
In a large mixing bowl, whisk together 3 cups of gluten-free flour blend, ½ cup of cane sugar, and ¼ teaspoon of salt until well blended. This flour mixture is essential for the texture and flavor of your cruffins. Ensure it is mixed thoroughly before proceeding, as this will provide the foundation for the delicate layers in your gluten-free pastry.
Step 3: Incorporate the Butter
Grate 6 tablespoons of frozen unsalted butter directly into the flour mixture. Use a fork or pastry cutter to incorporate the butter, ensuring it is evenly coated with flour. You’re aiming for a crumbly texture that resembles coarse crumbs, which will help create those beautifully flaky layers in your Gluten Free Cruffins.
Step 4: Combine Wet and Dry Ingredients
Pour the frothy yeast mixture and 1 teaspoon of pure vanilla extract into the flour mixture. Gently mix with a spatula or wooden spoon until just combined. If the dough feels too sticky, gradually add more gluten-free flour blend until it forms a workable dough. This step enhances the flavor and start to bring your Gluten Free Cruffins together.
Step 5: Shape the Dough
Dust a clean silicone mat or countertop with gluten-free flour and transfer your dough to this surface. Using a rolling pin, gently shape the dough into a rectangle about ¼-inch thick, ensuring an even thickness throughout. This shaping is crucial for creating the layers you desire in your cruffins, so be careful and deliberate in this process.
Step 6: Add the Cinnamon-Sugar Mixture
Brush the rolled-out dough with 3 tablespoons of melted unsalted butter. Then, sprinkle the sugar-cinnamon mixture (2 teaspoons of ground cinnamon mixed with ¼ cup of cane sugar) evenly over the surface. This sweet topping will add flavor and crunch to your Gluten Free Cruffins while enhancing that delicious sweet aroma as they bake.
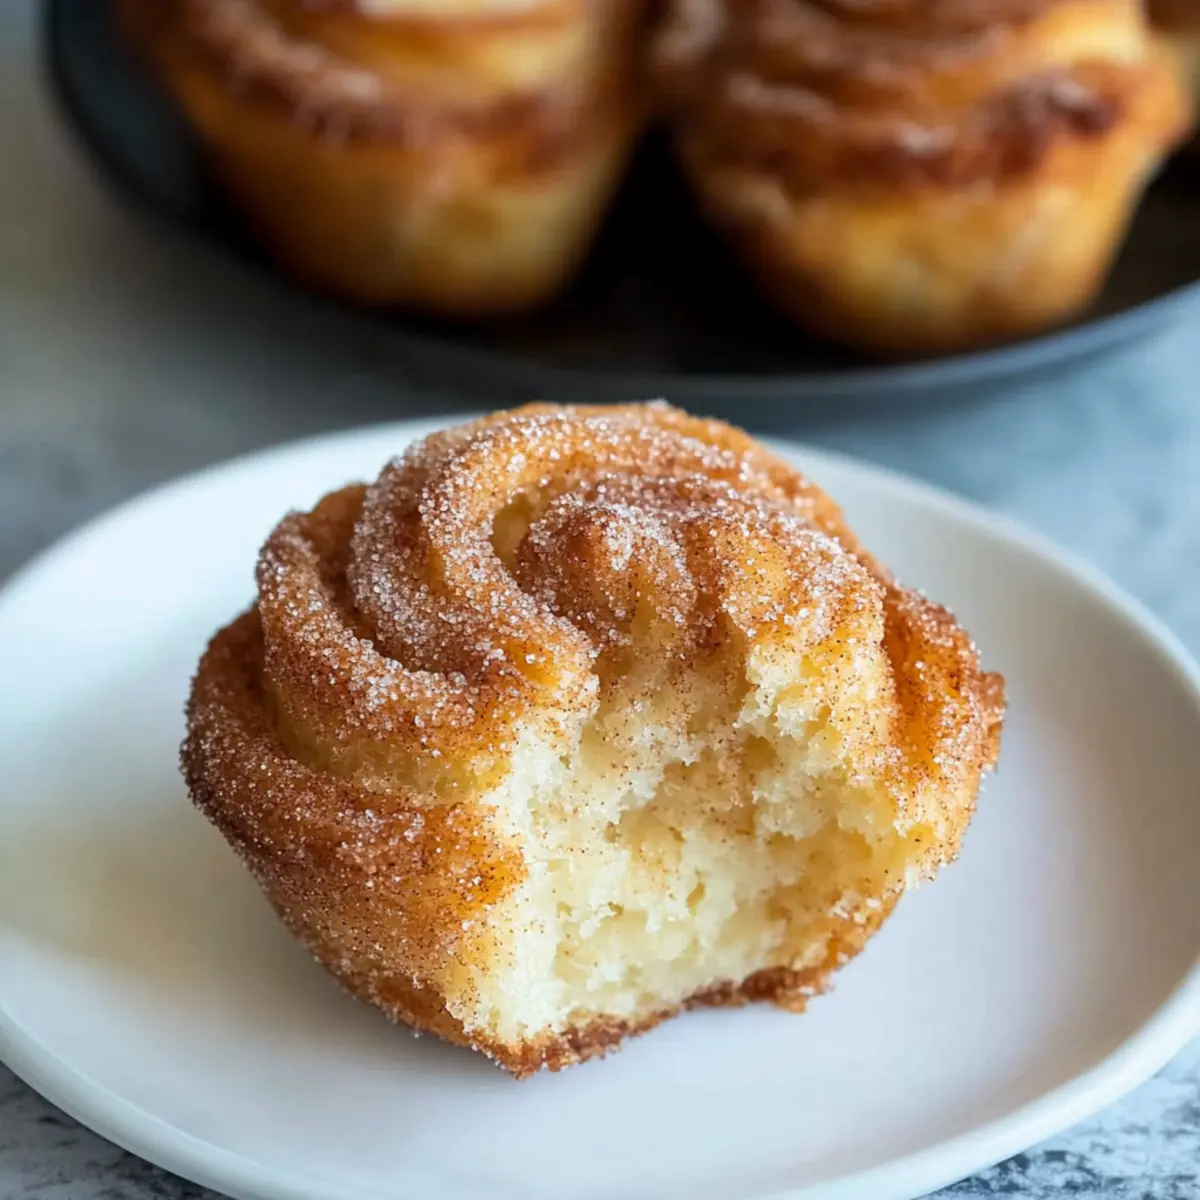
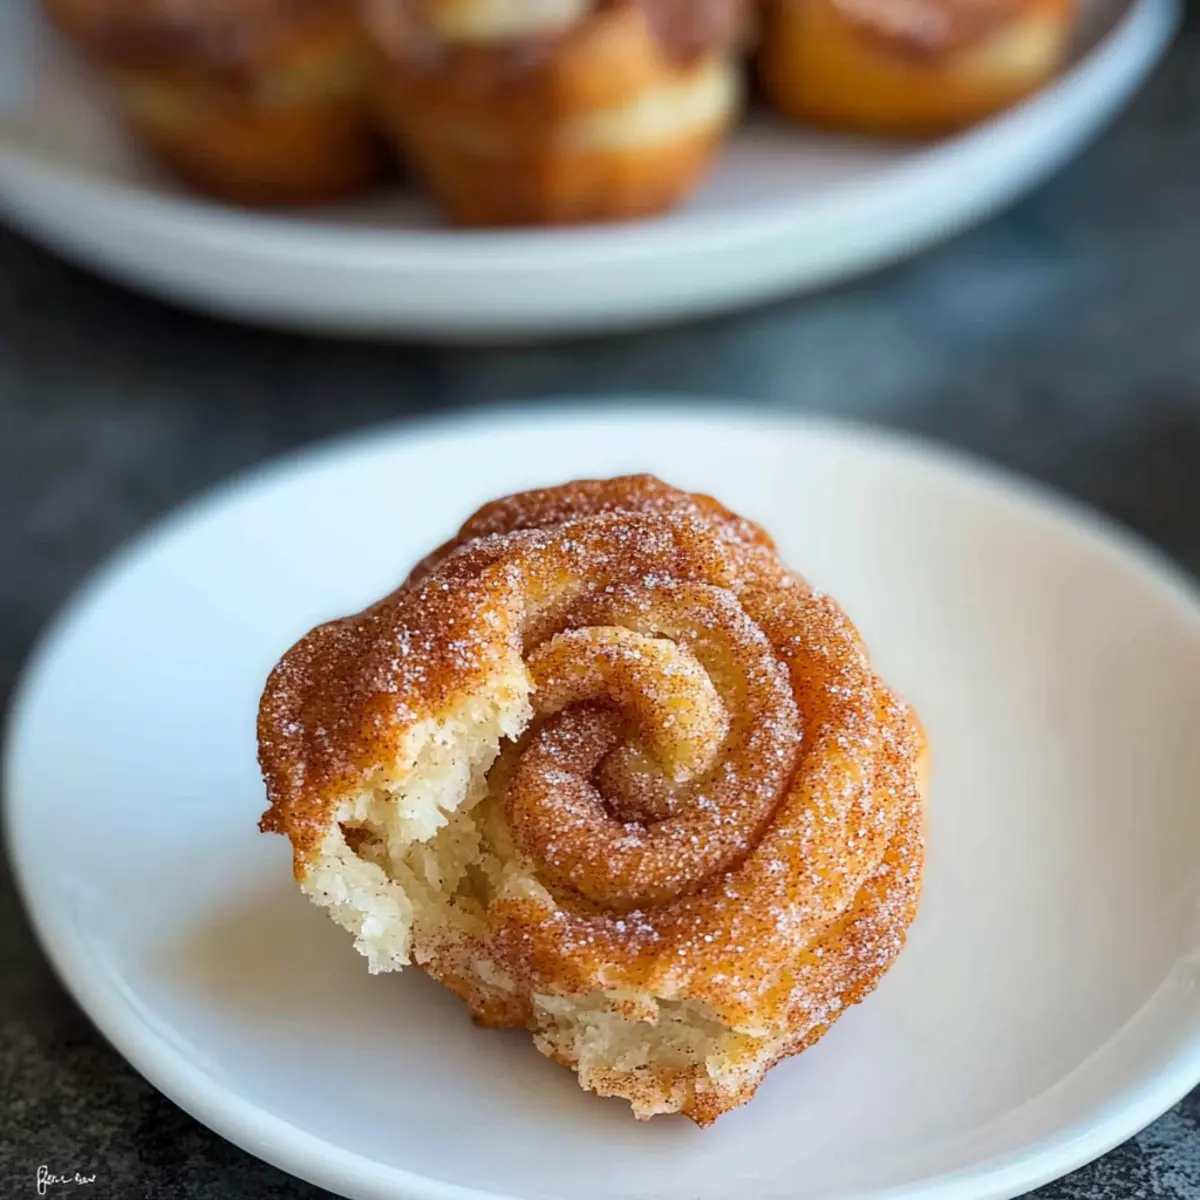
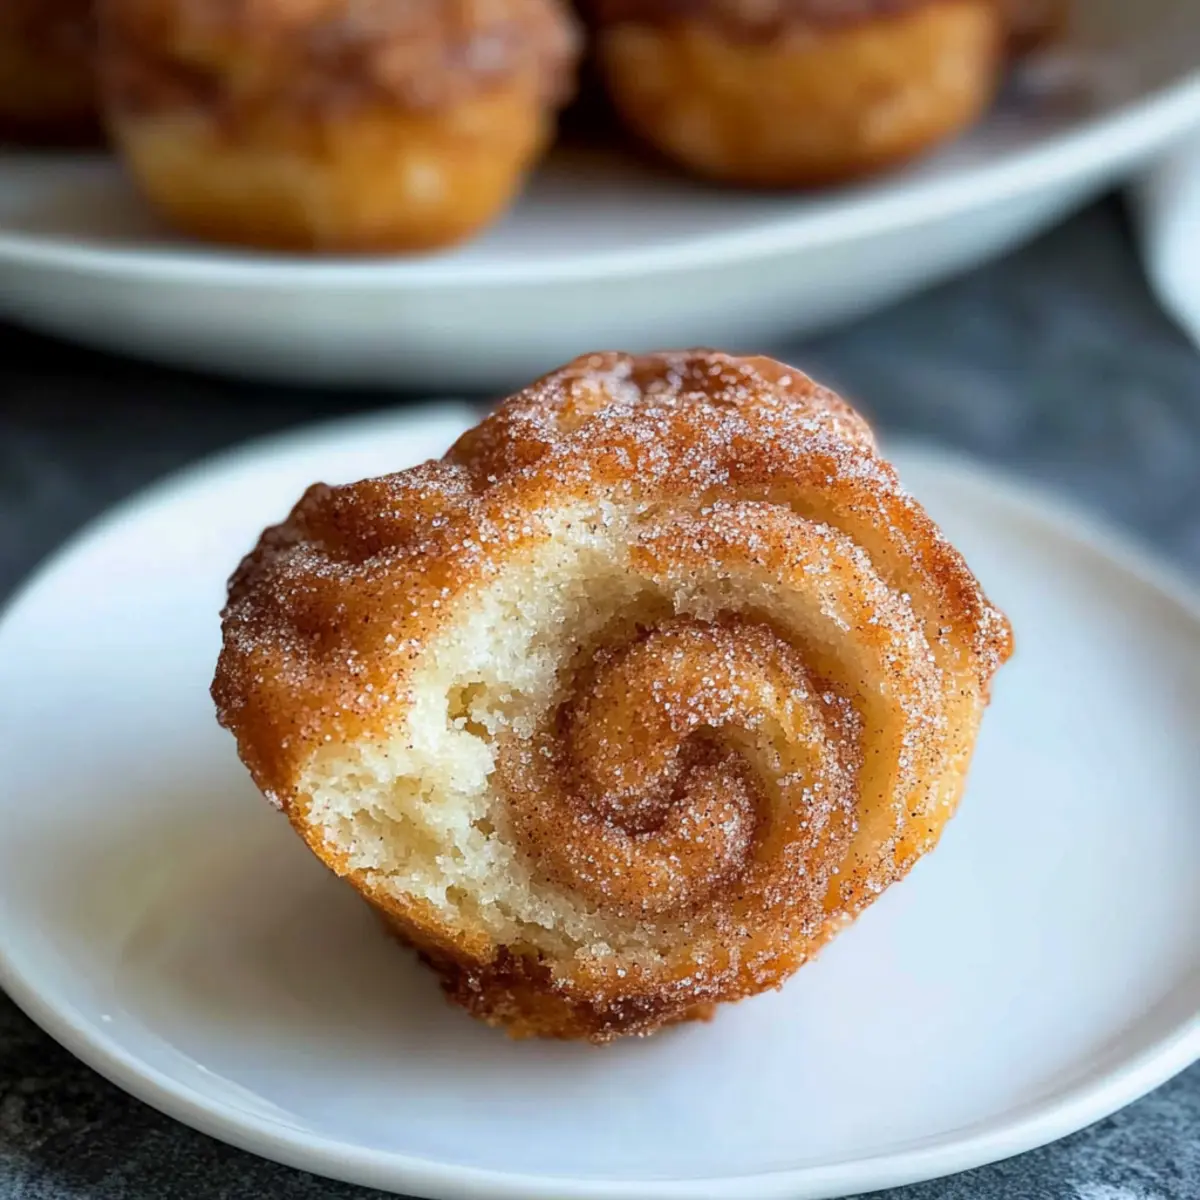
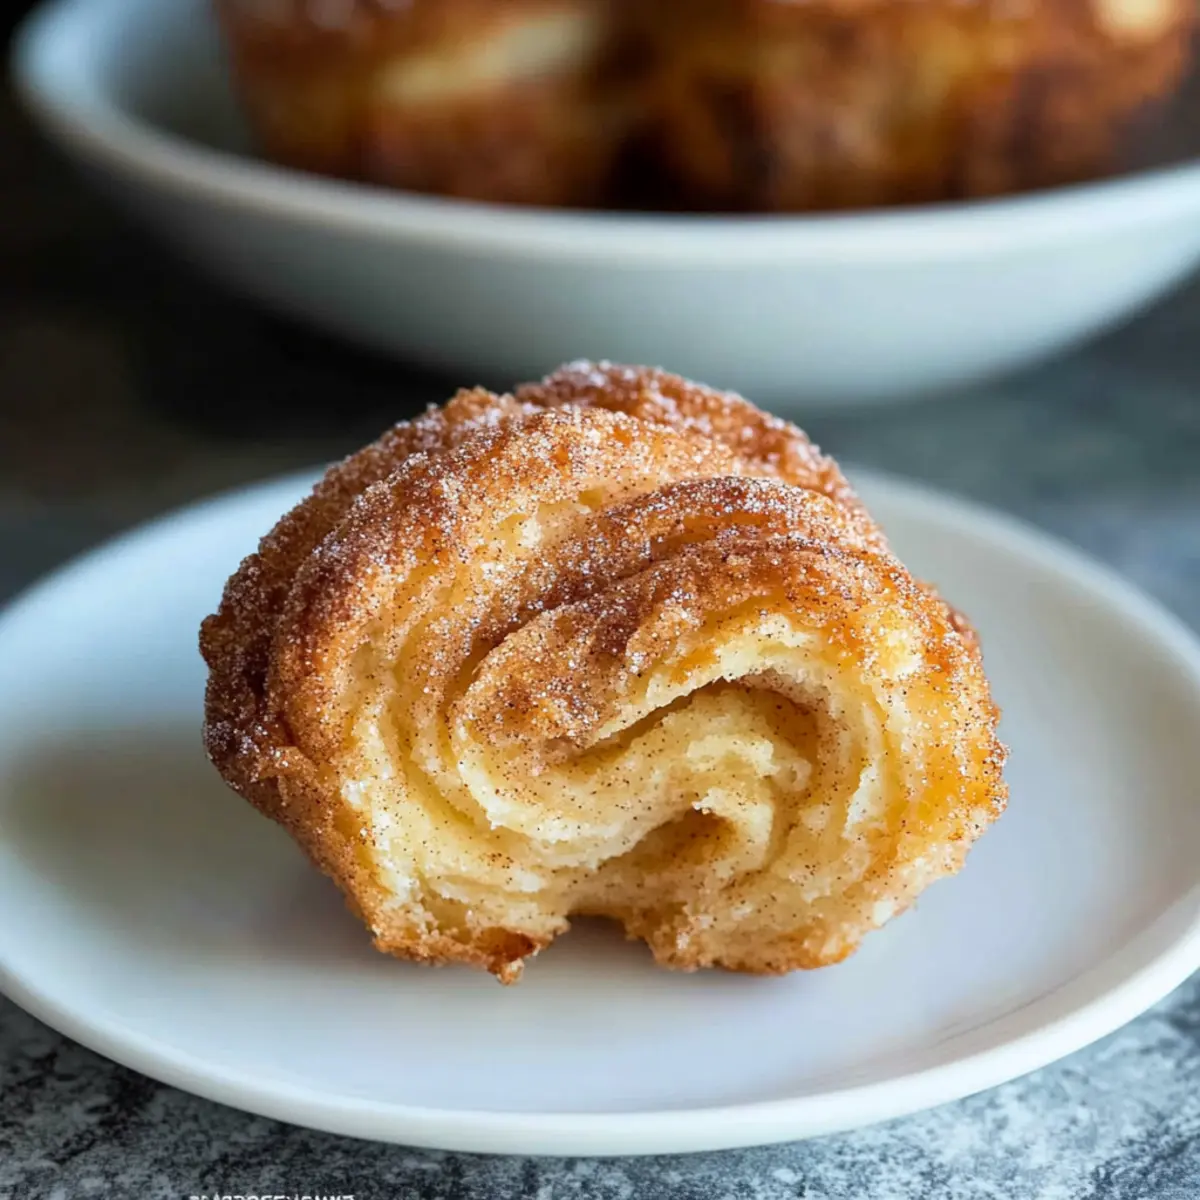
Step 7: Roll and Cut the Dough
Carefully cut the dough into strips about 2 inches wide. Starting from one end, roll each strip tightly into a spiral shape. These spiraled layers are what make your cruffins visually stunning. Place each rolled cruffin into a greased muffin tin, fitting them snugly but allowing a little space for expansion during rise.
Step 8: Allow to Rise
Cover the muffin tin loosely with a clean kitchen towel and place it in your preheated oven (set to 200ºF then turned off). Let the cruffins rise for approximately 45 minutes, or until they have doubled in size. This step is crucial for achieving a light, airy texture in your Gluten Free Cruffins, so be patient and let the dough do its work.
Step 9: Bake the Cruffins
After the rising period, preheat your oven to 375ºF. Once the oven is ready, brush the tops of the cruffins with any remaining melted butter to promote browning. Bake for 25-30 minutes, or until they turn a beautiful golden-brown color. Keep an eye on them towards the end to ensure they achieve that perfect crispy exterior.
Step 10: Finish with Cinnamon-Sugar
Once baked, remove the cruffins from the oven and allow them to cool slightly. While still warm, roll each cruffin in the reserved cinnamon-sugar mixture, ensuring they are well coated. This final touch adds an irresistible sweetness and crunch, making your Gluten Free Cruffins even more delightful and ready to enjoy!
What to Serve with Gluten-Free Cruffins
Imagine gathering your loved ones around the table, enjoying the aroma of freshly baked treats complemented by delightful pairings.
-
Creamy Coffee: The smooth, rich flavors of a well-brewed coffee enhance the warm, buttery notes of your cruffins, making each bite even more indulgent.
-
Fresh Fruit Salad: A medley of vibrant, juicy fruits adds a refreshing contrast to the sweet pastries, balancing the richness perfectly. Consider including citrus fruits for a zesty touch!
-
Greek Yogurt Parfait: Layering tangy Greek yogurt with berries and honey creates a delightful texture that’s creamy and satisfying, serving as a wholesome side.
-
Herbal Tea: Sipped alongside the cruffins, fragrant herbal tea can elevate the overall experience, with options like chamomile or mint providing soothing warmth.
-
Maple Syrup Drizzle: Drizzling a touch of maple syrup over your cruffins elevates their sweetness, creating an irresistible treat that feels like a warm hug.
-
Nutella Spread: For those with a penchant for chocolate, serving Nutella alongside your cruffins allows for a sumptuous dipping experience, making every bite truly memorable.
-
Chai Latte: Combining spices with warm milk, a chai latte brings aromatic flavors that beautifully complement the buttery layers of your cruffins.
-
Chocolate Mousse: For dessert lovers, a rich chocolate mousse offers a decadent finish, making your gathering feel extra special.
Variations & Substitutions for Gluten Free Cruffins
Feel free to get creative with your cruffins and explore exciting new flavors that will awaken your taste buds!
-
Berry Blast: Swap out some cane sugar for fresh or frozen mixed berries, adding natural sweetness and a tart twist. Imagine biting into a warm, berry-studded pastry that bursts with flavor.
-
Chocolate Chip Delight: Add ½ cup of gluten-free chocolate chips to the dough for a sweet, gooey surprise. These little pockets of chocolate will melt and create a heavenly treat that chocolate lovers will adore.
-
Maple Pecan: Replace the cinnamon-sugar mixture with chopped pecans and a drizzle of maple syrup prior to baking. This nutty variation brings a delightful crunch and comforting sweetness to your cruffins.
-
Coconut Cream: Use coconut milk instead of regular milk and add shredded coconut into the sugar mixture for a tropical flair. The combination of creamy coconut and flaky layers will transport you to a sunny beachside.
-
Chili Chocolate: For a daring twist, mix a dash of chili powder into the chocolate filling. The heat contrasts wonderfully with the sweetness, creating a unique cruffin experience that will leave a lasting impression.
-
Jam-Filled: Before rolling, spread your favorite jam (like raspberry or apricot) on the dough for added sweetness. This infusion creates a delicious surprise in the center of each cruffin, elevating your treat to new heights.
-
Savory Spin: Incorporate garlic powder and shredded cheese into the dough for a savory take on cruffins. Serve these beauties as an appetizer alongside a warm bowl of soup or salad.
If you are looking for more ideas, check out different variations on how to incorporate flavors and fillings into your cruffins, or perhaps explore our easy cruffin recipe for even more inspiration! Each variation is a delightful adventure waiting to be explored.
Expert Tips for Gluten-Free Cruffins
-
Butter Preparation: Freeze your butter overnight for easier grating and to achieve those wonderfully flaky layers in your Gluten-Free Cruffins.
-
Flour Selection: Always use a gluten-free flour blend designed for yeast recipes. This helps avoid a dense or crumbly texture, ensuring a delightful pastry.
-
One Rise Only: Remember to shape your cruffins before the first rise, as gluten-free dough only has one effective rise for the best results.
-
Temperature Control: Ensure your milk is at 110ºF when activating yeast. Too hot or too cold may hinder the yeast’s ability to rise the dough.
-
Uniform Slicing: When cutting your dough into strips, keep them even (about 2 inches wide) to ensure consistent baking and beautiful spirals.
Storage Tips for Gluten-Free Cruffins
Room Temperature: Store cruffins in an airtight container at room temperature for up to 3 days to maintain freshness and flavor.
Fridge: If you prefer to keep them longer, place in an airtight container in the fridge for up to 5 days. This helps them stay moist but may slightly alter texture.
Freezer: For longer storage, freeze cruffins in a freezer-safe bag for up to 2 months. Make sure to remove excess air to prevent freezer burn.
Reheating: To enjoy, thaw overnight in the fridge and reheat in a preheated oven at 350ºF for about 10 minutes for that fresh-baked taste. Enjoy your Gluten-Free Cruffins warm!
Make Ahead Options
These Gluten-Free Cruffins are perfect for busy home cooks looking to save time! You can prepare the dough and shape the cruffins up to 24 hours in advance. Simply follow the recipe until the dough is rolled and placed in the muffin tin, then cover and refrigerate until you’re ready to bake. For optimal quality, let the cruffins rest at room temperature for about 30 minutes before baking to ensure a fluffy rise. If you have extra cruffins, store them in an airtight container in the refrigerator for up to 3 days, or freeze them for longer storage. Just reheat in the oven until warm before serving, and they’ll be just as delicious!
Gluten Free Cruffins Recipe FAQs
What type of gluten-free flour should I use for the cruffins?
I recommend choosing a gluten-free flour blend that is specifically designed for yeast recipes, like Cup4Cup or Bob’s Red Mill Gluten-Free 1-to-1 Baking Flour. These blends have the right balance of proteins and starches to help achieve that lovely flaky texture crucial for gluten-free cruffins. Avoid regular one-to-one blends, as they may not rise properly.
How should I store leftover cruffins?
To keep your cruffins fresh, store them in an airtight container at room temperature for up to 3 days. If you’d like to extend their shelf life, transfer them to the refrigerator for an additional 2 days. Just keep in mind that refrigeration might affect the texture slightly, making them a bit denser. For the best flavor and texture, I suggest freezing leftovers.
Can I freeze gluten-free cruffins?
Absolutely! For freezing, allow the cruffins to cool completely, then place them in a single layer on a baking sheet until firm. Once frozen, transfer them into a freezer-safe bag, removing excess air to prevent freezer burn. They can be frozen for up to 2 months. To enjoy, simply thaw overnight in the fridge and reheat at 350ºF for about 10 minutes.
How can I prevent my cruffins from being too dense?
One crucial tip is to ensure that you’ve activated your yeast correctly; the milk should be warm (110ºF) but not hot, as excessive heat can kill the yeast. It’s also essential to incorporate the dry ingredients gently and avoid overmixing, as this can lead to a denser texture. Lastly, remember that gluten-free dough benefits from a single rise, so shape your cruffins before letting them rise to achieve that light and airy quality.
Are there any common allergens in gluten-free cruffins?
Yes, while gluten-free cruffins omit wheat, they may still contain other allergens like dairy (from butter and milk) and eggs if you choose to add them. To keep them dairy-free, opt for plant-based butters and non-dairy milk alternatives. Always check ingredient labels to confirm they are gluten-free, especially for active dry yeast and flour blends, as some brands may contain traces of gluten.
Delicious Gluten-Free Cruffins You’ll Want Every Morning
Ingredients
Equipment
Method
- Warm 1 cup of milk to 110ºF and mix with 1 tbsp of cane sugar and 2 tsp of active dry yeast. Let sit for 5 minutes.
- In a large bowl, whisk together 3 cups of gluten-free flour blend, 1/2 cup of cane sugar, and 1/4 tsp of salt.
- Grate 6 tbsp of frozen unsalted butter into the flour mixture and mix until crumbly.
- Add frothy yeast mixture and 1 tsp of vanilla extract to flour mixture and mix gently until combined.
- Dust a surface with gluten-free flour and roll the dough out to a 1/4-inch thick rectangle.
- Brush rolled dough with 3 tbsp melted butter and sprinkle the cinnamon-sugar mixture evenly on top.
- Cut the dough into 2-inch wide strips and roll each strip into a spiral shape.
- Place cruffins in a greased muffin tin and cover loosely. Let rise in a turned-off oven at 200ºF for 45 minutes.
- Preheat oven to 375ºF. Brush tops with melted butter and bake for 25-30 minutes until golden brown.
- Remove from oven, cool slightly, and roll warm cruffins in reserved cinnamon-sugar mixture before serving.