

As I pulled my newly baked cookies out of the oven, a playful vision of winter wonderland sprang to life in my kitchen. These Adorable Snowman Cookies are not just a delightful sight; they’re a celebration of the season wrapped in soft, buttery sweetness. With an easy-to-make dough and customizable toppings, these cookies are perfect for festive gatherings or cozy family baking days. They fit beautifully into any dietary preference—with variations for vegan and gluten-free options—ensuring everyone can enjoy a piece of joy. Imagine delighting your friends and family with these charming treats, each one a miniature masterpiece just waiting to bring smiles. Ready to whip up some magical memories with your very own snowmen? Let’s dive in!

Why are these Snowman Cookies a must?
Unforgettable and whimsical, these Adorable Snowman Cookies bring holiday cheer to any gathering. Versatile options allow for vegan and gluten-free variations, ensuring that everyone can indulge. Quick to make, their straightforward recipe appeals to both novice and seasoned bakers alike. Customizable toppings let your creativity shine, whether you want classic coconut or vibrant edible glitter. Whether decorating for a festive party or spending a cozy day in the kitchen, these cookies are the perfect way to spread joy this holiday season. Plus, if you’re seeking more sweet ideas, check out Birthday Cake Cookies and Coffee Cake Cookies.
Adorable Snowman Cookies Ingredients
• Get ready to create some delightful treats!
- Unsalted Butter – Provides richness and moisture; substitute with margarine for a dairy-free option.
- Sugar – Adds sweetness and helps in browning; feel free to adjust for less sweetness as desired.
- Eggs – Binds ingredients and adds moisture; use a flaxseed meal mixture (1 tbsp meal + 2.5 tbsp water per egg) for a vegan alternative.
- Vanilla Extract – Enhances flavor; almond extract can be a fun substitute for a unique twist!
- All-Purpose Flour – Provides structure; can be replaced with gluten-free flour for a gluten-free Adorable Snowman Cookies version.
- Confectioner’s Sugar – Used for the glaze, delivering sweetness; powdered sugar may work for a less sweet icing.
- Water – Adjust for glaze consistency to make it just right.
- Red Food Colorant – For decorating; opt for gel for a stronger and more vibrant hue.
- Coconut Flakes – For a snowy effect; substitute with edible glitter for added sparkle and creativity.
- Black Food Coloring Pencil – Used for facial details; chocolate chips can be a fun alternative for the eyes.
Step‑by‑Step Instructions for Adorable Snowman Cookies
Step 1: Prepare the Dough
In a large mixing bowl, cream together 1 cup of unsalted butter and 1 cup of sugar until the mixture is fluffy and pale, about 3-5 minutes. Next, add 2 eggs and 1 teaspoon of vanilla extract, mixing until combined. Gradually stir in 3 cups of all-purpose flour until the dough is smooth and cohesive, with a soft consistency that holds its shape.
Step 2: Chill the Dough
Once your dough is well-prepared, wrap it tightly in plastic wrap and place it in the refrigerator for at least 2 hours. This chilling time is crucial as it prevents the cookies from spreading during baking. While the dough chills, you can prepare your baking sheets by lining them with parchment paper for easy cookie removal later on.
Step 3: Shape the Cookies
After chilling, preheat your oven to 180°C (356°F). Roll out the chilled dough on a floured surface to about 1/4-inch thickness. Using cookie cutters, cut out 10 large circles for the snowman bodies and 10 smaller circles for the heads. Arrange the cut-out shapes on the prepared baking sheets, leaving some space between each cookie for even baking.
Step 4: Bake the Cookies
Place the baking sheets in the preheated oven and bake the cookies for 8-10 minutes, or until the edges are lightly golden. Make sure to keep an eye on them as baking times can vary. Once done, remove the sheets from the oven and allow the cookies to cool on a wire rack until completely set before decorating.
Step 5: Decorate the Cookies
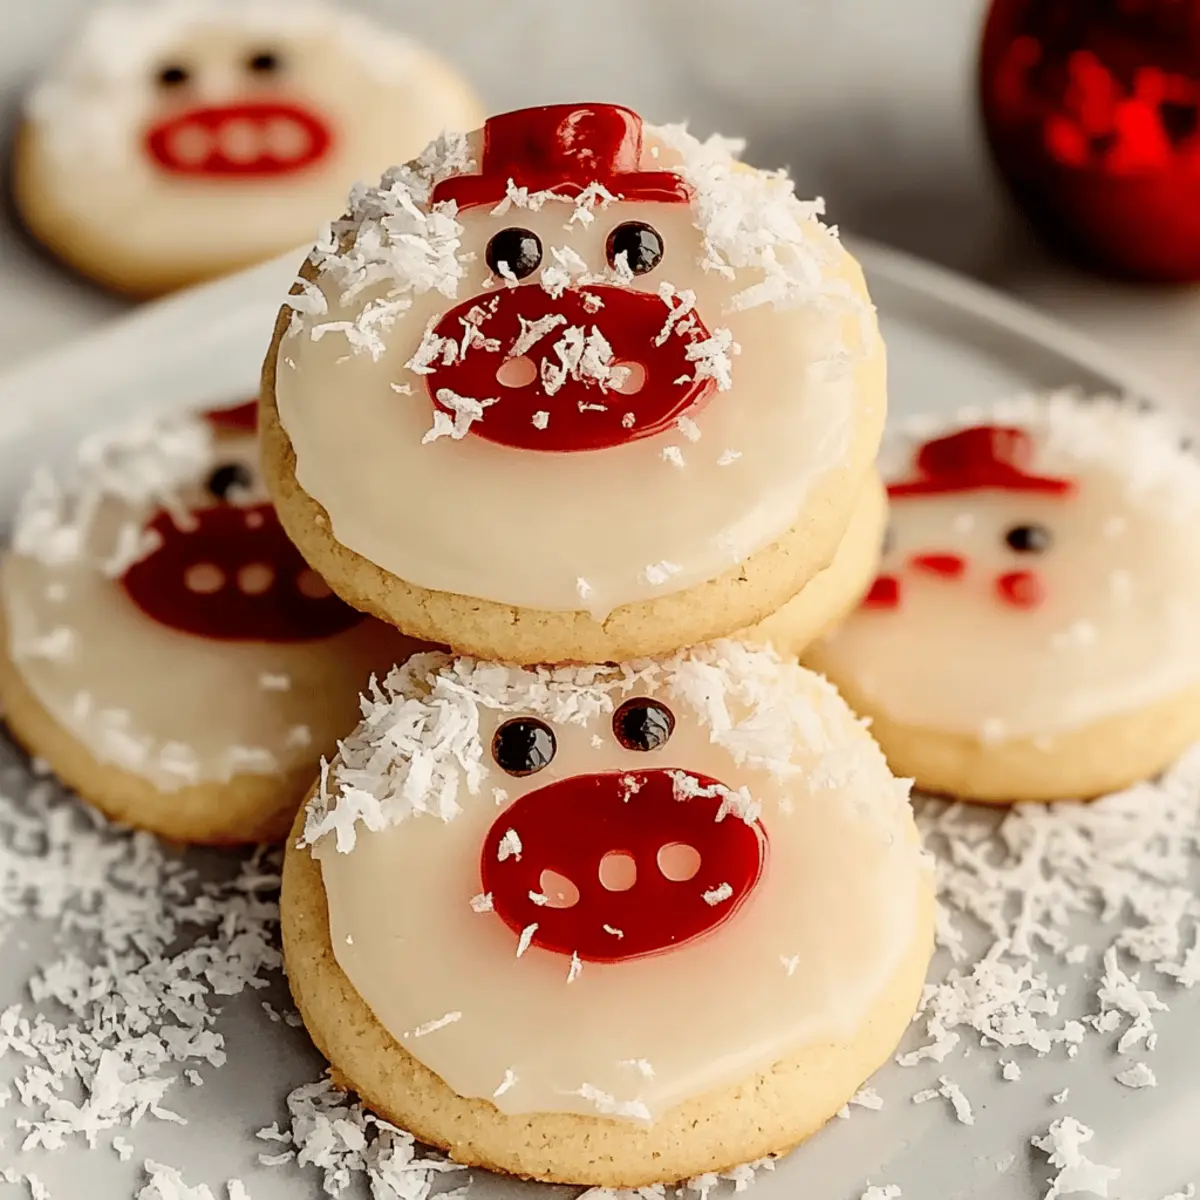
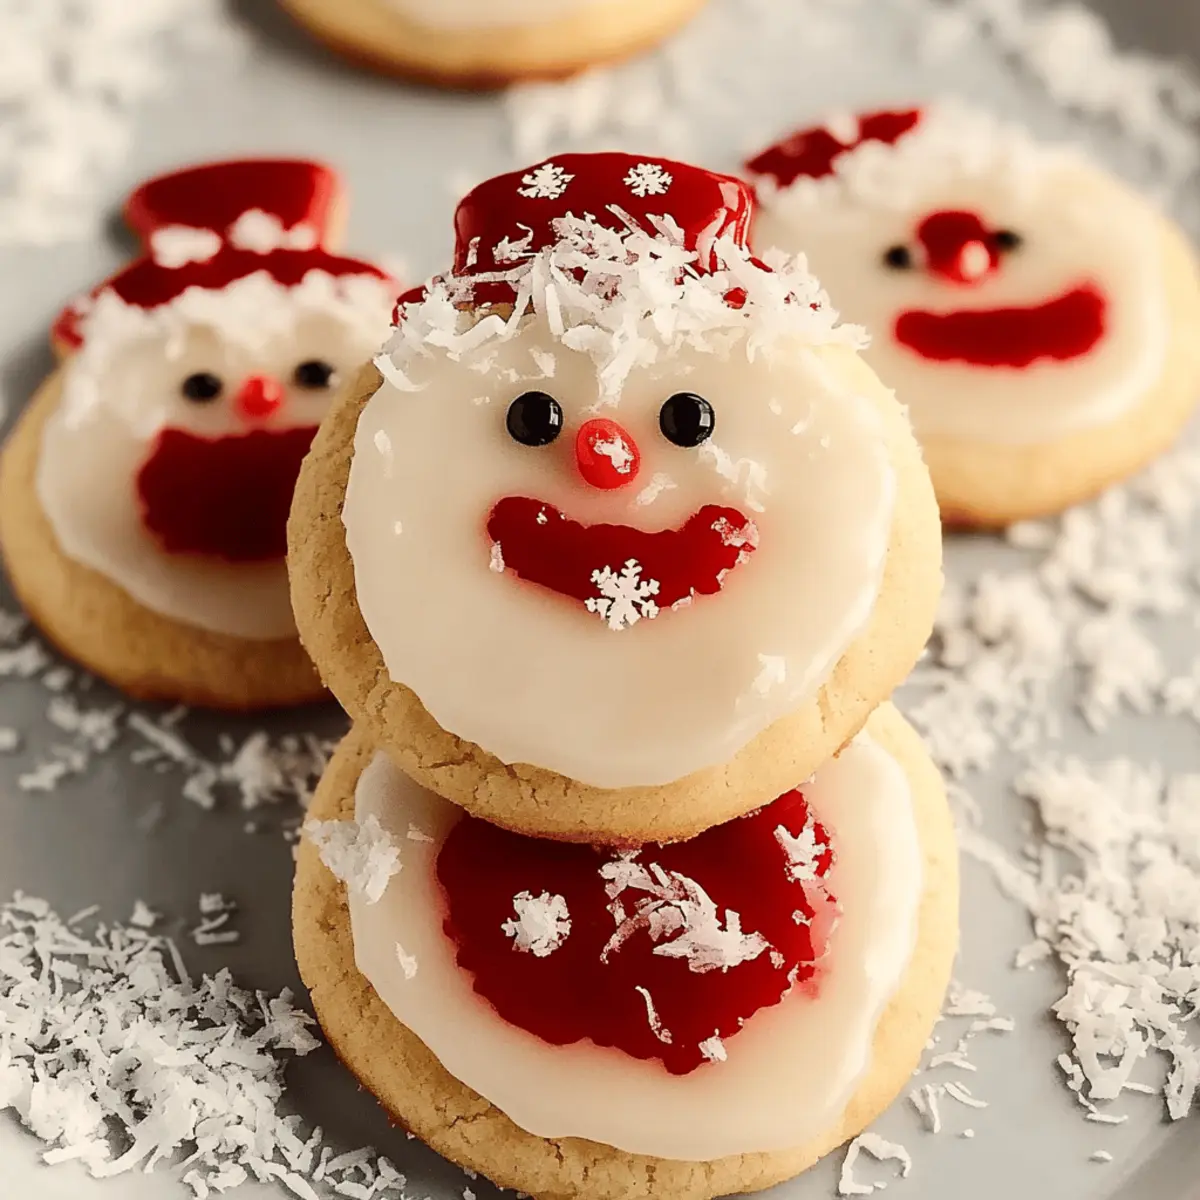
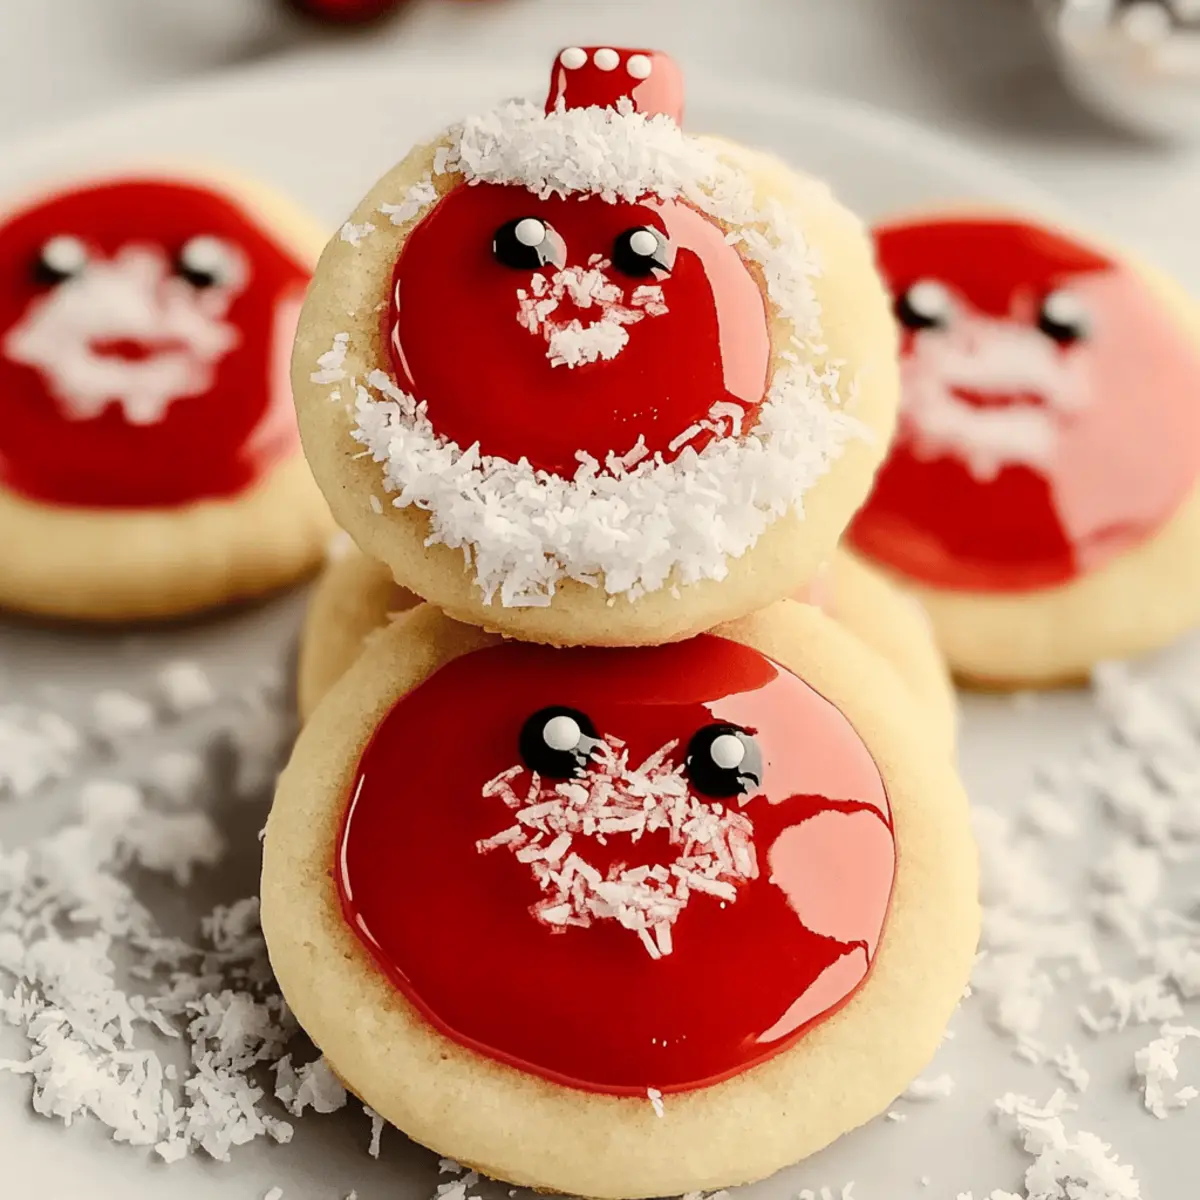
For the glaze, whisk together 2 cups of confectioner’s sugar and enough water to achieve a thick but pourable consistency. Stir in a few drops of red food colorant for a festive touch. Dip the larger cookies into this glossy white glaze, then immediately sprinkle with coconut flakes before stacking the smaller cookies on top to form the snowman’s head.
Step 6: Add Finishing Touches
Using a black food coloring pencil, add facial details like eyes and a smile on your stacked snowman cookies. If you prefer, chocolate chips can be used for the eyes for a tasty twist. Allow the decorations to dry completely before serving or storing, ensuring your Adorable Snowman Cookies are as delightful as they are delicious!
How to Store and Freeze Adorable Snowman Cookies
-
Room Temperature: Store cookies in an airtight container at room temperature for up to 1 week, keeping them fresh and soft for all your holiday gatherings.
-
Fridge: For longer freshness, these cookies can be refrigerated in an airtight container for up to 2 weeks; this helps to maintain their flavor and texture.
-
Freezer: Freeze undecorated cookies for up to 1 month. Just wrap them tightly in plastic wrap and place them in a freezer bag for easy storage.
-
Reheating: When you’re ready to enjoy, thaw cookies overnight in the refrigerator before decorating to bring back their delightful appeal for your festive celebrations.
Expert Tips for Adorable Snowman Cookies
-
Chill the Dough: Ensure the dough is well-chilled for at least 2 hours to maintain its shape during baking. This step prevents spreading and ensures your snowmen stay adorable.
-
Sticky Dough Fix: If your dough feels sticky, add flour gradually, but be careful not to over-flour it—this can lead to tough cookies, which can mask the delightful softness of your Adorable Snowman Cookies.
-
Glaze Application: Let the glaze dry completely before adding detailed decorations like facial features. This prevents smudging and keeps your cookies looking festive and charming.
-
Creative Decorations: Don’t hesitate to let your creativity shine! Try adding edible glitter along with coconut flakes for a dazzling snowy effect or use different food colorants for a variety of snowman designs.
-
Variations Galore: Don’t forget that these cookies are customizable. Use gluten-free flour for a gluten-free version or incorporate spices like cinnamon for warmth, making them a perfect fit for any dietary preferences!
What to Serve with Adorable Snowman Cookies
The festive spirit fills the air as you delight in these charming treats, perfect for pairing with a variety of holiday favorites.
-
Hot Chocolate: Perfectly indulgent, rich hot chocolate enhances the sweetness of your cookies and brings warmth to the festive season.
-
Eggnog: This creamy holiday classic offers a delightful spiced flavor that complements the buttery sweetness of the cookies beautifully.
-
Fruit Salad: A refreshing mix of seasonal fruits adds a burst of freshness that contrasts nicely with the rich, sweet flavors of the cookies.
-
Cheese Platter: Soft cheeses with a hint of sweetness harmonize unexpectedly well with the festive snowmen and provide a sophisticated touch to your gathering.
-
Christmas Tea: A fragrant blend of spices and herbs warms the heart, making it the perfect drink to sip alongside your delightful snowmen.
-
Gingerbread Men: Add a dash of nostalgia by serving classic gingerbread alongside your snowmen for a double dose of holiday cheer.
These pairings not only enhance the festive experience but also make for intriguing conversations as guests enjoy these enchanting treats!
Adorable Snowman Cookies Variations & Substitutions
Feel free to mix things up and make these cookies your own with these exciting ideas!
- Dairy-Free/Vegan: Swap unsalted butter for margarine and use a flaxseed meal mixture instead of eggs to create a fun vegan version.
- Gluten-Free: Replace all-purpose flour with a gluten-free flour blend to make these cookies suitable for everyone at your gathering. Baking can be inclusive!
- Minty Twist: Add peppermint extract to the dough or glaze for a refreshing holiday vibe that will tickle your taste buds. The coolness of mint perfectly complements the sweetness!
- Chocolate Chip Version: Fold in some chocolate chips to the dough for an extra touch of sweetness. Imagine biting into your snowman and discovering a delicious melted chocolate surprise!
- Festive Shapes: Use different cookie cutters for exciting holiday shapes like Christmas trees or stars, giving these cookies a fresh twist while maintaining their delightful charm.
- Flavor Enhancements: Incorporate spices like nutmeg or swap red food colorant with green or blue for vibrant designs. Each bite can take on a different festive flavor or appearance!
- Coconut-Free: For a different look, skip the coconut flakes and decorate with edible glitter instead for a sparkly winter effect, ensuring your cookies shine bright on any platter.
- Additional Fillings: Try adding in dried fruit like cranberries or raisins into the dough for a fruity surprise that not only adds flavor but also a pop of color!
With these variations, your Adorable Snowman Cookies can take on new flavors and themes, sure to delight friends and family. And if you’re ready for more holiday baking fun, check out Style Oreo Cookies for another delightful treat!
Make Ahead Options
These Adorable Snowman Cookies are ideal for busy home cooks looking to save time during the festive season! You can prepare the cookie dough up to 24 hours in advance by wrapping it tightly in plastic wrap and refrigerating it. This chilling step not only enhances the flavor but also ensures your cookies hold their shape while baking. Additionally, cookies can be baked 3 days ahead and stored in an airtight container at room temperature, maintaining their delightful texture. When you’re ready to serve, simply decorate with glaze and toppings right before presentation for that fresh, festive look. Enjoy stress-free baking and delightful treats!
Adorable Snowman Cookies Recipe FAQs
What kind of butter should I use for these cookies?
I recommend using unsalted butter for the best flavor and moisture. If you’re looking for a dairy-free option, margarine can work as a suitable substitute, giving you similar results in texture and taste.
How can I tell if my eggs are fresh?
Absolutely! A quick freshness test involves placing the eggs in a bowl of water. Fresh eggs will sink to the bottom and lay flat. If they stand upright or float, they may have gone bad—better to toss them out for your Snowman Cookies!
What’s the best way to store leftover cookies?
For optimal freshness, keep your Adorable Snowman Cookies in an airtight container at room temperature for up to 1 week. If you want to extend their life, refrigerate them for up to 2 weeks. This keeps them soft and delightful!
Can I freeze these cookies?
Yes, you can freeze your cookies! To do this, wrap the undecorated cookies tightly in plastic wrap and place them in a freezer bag. They should retain their deliciousness for up to 1 month. When you’re ready to enjoy, simply thaw them overnight in the refrigerator before decorating.
Are there any allergy considerations for this recipe?
Very! When making these cookies, be mindful of any allergies your guests might have. For nut allergies, ensure that any substitutes like almond extract are omitted and always read labels when using pre-packaged ingredients. If you’re baking for someone with egg allergies, consider using a flaxseed mixture (1 tbsp of flaxseed meal mixed with 2.5 tbsp of water per egg) as a great vegan alternative.
What if my dough is too sticky?
No worries! If you’re finding your dough sticky, gradually add more flour to achieve a smoother consistency. However, take care not to over-flour it, as this can lead to tough cookies. I often add just a tablespoon at a time until the dough is workable. Enjoy the baking process!
Adorable Snowman Cookies: Easy Holiday Treats for Everyone
Ingredients
Equipment
Method
- Cream together the butter and sugar until fluffy and pale, about 3-5 minutes.
- Add eggs and vanilla, mixing until combined.
- Gradually stir in flour until smooth and cohesive.
- Wrap the dough in plastic wrap and refrigerate for at least 2 hours.
- Preheat the oven to 180°C (356°F). Roll out the chilled dough to 1/4-inch thickness.
- Cut out circles for the bodies and heads, then arrange them on lined baking sheets.
- Bake for 8-10 minutes until edges are lightly golden. Cool on a wire rack.
- Mix confectioner’s sugar with enough water to create a glaze, add red food color.
- Dip larger cookies into the glaze, sprinkle with coconut flakes, and stack smaller cookies on top.
- Use a black food coloring pencil to add eyes and smiles, or use chocolate chips.