

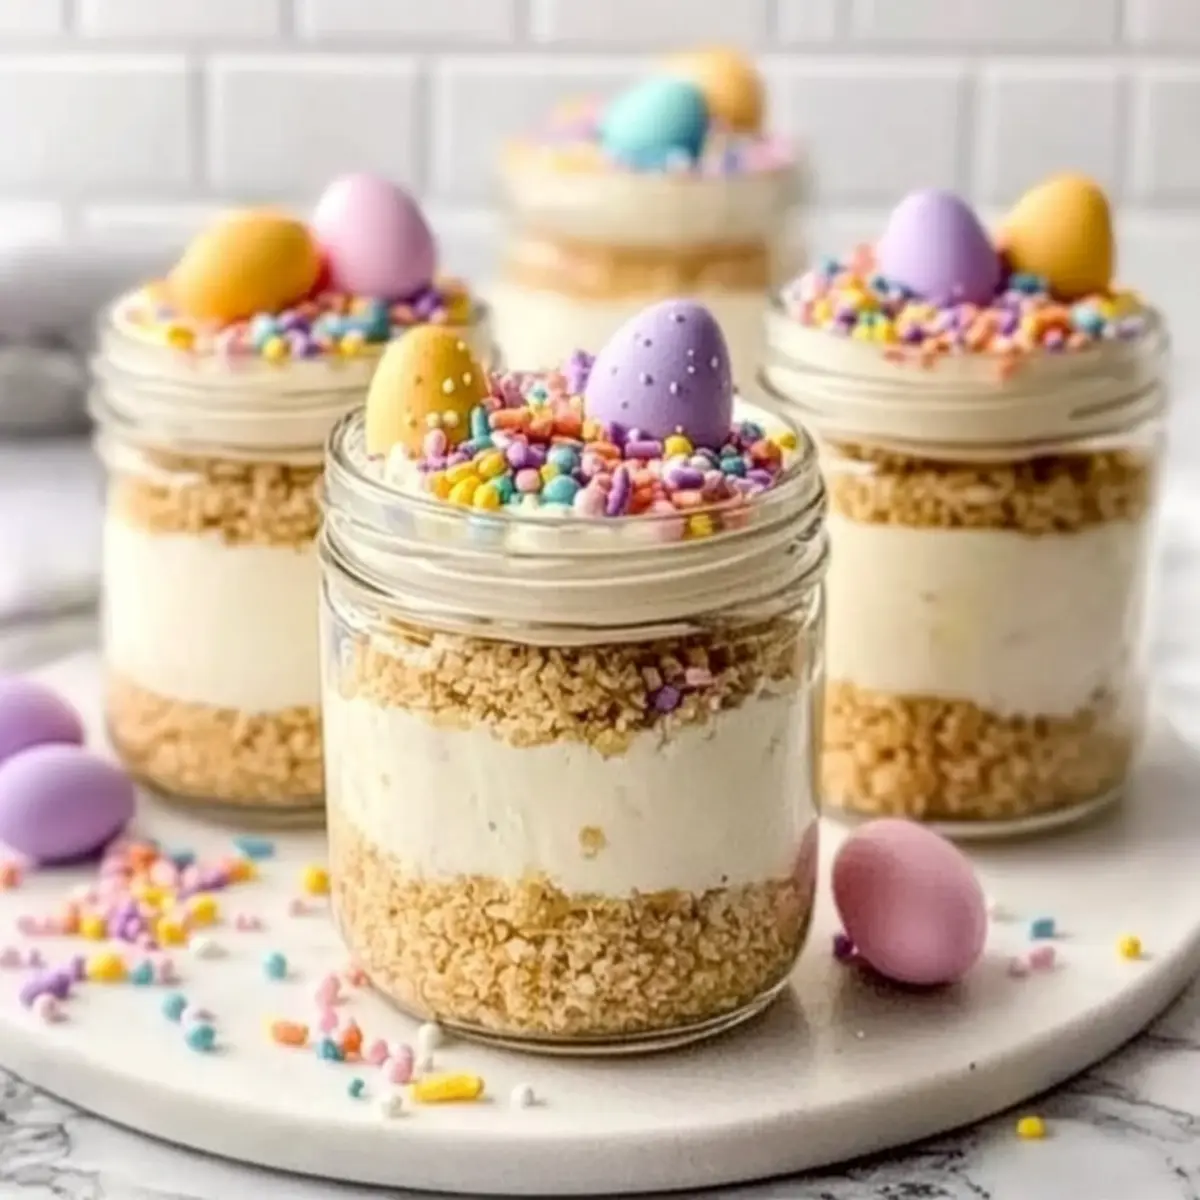
As I stood in my kitchen, I couldn’t help but smile at the vibrant colors of spring filtering through the windows, calling for something special. That’s when the idea for these Mini Easter Cheesecake Jars struck me—a delightful no-bake treat that combines the joy of Easter with the lightness of a creamy cheesecake. These jars are a fantastic way to enjoy a portion-controlled dessert without sacrificing flavor, making them perfect for sharing with loved ones of all ages. With minimal prep time and the ability to make them ahead of schedule, you’ll be sure to impress your guests without the last-minute stress. So, are you ready to brighten up your festivities with these charming little jars?
Why Are Mini Easter Cheesecake Jars Perfect?
Vibrant, Eye-Catching Appeal: These delightful jars are a feast for the eyes, featuring pastel colors that scream spring celebrations.
No-Bake Convenience: Enjoy the ease of a no-bake recipe that saves you precious time in the kitchen.
Portion-Controlled Joy: Each jar offers the perfect serving size, making it easy to indulge without overdoing it!
Customize to Your Liking: From lemon twists to berry layers, these jars can be tailored to satisfy any palate.
Kid-Friendly Fun: Kids adore the colorful toppings like mini chocolate eggs and sprinkles, ensuring smiles all around.
Make-Ahead Magic: Prepare these in advance and simply chill them until it’s time to serve, taking the stress out of entertaining!
Mini Easter Cheesecake Jars Ingredients
For the Crust
• Graham Cracker Crumbs (1 1/2 cups) – Structure the base nicely; swap with digestive biscuits for a unique flavor.
• Unsalted Butter, melted (5 tablespoons) – Acts as the binding agent; use coconut oil for a dairy-free twist.
• Sugar (2 tablespoons) – Adds sweetness to the crust; brown sugar works great for a richer flavor.
• Salt (pinch) – Enhances the overall flavor perfectly.
For the Cheesecake Filling
• Cream Cheese, softened (12 oz) – The creamy base for the cheesecake; ensure it’s just softened, not melted.
• Powdered Sugar (1/2 cup) – Sweetens and smoothens the texture; essential for that perfect bite.
• Vanilla Extract (1 teaspoon) – Enhances the flavor beautifully, making it truly delicious.
• Lemon Juice (1 tablespoon) – Brightens up the cheesecake; lime juice is a great substitute for a tropical flair.
• Heavy Whipping Cream, cold (1 cup) – Adds a light and airy texture; whip until medium-stiff peaks form.
• Gel Food Coloring (optional) – Use to tint the filling; pastel shades bring that spring vibe to life.
For the Topping
• Mini Chocolate Eggs or Jelly Beans – Fun decorative touches that add flavor and a festive spirit.
• Pastel Sprinkles or Shredded Coconut (optional) – Great for decoration; dyed green coconut mimics grass for added charm.
These Mini Easter Cheesecake Jars are not only visually stunning but also customizable, making them a hit for any spring gathering!
Step‑by‑Step Instructions for Mini Easter Cheesecake Jars
Step 1: Make the Crust
In a mixing bowl, combine 1 ½ cups of graham cracker crumbs, 2 tablespoons of sugar, a pinch of salt, and 5 tablespoons of melted unsalted butter. Stir until the mixture resembles wet sand. Press it firmly into the bottom of each jar using a measuring cup or your fingers, ensuring an even layer that sets the foundation for your Mini Easter Cheesecake Jars.
Step 2: Whip the Cream
Take a chilled mixing bowl and pour in 1 cup of cold heavy whipping cream. Using an electric mixer, whip the cream on medium speed until medium-stiff peaks form, which will take about 3-5 minutes. Be attentive to avoid over-whipping, as we want a fluffy, light texture that will enhance the creaminess of your cheesecake filling.
Step 3: Mix Cheesecake Filling
In another mixing bowl, beat together 12 oz of softened cream cheese, ½ cup of powdered sugar, 1 teaspoon of vanilla extract, and 1 tablespoon of lemon juice. Use a hand mixer to blend until the mixture is smooth and fluffy, taking about 3 minutes. This creamy base is what makes your Mini Easter Cheesecake Jars so delightful and rich, bringing in that luscious flavor.
Step 4: Fold Whipped Cream
Gently fold the whipped cream mixture into the cheesecake base in two additions, using a spatula. This technique ensures that the airy texture is preserved while incorporating the two mixtures. Keep folding until there are no streaks of whipped cream visible; this process is key to creating a light and fluffy filling for your jars.
Step 5: Add Color (optional)
If you’d like to add a festive touch to your filling, now is the time to incorporate some gel food coloring. Start with a few drops and gently mix until you achieve a pastel shade that excites the eye. This step adds a cheerful pop to your Mini Easter Cheesecake Jars, perfect for that spring celebration!
Step 6: Fill the Jars
Using a piping bag or a spoon, carefully fill each jar with the cheesecake mixture, layering it on top of the crust. Leave a little space at the top for your desired toppings, creating a beautiful layered effect, which enhances both the presentation and the taste of your Mini Easter Cheesecake Jars.
Step 7: Chill
Cover each jar with a lid or plastic wrap and refrigerate for at least 2 hours, or up to 24 hours if you want to prepare ahead. This chilling time allows the flavors to meld and the texture to set perfectly, making each bite of your Mini Easter Cheesecake Jars creamy and indulgent.
Step 8: Decorate & Serve
Just before serving, take your Mini Easter Cheesecake Jars from the fridge and add your chosen toppings, such as mini chocolate eggs, jelly beans, pastel sprinkles, or shredded coconut. This final touch adds both flavor and decoration, making each jar a delightful treat that celebrates the spirit of Easter!
Mini Easter Cheesecake Jars Variations & Substitutions
Feel free to explore these delicious variations and make the recipe uniquely yours!
-
Lemon Twist: Replace vanilla with lemon extract and stir in fresh lemon zest for a zesty surprise. The citrusy brightness pairs beautifully with the creamy filling!
-
Chocolate Delight: Swap out regular graham cracker crumbs for chocolate cookie crumbs, or add cocoa powder to the filling for a decadent twist. It’s a favorite among chocolate lovers!
-
Berry Layer: Add a layer of fresh strawberry or raspberry compote between the crust and cheesecake filling for a fruity burst. This twist introduces a delightful contrast to the creamy texture!
-
Nutty Twist: Mix in pistachio paste into the filling, topping with crushed pistachios for added flavor and crunch. The nutty flavor complements the cheesecake perfectly.
-
Dairy-Free Version: Substitute cream cheese with a dairy-free option such as cashew cream. This variation ensures everyone can enjoy this delicious dessert!
-
Tropical Mango: Incorporate pureed mango into the cheesecake filling for a tropical flair. It’s like a mini vacation in a jar, perfect for warm days!
-
Extra Crunch: For added texture, mix in some toasted coconut flakes or crushed nuts into the graham cracker crust. It adds a delightful crunch that enhances every bite.
-
Spicy Kick: Introduce a hint of cinnamon or nutmeg into the filling for a warming flavor. The subtle spice contrasts wonderfully with the sweetness of the cheesecake.
For even more fun dessert ideas, you might want to check out these delightful options like Patriotic Mini Cheesecakes or Strawberry Cheesecake Bars. Enjoy your Easter celebrations with these delightful variations!
Expert Tips for Mini Easter Cheesecake Jars
-
Achieve Perfect Creaminess: Ensure your cream cheese is just softened, not melted. This will help you avoid a runny filling in your Mini Easter Cheesecake Jars.
-
Proper Whipping Technique: Whip your heavy cream to medium-stiff peaks for a light and airy texture. Over-whipping can turn it into butter, so watch closely!
-
Gentle Folding: When combining your whipped cream with the cheesecake mixture, fold gently to maintain that airy structure. Overmixing may deflate the fluffy goodness.
-
Chill for Best Flavor: The longer the jars chill, the better the flavors meld together. Aim for a minimum of 2 hours, but overnight is fantastic if you can wait!
-
Toppings Timing: Add decorative toppings right before serving to prevent any sogginess or color bleeding, ensuring your Mini Easter Cheesecake Jars look as delightful as they taste!
Make Ahead Options
These Mini Easter Cheesecake Jars are perfect for busy home cooks looking to save time and stress during festive gatherings! You can prepare the crust and cheesecake filling up to 24 hours in advance. Simply make the crust and layer it in the jars, then mix the cheesecake filling and refrigerate it separately. When you’re ready to enjoy, fill the jars with the prepared filling and chill for a couple of hours to set. To maintain that delightful fresh flavor and texture, only add toppings—like mini chocolate eggs or sprinkles—just before serving. This way, you’ll have effortless, delicious desserts ready to impress, ensuring a joyful celebration!
Storage Tips for Mini Easter Cheesecake Jars
-
Fridge: Keep the jars covered in the refrigerator for up to 3 days. This ensures your Mini Easter Cheesecake Jars stay fresh and delicious, ready to be enjoyed.
-
Freezer: For longer storage, freeze the jars without toppings for up to 1 month. To enjoy them, simply thaw overnight in the refrigerator, maintaining that creamy texture.
-
Airtight Containers: If you have extra cheesecake filling or crust, store them separately in airtight containers. This way, you can whip up fresh jars anytime!
-
Reheating: Since these are no-bake treats, there’s no need to reheat them. Just top them with your favorite garnishes and serve cold for the best experience.
What to Serve with Mini Easter Cheesecake Jars
Experience the delight of a complete spring gathering by complementing your charming dessert with these delicious pairings.
-
Fresh Berry Medley: A vibrant mix of strawberries, blueberries, and raspberries enhances the cheesecake’s creaminess with a pop of tangy freshness.
-
Lemon Tart: The zesty, buttery flavors of a delectable lemon tart balance the sweetness of your cheesecake jars, offering a harmonizing contrast.
-
Minty Green Salad: Crisp greens tossed with a zesty vinaigrette add a refreshing crunch, cleansing the palate and brightening the entire meal.
-
Sparkling Lemonade: Bubbly and refreshing, a homemade sparkling lemonade provides a citrusy kick that pairs perfectly with the rich cheesecake.
-
Coffee or Tea: Serve a warm cup of coffee or herbal tea alongside for a comforting finish, enhancing the flavors of your Mini Easter Cheesecake Jars.
-
Chocolate-Dipped Strawberries: These indulgent treats add a layer of decadence, beautifully tying into the festive spirit while providing a juicy bite.
Indulge your loved ones in a delightful array of flavors and textures, making your gathering unforgettable!
Mini Easter Cheesecake Jars Recipe FAQs
How do I choose the right graham cracker crumbs?
Absolutely! Opt for fresh, finely crushed graham cracker crumbs that are free from dark spots or excess moisture to ensure a crumbly, flavorful crust. If you’re in the mood for a twist, consider using digestive biscuits for a unique taste and texture that pairs beautifully with the creamy filling.
What is the best way to store Mini Easter Cheesecake Jars?
Very good question! You can keep these delightful jars covered in the refrigerator for up to 3 days, maintaining their freshness and flavor. If you’re looking to store them longer, freeze without toppings for up to 1 month. Just make sure to thaw them in the refrigerator overnight to preserve that creamy texture.
Can I freeze Mini Easter Cheesecake Jars?
Yes! To freeze, simply avoid adding toppings and place the jars in an airtight container or wrap them tightly with plastic wrap. They can be frozen for up to 1 month. When you’re ready to enjoy them, just pop them in the fridge overnight to thaw and add your decorative toppings just before serving.
What if my cheesecake filling turns out runny?
Don’t panic! If your filling is too runny, it might be that your cream cheese was melted instead of just softened, or you could have overwhipped the heavy cream. To troubleshoot, you can try refrigerating the jars for a while to help the filling set. If it’s still too soft, consider adding a bit more powdered sugar and gently mixing to thicken it up for a creamier texture.
Are Mini Easter Cheesecake Jars safe for kids and people with allergies?
Absolutely! These jars are kid-friendly and customizable to the dietary needs of your guests. Just ensure you use gluten-free graham crackers and double-check that any candies or toppings are also gluten-free for those with allergies. You can even swap regular cream cheese for a dairy-free cream cheese alternative to cater to any dietary restrictions, keeping the fun alive for everyone!
Mini Easter Cheesecake Jars That Brighten Your Spring Treats
Ingredients
Equipment
Method
- In a mixing bowl, combine graham cracker crumbs, sugar, salt, and melted unsalted butter. Stir until resembling wet sand. Press firmly into the bottom of each jar.
- Pour cold heavy whipping cream into a chilled mixing bowl and whip on medium speed until medium-stiff peaks form, about 3-5 minutes.
- In another mixing bowl, beat together softened cream cheese, powdered sugar, vanilla extract, and lemon juice until smooth and fluffy, about 3 minutes.
- Gently fold the whipped cream mixture into the cheesecake base in two additions until no streaks are visible.
- Incorporate gel food coloring if desired, mixing until the desired pastel shade is achieved.
- Fill each jar with the cheesecake mixture, leaving space for toppings, creating a layered effect.
- Cover each jar and refrigerate for at least 2 hours. For best results, chill up to 24 hours.
- Before serving, add toppings such as mini chocolate eggs, jelly beans, sprinkles, or shredded coconut.