

As the aroma of coconut and pandan wafts through my kitchen, I can’t help but feel transported to a bustling Vietnamese market filled with vibrant colors and enchanting flavors. Today, I’m excited to share my take on an Easy Banh Bo Nuong, or Vietnamese Honeycomb Cake—a gluten-free dessert that delights not just the palate but the senses as well. With its airy texture and eye-catching honeycomb design, this cake is not only a crowd-pleaser but also a breeze to whip up, making it a fantastic choice for both gatherings and quiet afternoons at home. If you’re looking for a unique dessert that’s free from gluten and dairy while also offering tropical sweetness, you’re in for a treat! Ready to discover how to create this fluffy delight? Let’s dive in!

Why Try This Vietnamese Honeycomb Cake?
Irresistible Aroma: The enchanting blend of coconut and pandan fills your kitchen with a tropical scent, setting the stage for a delightful dessert.
Gluten-Free Delight: Perfect for those seeking gluten-free options, this cake caters to varied dietary preferences, ensuring everyone can indulge.
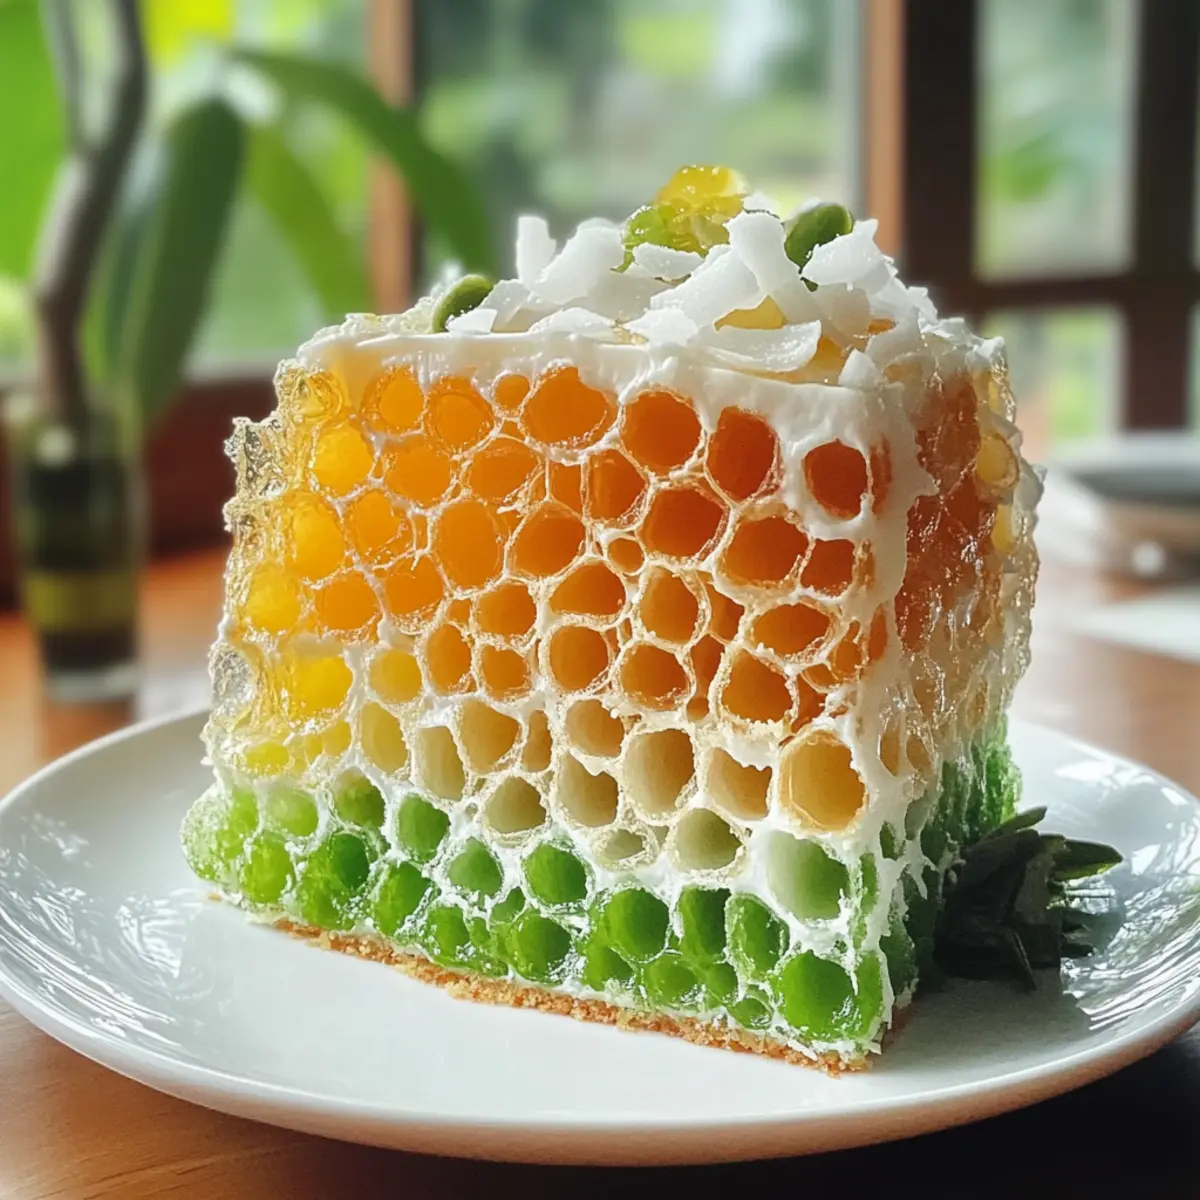
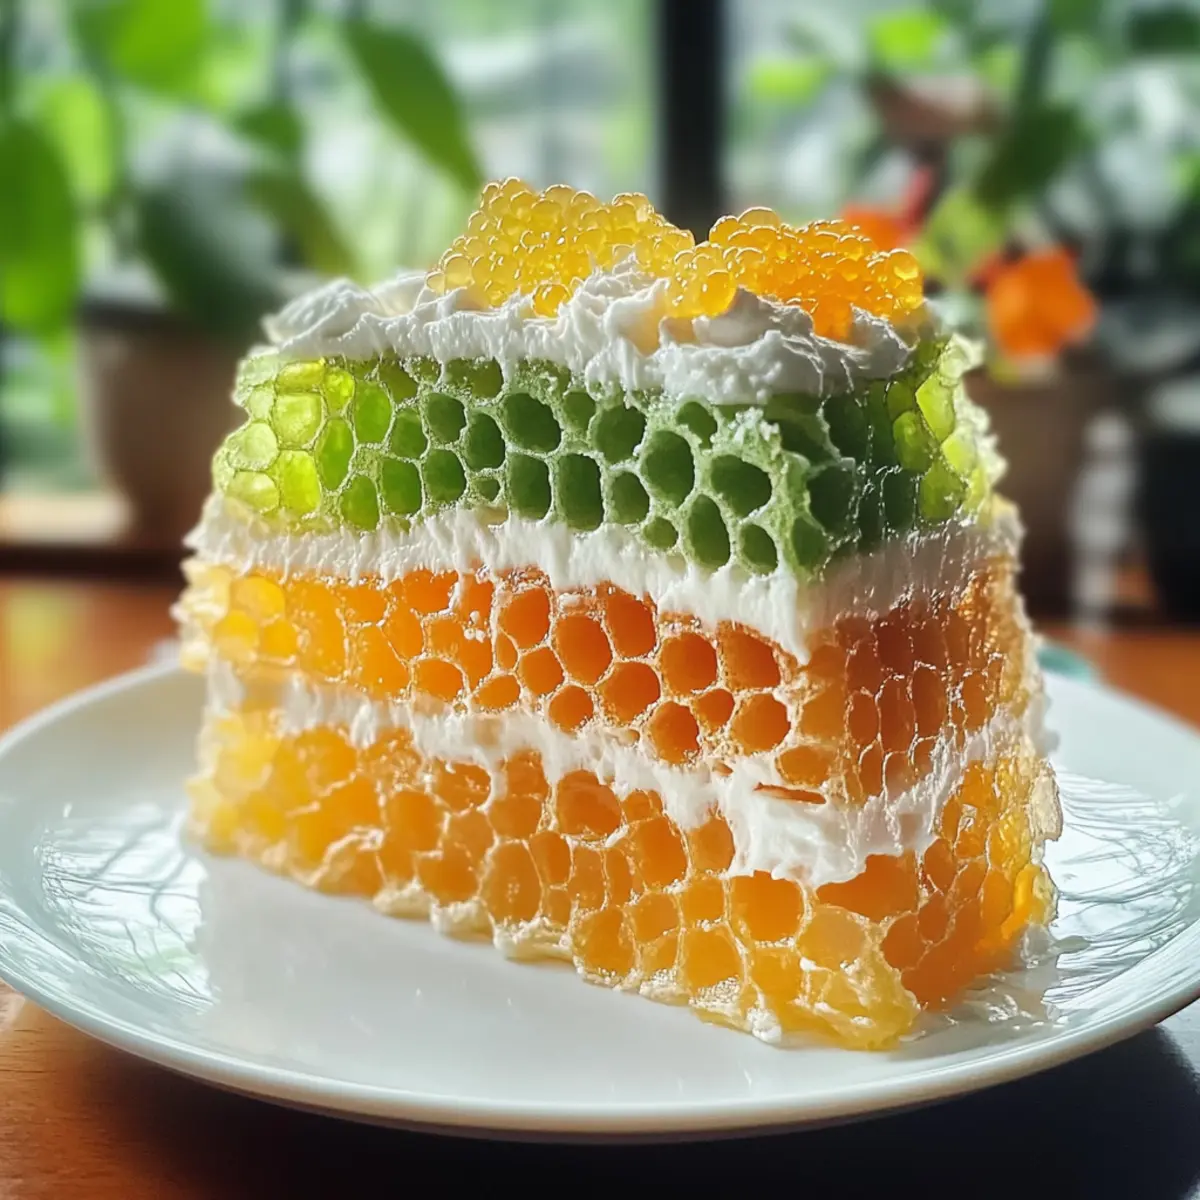
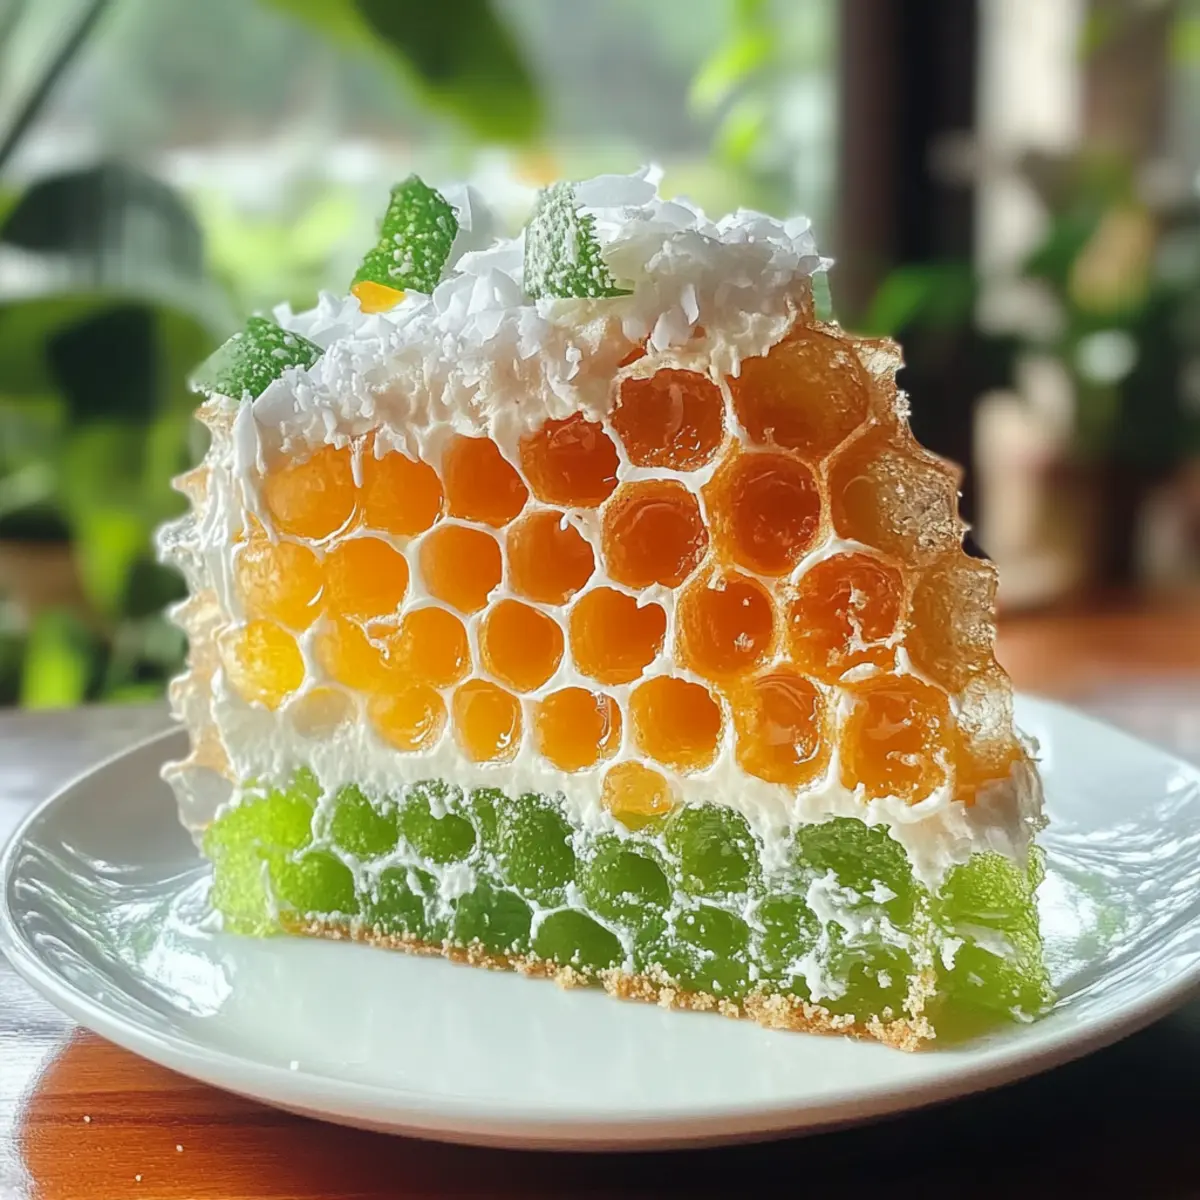
Visually Stunning: With its unique honeycomb texture, this cake is not just a treat for the taste buds but a beautiful centerpiece for any gathering.
Quick and Easy: You don’t need to be a seasoned chef to create this dish; it’s simple enough for anyone to master!
Endless Possibilities: Customize with toppings like fresh mango slices or a drizzle of coconut glaze for a personalized touch.
Crowd-Pleaser: Whether it’s a family dinner or a festive celebration, this Vietnamese Honeycomb Cake is sure to impress guests and leave them wanting more.
Vietnamese Honeycomb Cake Ingredients
For the delightful and fluffy essence of this treat, gather the following ingredients:
For the Batter
• Coconut Milk – Provides richness and moisture; use full-fat for the best flavor.
• Pandan Leaves – Adds a fragrant, tropical essence; can substitute with 1 tsp of pandan extract if unavailable.
• Eggs – Contributes structure and moisture; using large eggs yields optimal results.
• Granulated Sugar – Adds sweetness; adjust the quantity according to taste preferences.
• Pandan Extract – Enhances the flavor profile; use the equivalent of 2 tsp if substituting for fresh pandan.
• Vanilla Extract – Introduces depth to the flavor; essential for rounding out the sweetness.
• Tapioca Starch – Key for achieving the cake’s signature honeycomb structure; do not substitute with regular flour.
• Baking Powder – Helps the cake rise; ensure its freshness for effective leavening.
• Salt – Balances sweetness and enhances overall flavor.
Embrace the art of crafting this wonderful Vietnamese dessert, and get ready to indulge in each light, fluffy bite of your gluten-free honeycomb cake!
Step‑by‑Step Instructions for Vietnamese Honeycomb Cake
Step 1: Preheat the Oven
Begin by preheating your oven to 350°F (177°C). While the oven warms, place a bundt pan inside for about 10 minutes to ensure it’s evenly heated. This initial step is crucial for achieving the perfect rise and texture for your Vietnamese Honeycomb Cake.
Step 2: Prepare the Coconut Mixture
In a blender, combine the full-fat coconut milk with fresh pandan leaves. Blend vigorously until well-mixed, then strain the mixture through a fine mesh sieve into a bowl, discarding the solids. The smooth coconut-pandan base is key to a moist cake, reflecting the tropical flavors you’ll savor in this dessert.
Step 3: Mix the Wet Ingredients
In a large mixing bowl, whisk together the strained coconut mixture, eggs, and granulated sugar until the mixture is smooth and frothy. This should take about 2-3 minutes of vigorous whisking. The combined mass will contribute to the light, fluffy texture of your Easy Banh Bo Nuong, setting a delightful foundation.
Step 4: Add Flavorings
Gently stir in the pandan extract and vanilla extract to the wet mixture. Be careful not to aerate it too much; a few strokes should do. This addition enhances the flavor of your Vietnamese Honeycomb Cake and infuses it with a rich aromatic quality, making it even more inviting.
Step 5: Combine the Dry Ingredients
In a separate bowl, whisk together the tapioca starch, baking powder, and salt. Gradually fold this dry mixture into the wet ingredients until just combined. It’s vital to avoid over-mixing to maintain the cake’s airy texture; a few flour streaks are perfectly fine.
Step 6: Bake the Cake
Carefully pour the batter into the pre-warmed bundt pan, spreading it evenly. Bake in your preheated oven for 50-55 minutes, or until a toothpick inserted in the center comes out clean. This baking step transforms the batter into a fluffy, visually stunning Vietnamese Honeycomb Cake with its signature honeycomb structure.
Step 7: Cool and Unmold
Once baked, allow the cake to cool in the pan for about 60 minutes. This helps it set properly and makes it easier to unmold. After cooling, gently invert the pan onto a plate to reveal the beautiful honeycomb design. The careful cooling process is essential for preserving the cake’s delightful shape.
How to Store and Freeze Vietnamese Honeycomb Cake
Room Temperature: Store at room temperature in an airtight container for up to 3 days, making it perfect for enjoying a slice every day.
Fridge: In warm climates, refrigerate the cake wrapped tightly for up to a week to maintain freshness and prevent drying out.
Freezer: For longer storage, wrap the cake in plastic wrap or foil and freeze for up to 2 months. Thaw in the refrigerator overnight before serving.
Reheating: If desired, warm slices in the microwave for a few seconds to revive the fluffy texture of your Vietnamese Honeycomb Cake.
Make Ahead Options
Ready to save time in your busy week? You can prepare the batter for your Easy Banh Bo Nuong up to 24 hours in advance! Simply follow the initial steps of blending the coconut milk with pandan leaves and whisking the wet ingredients together. Store the mixture in an airtight container in the refrigerator to maintain its freshness. You can also mix the dry ingredients a day ahead and keep them separate. When you’re ready to bake, just combine the wet and dry mixtures, pour the batter into the prepared bundt pan, and bake. This prep-ahead strategy ensures you’ll enjoy a delightful dessert with minimal effort right when you need it!
Variations & Substitutions for Vietnamese Honeycomb Cake
Feeling adventurous in the kitchen? Let’s explore delightful twists for your Vietnamese Honeycomb Cake that will tickle your taste buds and impress your friends!
-
Pandan Extract: Substitute fresh pandan leaves for 1 tsp of pandan extract if fresh leaves aren’t available. You’ll still capture that signature tropical flavor!
-
Sweetener Swap: Try using brown sugar instead of granulated sugar for a deeper, richer caramel note in your cake. This simple change adds a sophisticated layer of sweetness that pairs beautifully with the coconut.
-
Coconut Essence: Enhance the coconut flavor with coconut extract in addition to the coconut milk. A teaspoon can really amplify that tropical taste experience!
-
Texture Addition: Fold in toasted coconut flakes to the batter before baking for a delightful crunch. The contrast between the airy cake and the crispy bits will leave everyone coming back for seconds.
-
Top It Off: For a stunning presentation, garnish each slice with fresh mango slices or a light drizzle of coconut glaze. These fresh toppings create an inviting contrast that elevates your cake to a new level of deliciousness.
-
Go Fruity: Add shredded fresh pineapple to the batter for a fruity twist that beautifully complements the tropical flavors. The added moisture from the pineapple keeps the cake deliciously tender.
-
Experiment with Flavors: For something unique, incorporate matcha powder into the batter. This not only changes the color but also adds an earthy depth to the flavor profile, marrying wonderfully with the coconut.
-
Chill and Serve: Try serving the cake chilled for a refreshing dessert, especially on hot days. Pair it with a scoop of coconut ice cream for an unforgettable treat, similar to my delightful Strawberry Bliss Cake that combines icy goodness with a fluffy texture!
With these variations, your Easy Banh Bo Nuong will be a canvas for creativity, proving that this beloved Vietnamese dessert can offer endless delightful surprises!
Expert Tips for the Best Vietnamese Honeycomb Cake
-
Preheat Properly: Ensure your oven is fully preheated to 350°F (177°C) to achieve the perfect rise and airy texture in the Vietnamese Honeycomb Cake.
-
Smooth Coconut Mixture: Blend and strain the coconut mixture thoroughly to avoid lumps, ensuring a velvety batter for the best results.
-
Gentle Mixing: When combining wet and dry ingredients, mix just until combined; over-mixing can lead to a denser cake rather than the desired fluffy texture.
-
Cool Completely: Be patient and allow the cake to cool for at least 60 minutes before unmolding. This prevents breakage and maintains the beautiful honeycomb structure.
-
Use Fresh Ingredients: Always check the freshness of your baking powder and tapioca starch. Fresh ingredients yield the best results in flavor and texture, ensuring your cake shines.
What to Serve with Easy Banh Bo Nuong
Indulging in this fluffy Vietnamese Honeycomb Cake can be even more delightful when paired with the right accompaniments.
- Fresh Mango Slices: The tropical sweetness of ripe mango adds a juicy burst complementing the cake’s airy texture perfectly.
- Coconut Ice Cream: Creamy and rich, coconut ice cream enhances the flavors of coconut and pandan, creating a luscious contrast.
- Toasted Coconut Flakes: Sprinkling these on top adds a crunchy texture that beautifully complements the soft cake while boosting the coconut flavor.
- Green Tea: A warm cup of lightly brewed green tea provides a refreshing palate cleanser, balancing the cake’s sweetness beautifully.
For those who enjoy a more robust dessert experience, consider pairing the cake with a drizzle of honey or a light coconut glaze. These additions amplify the tropical essence of the cake while ensuring each bite is a harmonious celebration of flavors.
Delighting your family and friends with the stunning presentation of this dessert alongside these delightful pairings will surely make for unforgettable moments.
Easy Banh Bo Nuong (Vietnamese Honeycomb Cake) Recipe FAQs
What type of coconut milk should I use for the cake?
I recommend using full-fat coconut milk, as it provides richness and moisture for the best flavor. Look for coconut milk in a can rather than a carton, as the canned variety typically has a thicker consistency that is ideal for this recipe. If you can’t find it, ensure that any alternative is creamy and unsweetened.
How should I store leftover Banh Bo Nuong?
You can store this delightful Vietnamese honeycomb cake at room temperature in an airtight container for up to 3 days. If you’re in a warmer climate, it’s best to wrap it tightly and refrigerate for up to a week to prevent it from drying out. Just remember to let it come to room temperature before serving for the best texture!
Can I freeze the Banh Bo Nuong?
Absolutely! To freeze your Vietnamese Honeycomb Cake, wrap it tightly in plastic wrap or aluminum foil, ensuring there are no air pockets, and store it in the freezer for up to 2 months. When you’re ready to enjoy it, simply thaw it in the refrigerator overnight. If you’d like, you can reheat slices in the microwave for a few seconds to restore some of that fluffy texture.
What should I do if my cake doesn’t rise properly?
If your Banh Bo Nuong doesn’t rise as expected, check the freshness of your baking powder; old or inactive baking powder can hinder the cake’s rise. Also, ensure you’ve mixed the wet and dry ingredients just enough to combine—over-mixing can create a denser texture instead of the airy delight you want. Always remember to preheat your oven fully, as an unheated oven can also prevent proper rising.
Is this cake suitable for people with nut allergies?
Yes! This cake is nut-free, making it suitable for those with nut allergies. However, always verify that the ingredients you choose are free from cross-contamination if you’re serving someone with severe allergies. Additionally, it’s gluten-free and dairy-free, accommodating various dietary needs without compromising on taste.
Can I use a different type of flour instead of tapioca starch?
Tapioca starch is crucial for achieving the honeycomb structure characteristic of this cake, so I wouldn’t recommend substituting it with regular flour. However, if you’re looking for alternatives, you could try gluten-free blends that contain tapioca starch yet are specifically designed for baking, ensuring you maintain the airiness and texture of the cake.
Delight in Vietnamese Honeycomb Cake – Soft, Sweet, and Gluten-Free
Ingredients
Equipment
Method
- Preheat your oven to 350°F (177°C) and place a bundt pan inside for about 10 minutes.
- Blend coconut milk with pandan leaves, strain into a bowl to remove solids.
- Whisk together the strained coconut mixture, eggs, and granulated sugar until smooth and frothy.
- Gently stir in pandan extract and vanilla extract into the wet mixture.
- In a separate bowl, whisk tapioca starch, baking powder, and salt. Fold this into the wet ingredients until just combined.
- Pour the batter into the pre-warmed bundt pan and bake for 50-55 minutes until a toothpick comes out clean.
- Cool the cake in the pan for 60 minutes before inverting onto a plate to unmold.