

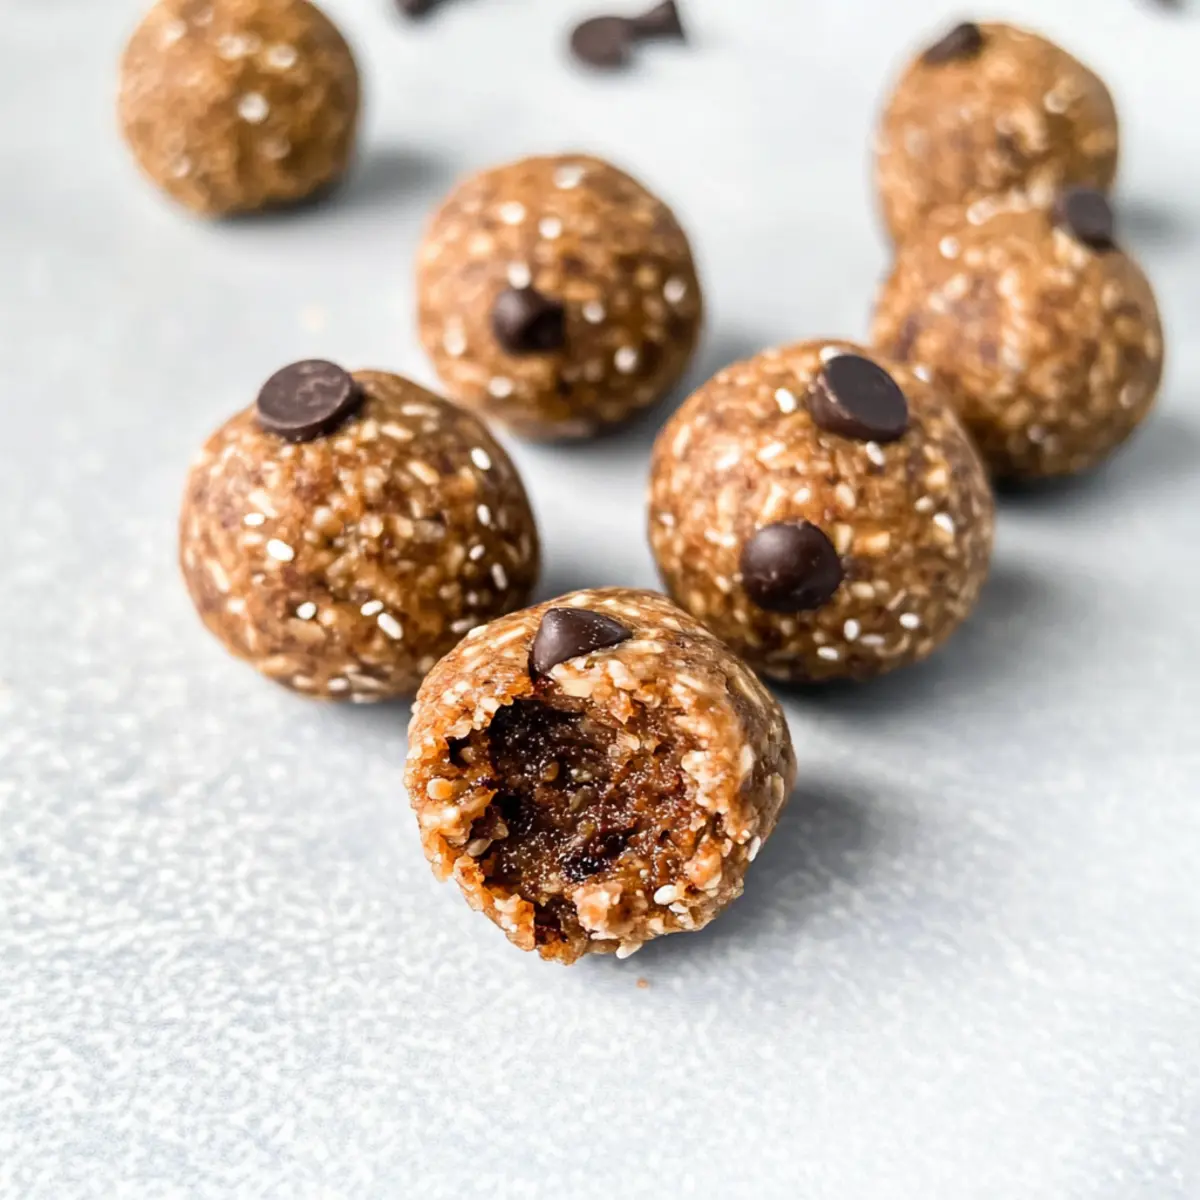
Stumbling upon the perfect quick snack feels like finding a hidden gem, and I’ve got just the treasure for you: Banana Protein Balls! These nutrient-packed, no-bake delights fuse the sweetness of ripe bananas with hearty oats and creamy peanut butter, making them an irresistible addition to your pantry. Not only are they an easy, healthy snack for any time of day, but they’re also gluten-free and vegetarian, catering to all dietary preferences. They’re perfect for busy people like us who crave a nutritious boost on-the-go without any fuss. So, if you’re ready to elevate your snacking game and kick fast food to the curb, let’s dive into this recipe together—what’s your favorite way to enjoy a healthy treat?
Why Are Banana Protein Balls So Great?
Energy Boost: These banana protein balls are packed with wholesome ingredients that provide a quick and sustained energy boost, making them perfect for a pre-workout snack or an afternoon pick-me-up.
No-Bake Convenience: The simple preparation means you can whip these up in no time, making snack prep as easy as 1-2-3.
Health-Conscious: With their high-protein and gluten-free profile, these bites cater to a variety of dietary needs—perfect for anyone looking to elevate their snacking habits.
Versatile Ingredients: Feel free to explore different flavors by swapping in your favorite nut butters or mix-ins; think chopped nuts or dried fruits for a fun twist!
Family-Friendly Appeal: Kids and adults alike will love these delicious protein balls, which can be enjoyed on-the-go or as a healthy dessert. If you’re looking for fun variety, check out these Cinnamon Swirl Banana or Garlic Chicken Meatballs for more nutritious ideas to keep the family thrilled!
Banana Protein Balls Ingredients
• Here’s what you need to make nutritious banana protein balls!
For the Base
- Ripe Banana – Provides natural sweetness and moisture; mash well for a smooth texture.
- Rolled Oats – Adds structure; opt for gluten-free oats to keep it compliant with dietary needs.
- Vanilla Protein Powder – Boosts protein content; select a low-sugar, plant-based variety for health benefits.
For Binding & Flavor
- Peanut Butter – The binding agent that adds creaminess; substitute with almond or sunflower seed butter for nut-free options.
- Honey – Enhances sweetness; for a vegan alternative, use maple syrup or agave nectar.
- Dark Chocolate Chips – Adds a touch of indulgence; choose dairy-free chips for a strictly vegan treat.
- Cinnamon – Infuses warmth and flavor; feel free to adjust the amount to your taste.
For Extra Nutrition
- Chia Seeds – Provide fiber and omega-3s; can be omitted if unavailable, but they add a healthy boost.
Step‑by‑Step Instructions for Banana Protein Balls
Step 1: Mash Bananas
Start by peeling and placing 2 ripe bananas in a mixing bowl. Use a fork to mash the bananas until they are smooth and free of lumps, about 2-3 minutes. This step ensures that the bananas blend well with the other ingredients, creating a creamy base for your banana protein balls.
Step 2: Combine Ingredients
Add the rolled oats, vanilla protein powder, peanut butter, honey, dark chocolate chips, cinnamon, and chia seeds to the mashed bananas. Use a spatula to gently fold the ingredients together, making sure to evenly incorporate each component without overmixing. Aim for a sticky yet cohesive mixture, around 3-4 minutes of mixing should suffice.
Step 3: Mix Thoroughly
Continue stirring the mixture until all ingredients are well combined into a thick paste. You should see the chocolate chips and oats evenly distributed throughout the mixture. Look for a uniform color and texture, with everything nicely coated by the banana and peanut butter, which helps the banana protein balls stick together.
Step 4: Shape Balls
Once mixed, it’s time to shape your banana protein balls. Using your hands or a cookie scoop, portion out about 2 tablespoons of the mixture and roll it into a ball approximately 1 inch in diameter. This method ensures that each ball is evenly sized, allowing for easy storage and quick serving later on.
Step 5: Prep for Chilling
Line a plate or small baking tray with parchment paper to prevent the banana protein balls from sticking. Place each rolled ball on the parchment-lined surface, leaving a little space between each one to avoid them sticking together as they chill in the refrigerator.
Step 6: Refrigerate
Refrigerate the tray of banana protein balls for at least 2 hours. This chilling time is crucial for firming up the protein balls, allowing the oats to soften and helping them hold their shape. After chilling, you should find them firm to the touch, ready for snacking.
Banana Protein Balls Variations
Feel free to get creative and customize your banana protein balls with these delightful twists to suit your taste and dietary preferences!
- Nut-Free Delight: Swap peanut butter with sunflower seed butter for a delicious nut-free alternative that everyone can enjoy.
- Vegan Sweetness: Replace honey with maple syrup or agave nectar for a vegan-friendly treat that retains all the sweetness.
- Chocolate Lovers: Increase dark chocolate chips quantity or include chunks for an extra chocolatey experience—ideal for a sweet tooth!
- Protein Boost: Add a scoop of your favorite hemp protein along with the vanilla protein powder for an even higher protein snack.
- Flavor Explosions: Mix in a teaspoon of vanilla extract or almond extract to elevate the flavor profile of these tasty bites.
- Fruit Fusion: Toss in some dried cranberries or raisins for a burst of sweetness and chewiness that complements the bananas beautifully.
- Spice It Up: Add a pinch of nutmeg or even a dash of cayenne pepper for a surprising twist, bringing warmth and depth to your protein balls.
- Texture Variation: Fold in a tablespoon of ground flaxseed for added omega-3s and a slightly different texture, enhancing the nutritional value even more.
These banana protein balls are ever so versatile, just like a cozy kitchen that welcomes all flavors. Dive into experimenting and make them your own! And if you’re looking for more healthy recipes, don’t miss out on the scrumptious Cinnamon Swirl Banana or the savory Garlic Chicken Meatballs that are sure to delight your family!
How to Store and Freeze Banana Protein Balls
Fridge: Store banana protein balls in an airtight container in the fridge for up to 7-10 days. This keeps them fresh and ready for snacking anytime.
Freezer: For longer shelf life, freeze the banana protein balls in a single layer on a baking sheet for about an hour, then transfer them to a freezer-safe bag. They can be frozen for up to 3 months.
Thawing: When you’re ready to enjoy, simply take out the desired number of protein balls and let them thaw in the fridge for a couple of hours or on the counter for about 30 minutes.
Reheating: There’s no need to heat these up; they can be enjoyed cold straight from the fridge or freezer, providing a quick and nutritious boost whenever you need it!
Expert Tips for Banana Protein Balls
-
Sticky Handling: Lightly oil your hands or the scoop with coconut oil to prevent sticking during shaping. This will make your process so much smoother!
-
Chill Time is Key: Don’t skip the refrigeration step; it helps the oats absorb moisture and firm up the banana protein balls perfectly.
-
Texture Perfection: If your mixture feels too dry, add a touch more peanut butter or a splash of almond milk. It should be sticky, not crumbly!
-
Mix-in Fun: Experiment with different add-ins like chopped nuts or dried fruits. Just remember to keep the overall balance to maintain the healthiness of your banana protein balls.
-
Storage Matters: Store leftovers in an airtight container in the fridge. They’ll stay fresh for up to 7-10 days—if they last that long!
What to Serve with Nutritious No-Bake Banana Protein Balls?
Pairing these delightful banana protein balls with complementary snacks can enhance your overall experience and create a satisfying meal.
-
Greek Yogurt with Honey: The creamy tanginess of Greek yogurt balances the sweetness of the protein balls, creating a perfect dip. Add honey for an extra layer of sweetness!
-
Fresh Fruit Salad: A vibrant mix of seasonal fruits adds fresh acidity and juiciness, making each bite a delightful contrast to the chewy protein balls. Enjoying them together is simply refreshing!
-
Nutty Granola: Sprinkle some crunchy granola on the side for added texture and flavor. The oats in both snacks create a harmonious complement, keeping your snack time exciting.
-
Nut Butter Dip: For an extra protein boost, pair the protein balls with your favorite nut butter as a dip. It’s a deliciously indulgent way to elevate your healthy snack game.
-
Smoothie: Blend a refreshing smoothie with spinach, banana, and almond milk to wash down the protein balls. Smoothies and protein balls make for a gratifying snacking duo!
-
Dark Chocolate Drizzle: Drizzling a little melted dark chocolate over both the protein balls and sliced fruit can add a touch of indulgence that transforms your snack experience.
-
Almond Milk: Pair with chilled almond milk for a soothing drink that complements the flavors of the banana protein balls. The nutty flavor of almond milk ties everything together beautifully!
-
Energy Bites: Serve with other homemade energy bites for a delightful snacking platter that covers a variety of flavors and textures. It’s a feast to keep the whole family energized!
Make Ahead Options
These Banana Protein Balls are perfect for meal prep enthusiasts looking to save time during busy weeknights! You can mix the ingredients up to 24 hours in advance; simply prepare the sticky mixture and store it in an airtight container in the refrigerator. For best results, shape the balls after chilling to maintain their optimal texture. If you prefer, roll them into balls and keep them in the fridge for up to 7 days or freeze them for up to 3 months. Just remember to let them thaw for a few minutes before serving to enjoy their deliciously chewy goodness, making your healthy snacking effortless and enjoyable!

Banana Protein Balls Recipe FAQs
What type of bananas should I use?
Absolutely! Use ripe bananas that have some brown spots. They’re sweeter and provide more moisture, which is essential for the creamy texture of your banana protein balls.
How should I store my banana protein balls?
The more, the merrier! Store your banana protein balls in an airtight container in the fridge for up to 7-10 days, ensuring they’re always ready for snacking.
Can I freeze banana protein balls?
Certainly! To freeze banana protein balls, first place them in a single layer on a baking sheet and freeze for about an hour. Once firm, transfer them to a freezer-safe bag. They can be stored for up to 3 months! When you’re ready to enjoy, just thaw them in the fridge for a couple of hours or leave them out at room temperature for about 30 minutes.
What can I do if my mixture feels too dry?
Don’t worry! If the mixture feels dry, simply add a little more peanut butter or a splash of almond milk to help it stick together properly. Mix until you achieve a sticky yet cohesive texture, making it easier to form into balls.
Are there any allergy considerations for this recipe?
Definitely! If you’re making these banana protein balls for someone with allergies, use sunflower seed butter instead of peanut butter for a nut-free option. And always check the labels on your products to ensure they’re free from allergens.
Can I substitute any of the ingredients?
Sure! Feel free to swap peanut butter for almond or cashew butter if you prefer. For a vegan option, substitute honey with maple syrup or agave nectar. Get creative with mix-ins like dried fruits or seeds to personalize your banana protein balls according to your taste!
Deliciously Healthy Banana Protein Balls for a Quick Boost
Ingredients
Equipment
Method
- Start by peeling and placing 2 ripe bananas in a mixing bowl. Use a fork to mash the bananas until they are smooth and free of lumps, about 2-3 minutes.
- Add the rolled oats, vanilla protein powder, peanut butter, honey, dark chocolate chips, cinnamon, and chia seeds to the mashed bananas. Use a spatula to gently fold the ingredients together.
- Continue stirring the mixture until all ingredients are well combined into a thick paste.
- Using your hands or a cookie scoop, portion out about 2 tablespoons of the mixture and roll it into a ball approximately 1 inch in diameter.
- Line a plate or small baking tray with parchment paper. Place each rolled ball on the parchment-lined surface.
- Refrigerate the tray of banana protein balls for at least 2 hours to firm them up.